Finance Setup
Creating and Managing Finance: A Step-by-Step Guide
This guide provides a comprehensive walkthrough of the process for creating and managing finance settings within the system. Each step includes a screenshot to aid in navigation and understanding. Follow these instructions carefully to ensure accurate completion of each task.
Start url: http://localhost/vanguard-genova/cia/admin
Tab Name: GENOVA INSURANCE
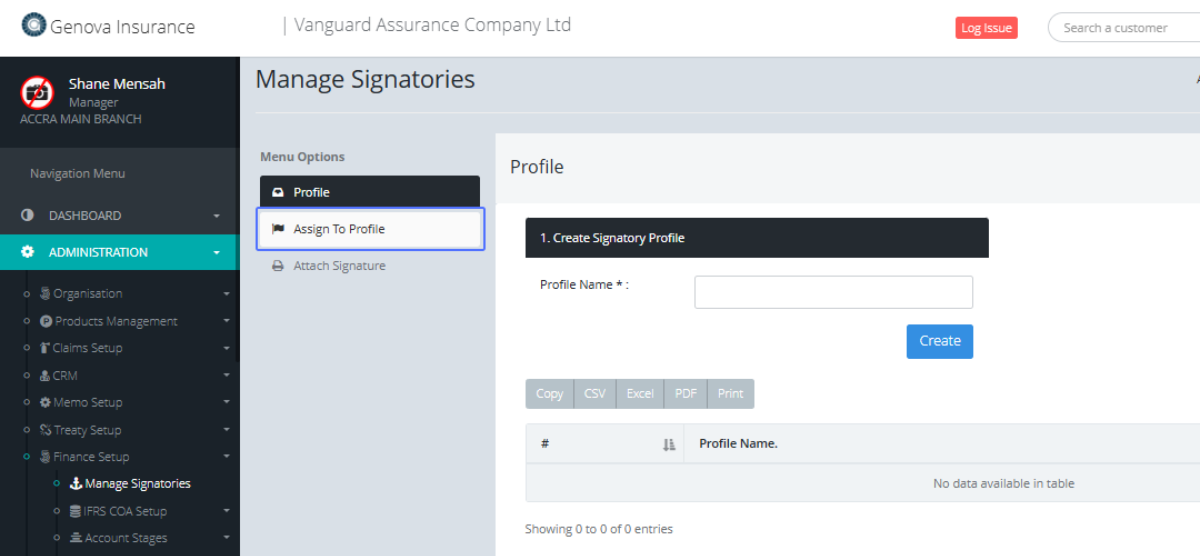
Click on the link "Finance Setup" tab within the sidebar under administration
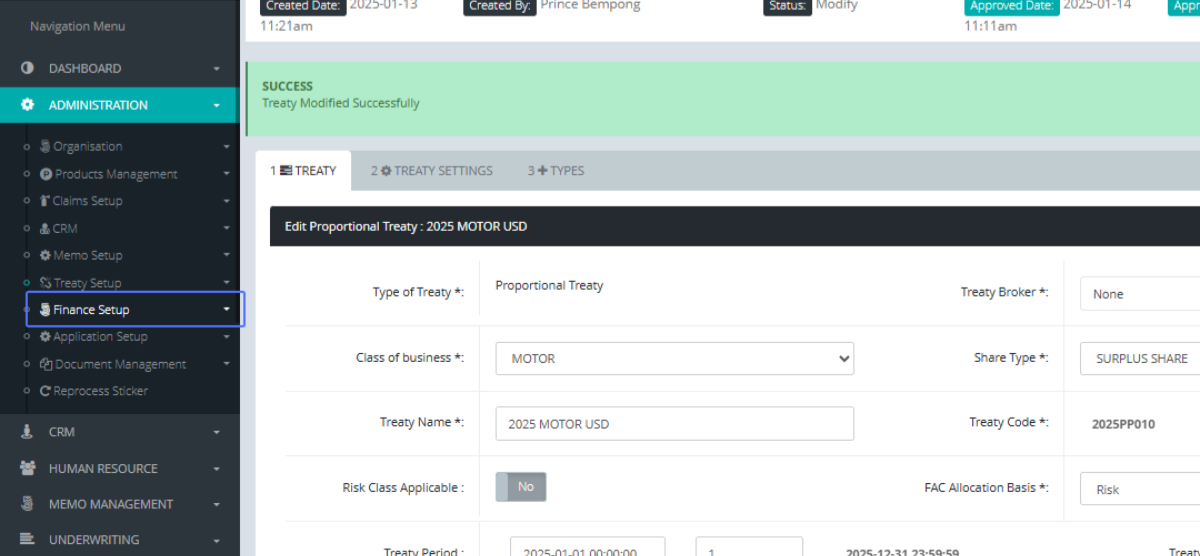
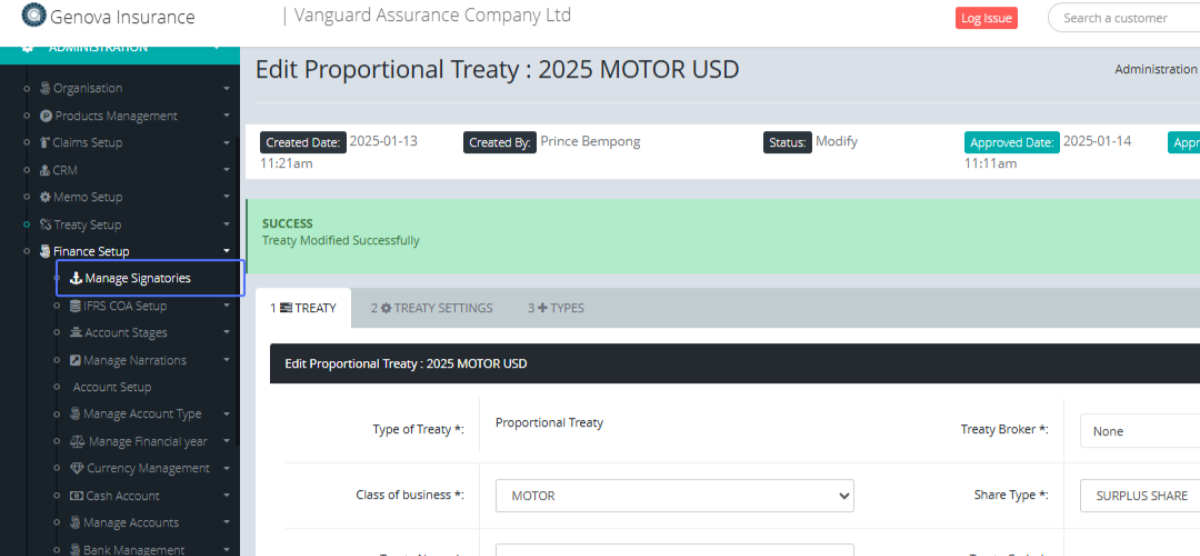
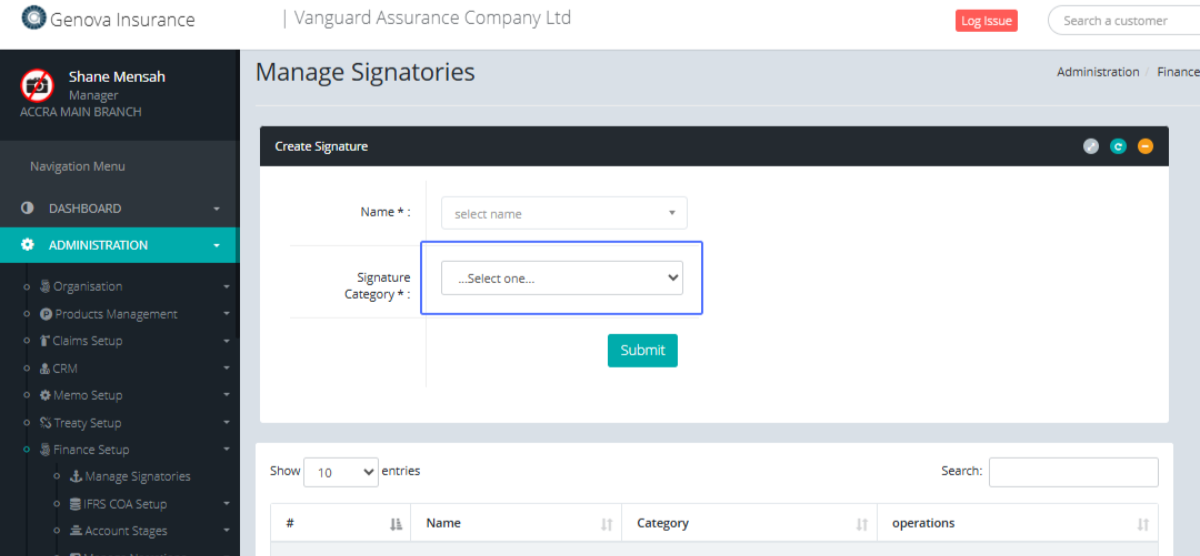
Click on the link "Manage Signatories" tab
Tab Name: Manage Signatories - GENOVA INSURANCE
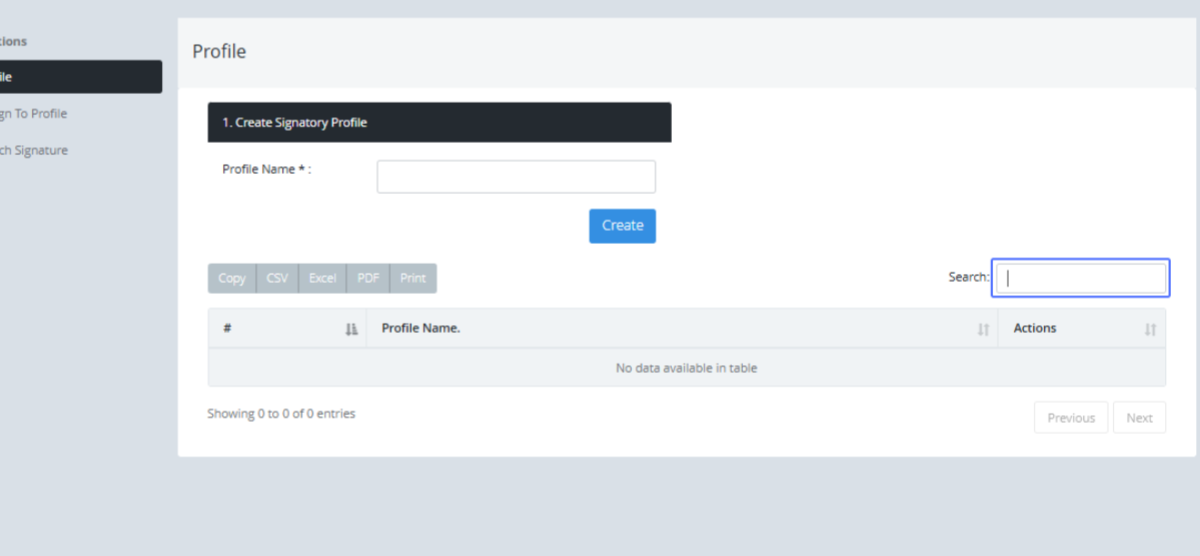
On the Manage Signatories page, Enter the Profile Name into the Input field.
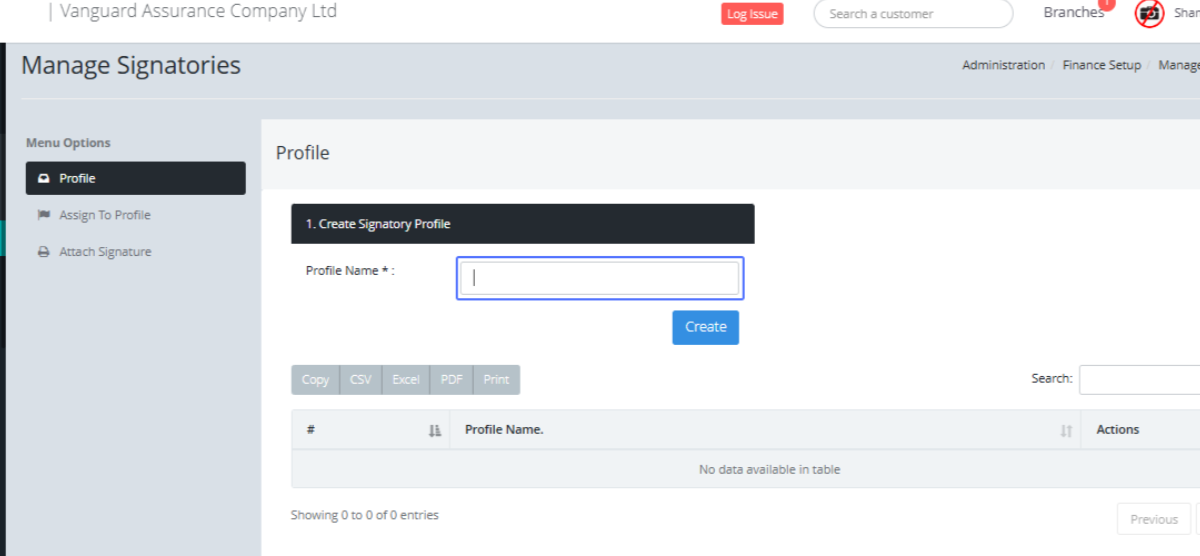
Click on the Create Button to Create the Signatory profile.
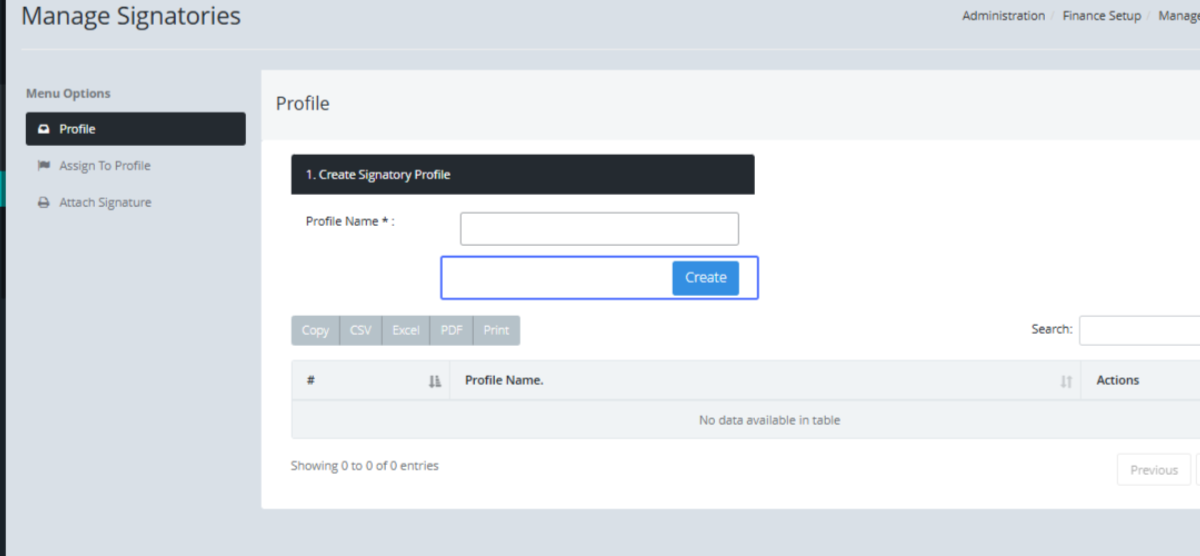
Signatories listed here can be searched within the search field
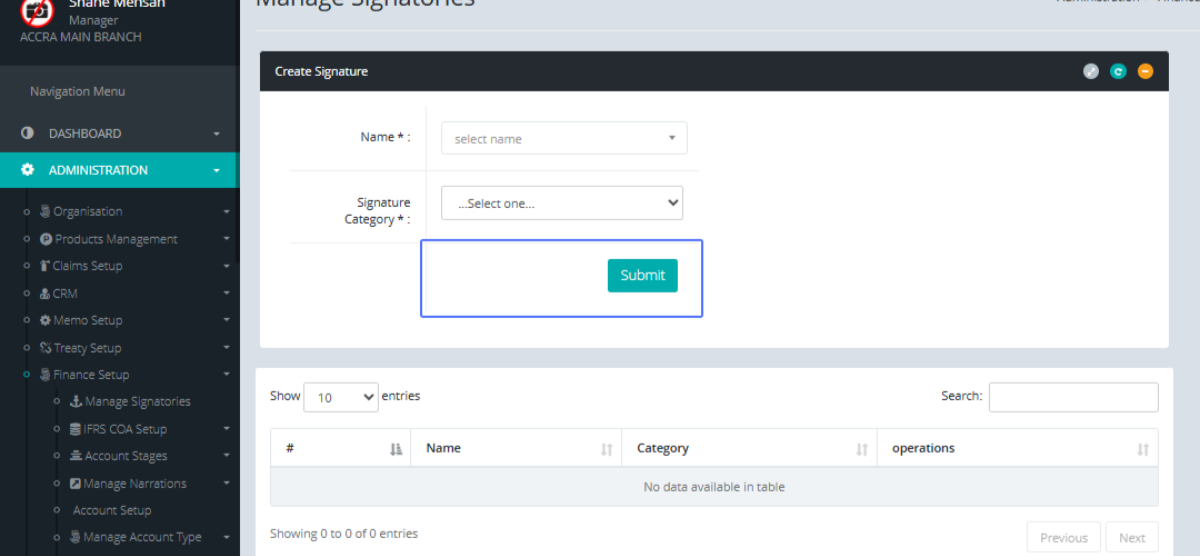
On the Manage Signatories Page, Click on the link "Assign to Profile" tab to get access to the Assign Profile page
Select the name from the provided field.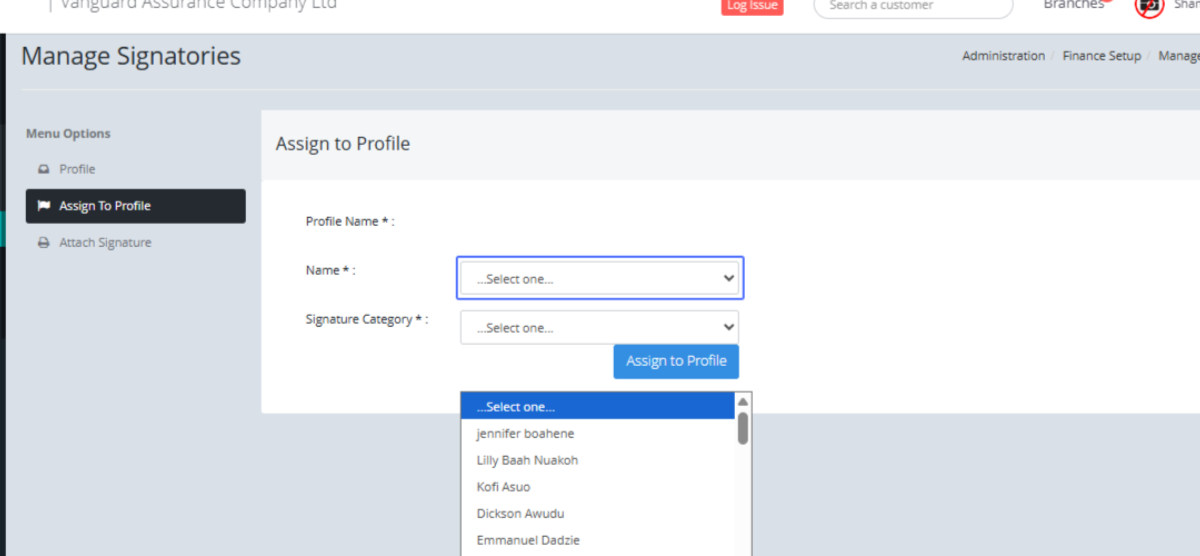
Select the Signatory Category from the provided Dropdown
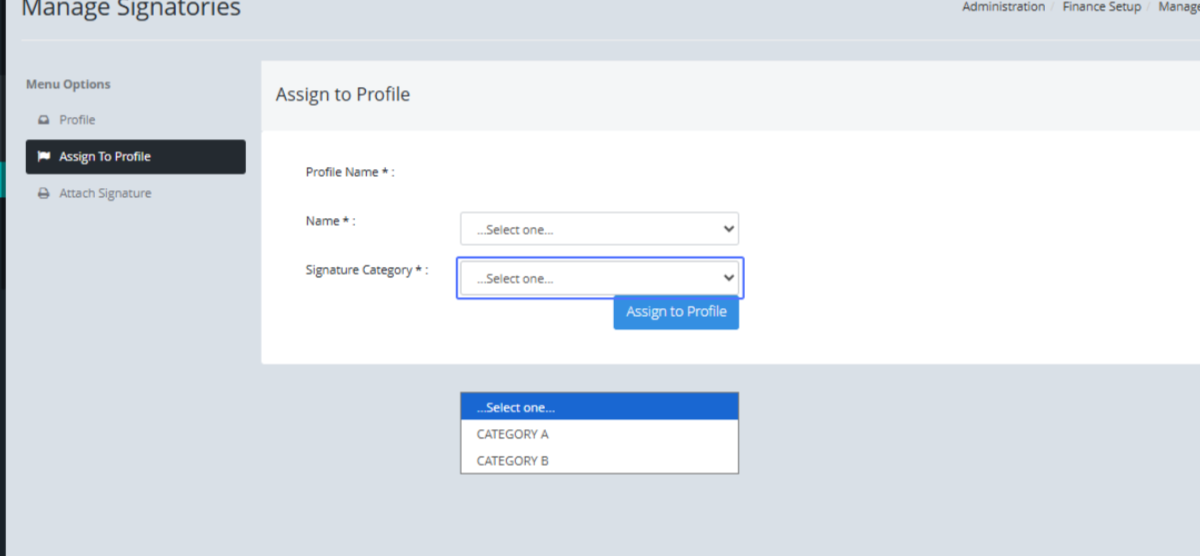
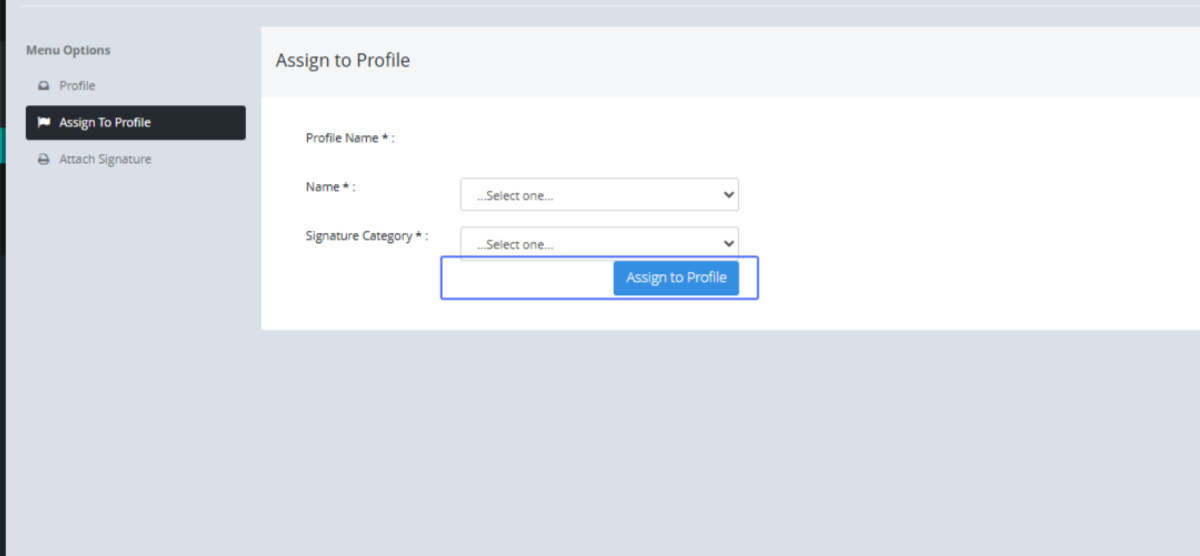
Click the “Assign to Profile” button to assign the member to the profile.
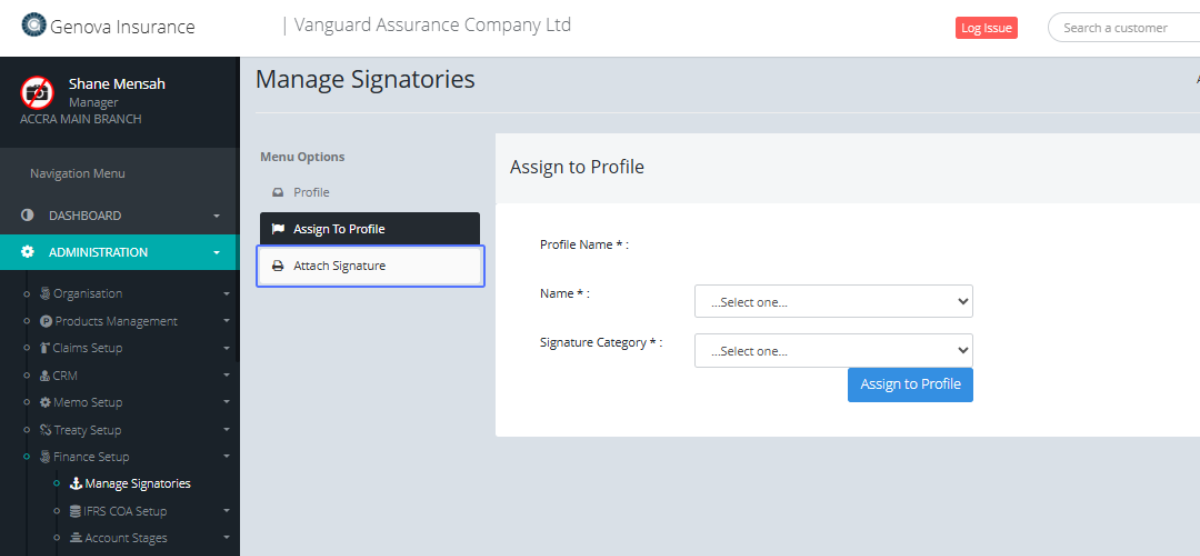
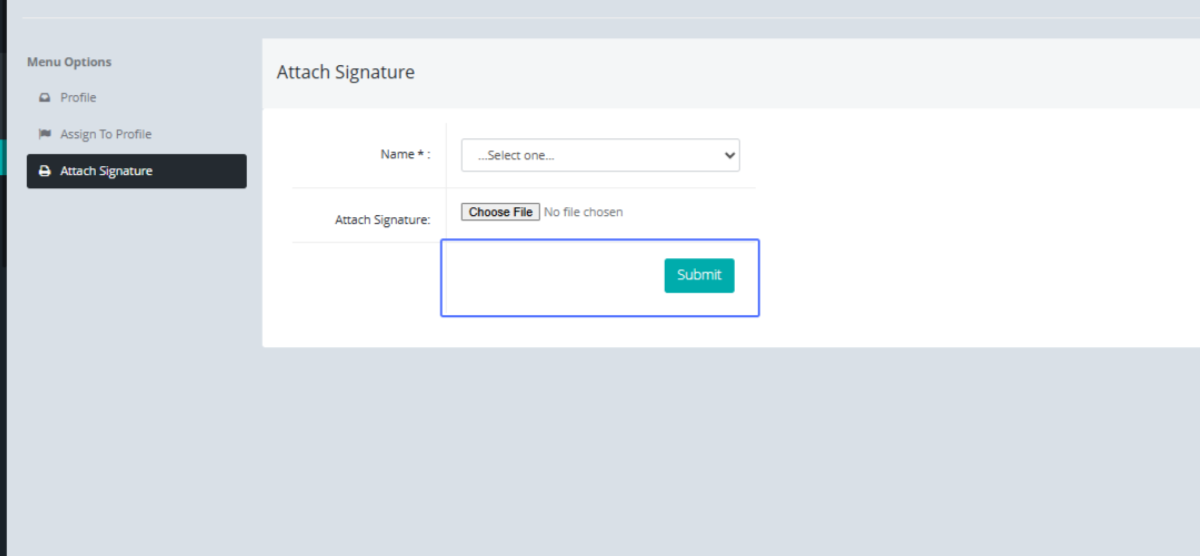
Click on the "Attach Signature" Tab to open the segment to attach the signature
Select the user from the provided dropdown
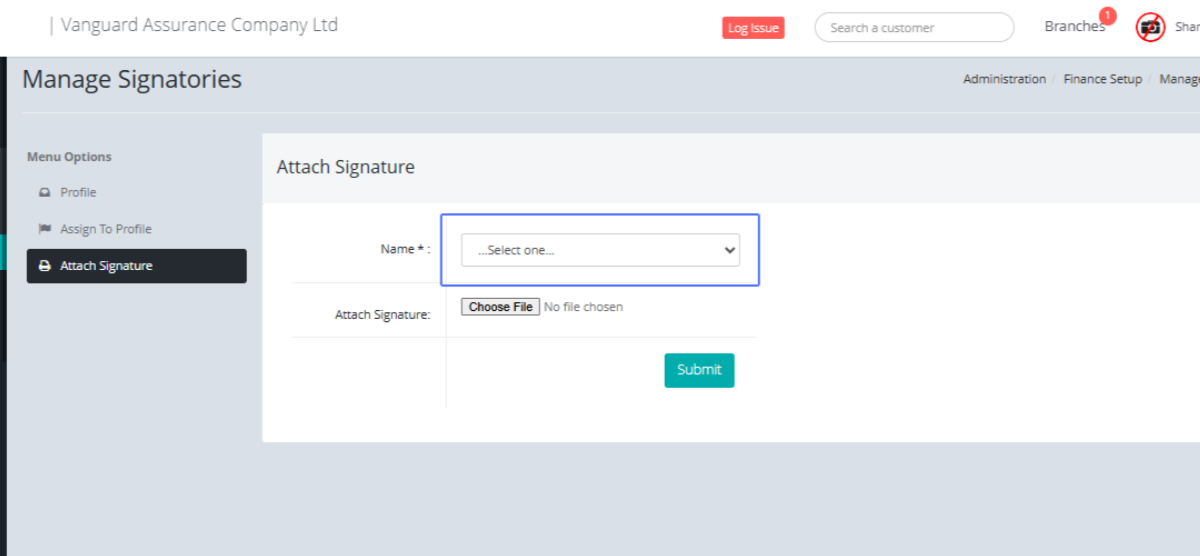
Click the “Choose File” button to attach the signature file, preferably an image.
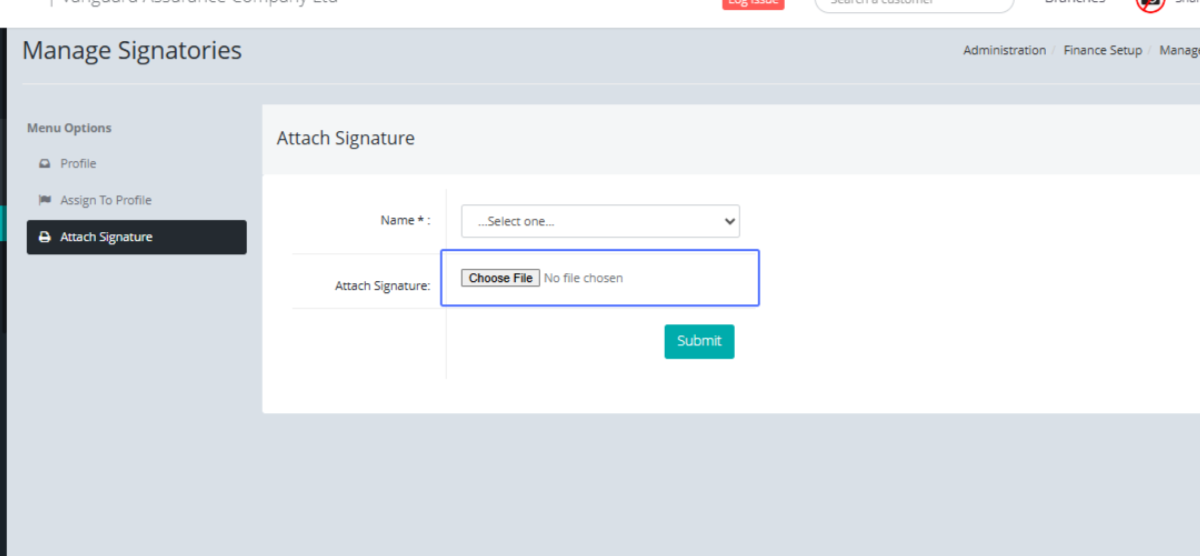
Click on the "Submit" button to save the signature.
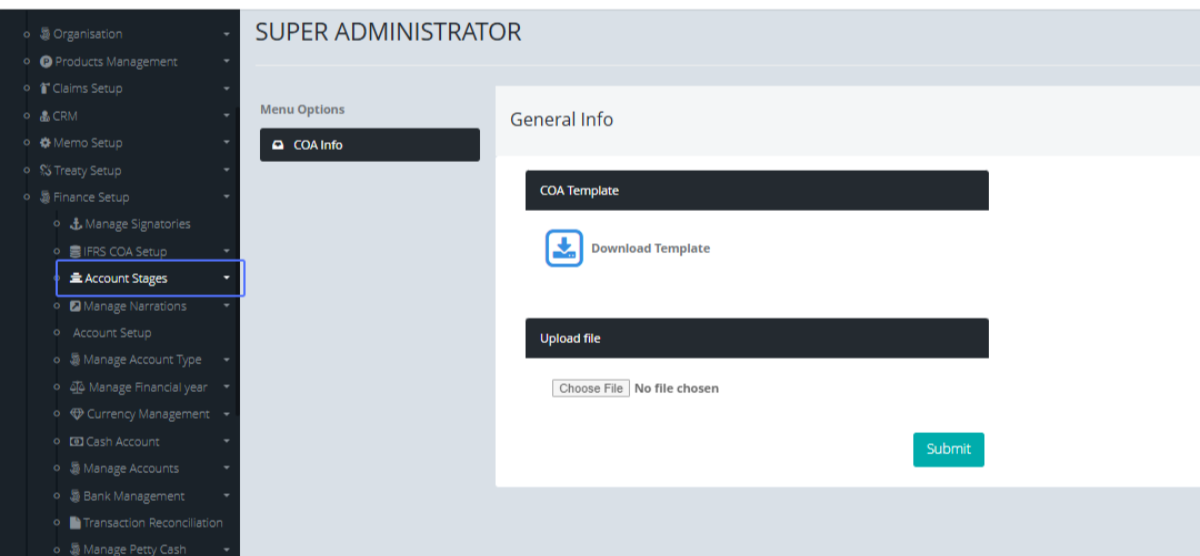
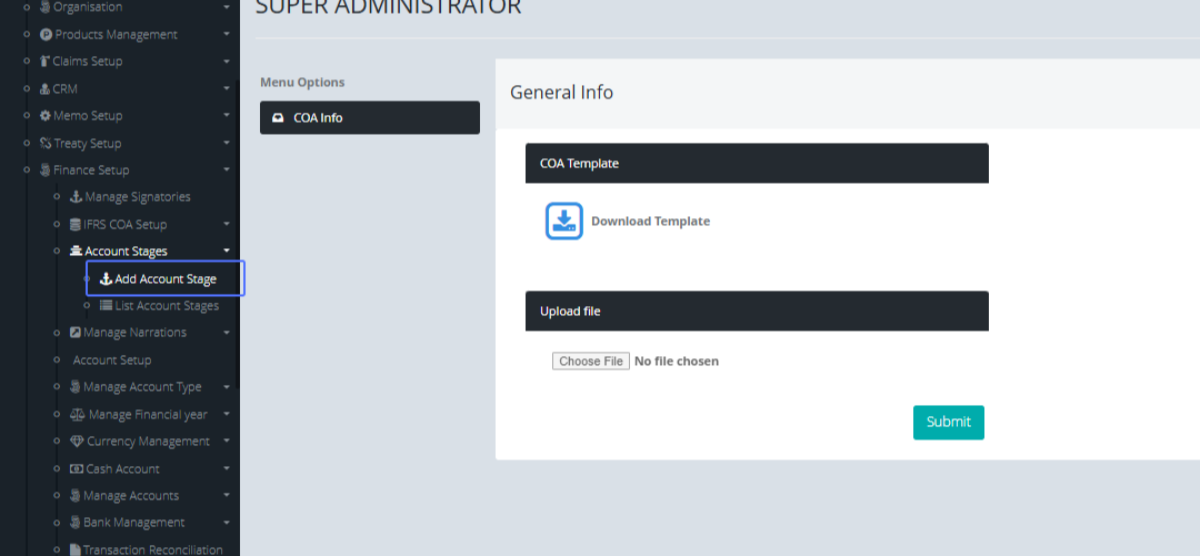
Click on the link "IFRS COA Setup" to access the IFRS COA setup list
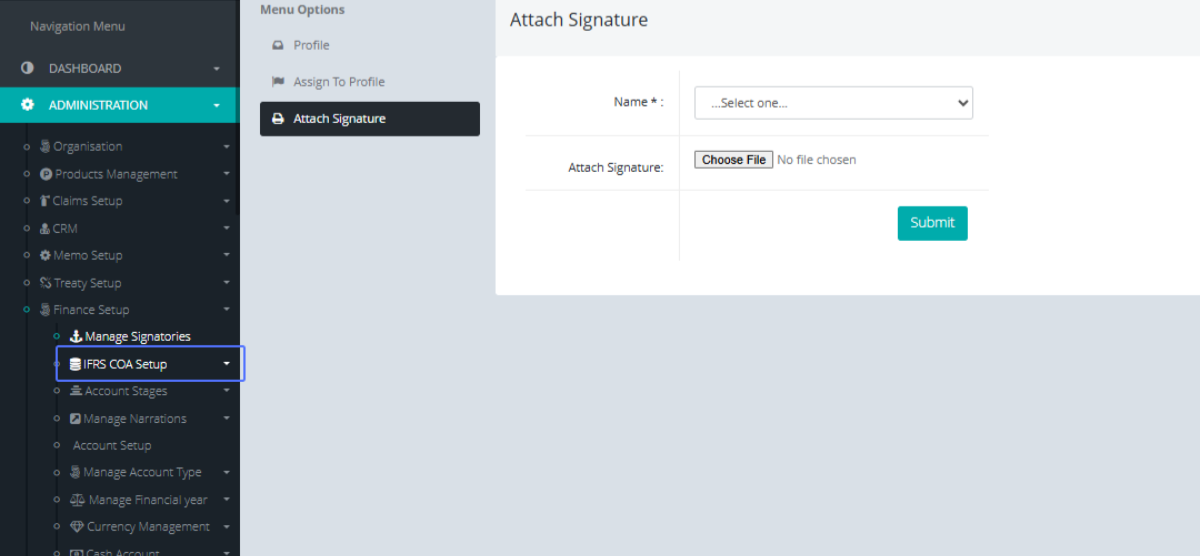
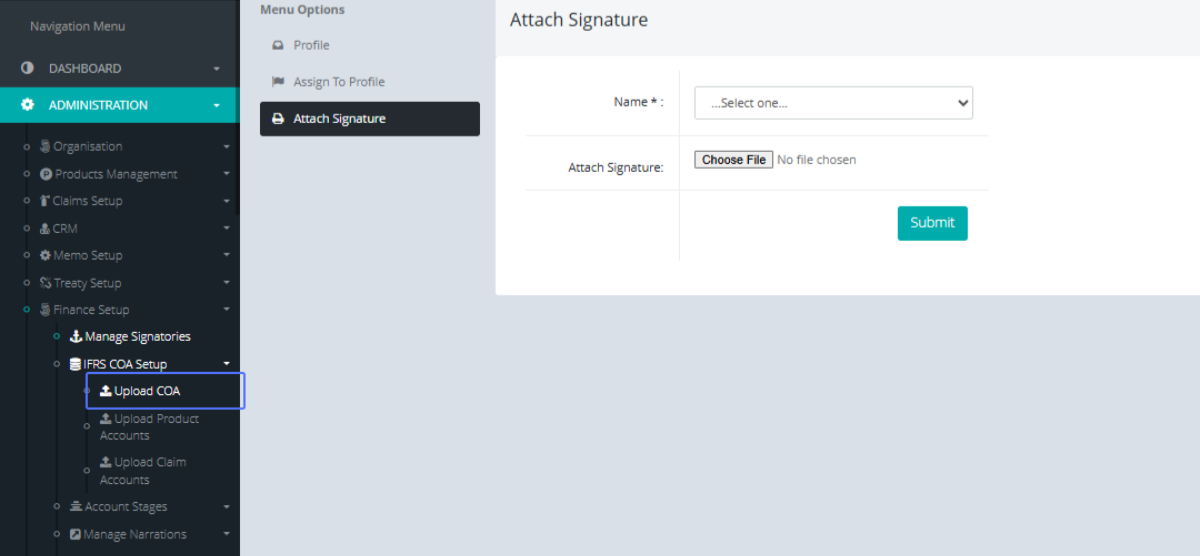
Click on the link "Upload COA" to open the Upload COA page.
Tab Name: SUPER ADMINISTRATOR - GENOVA INSURANCE
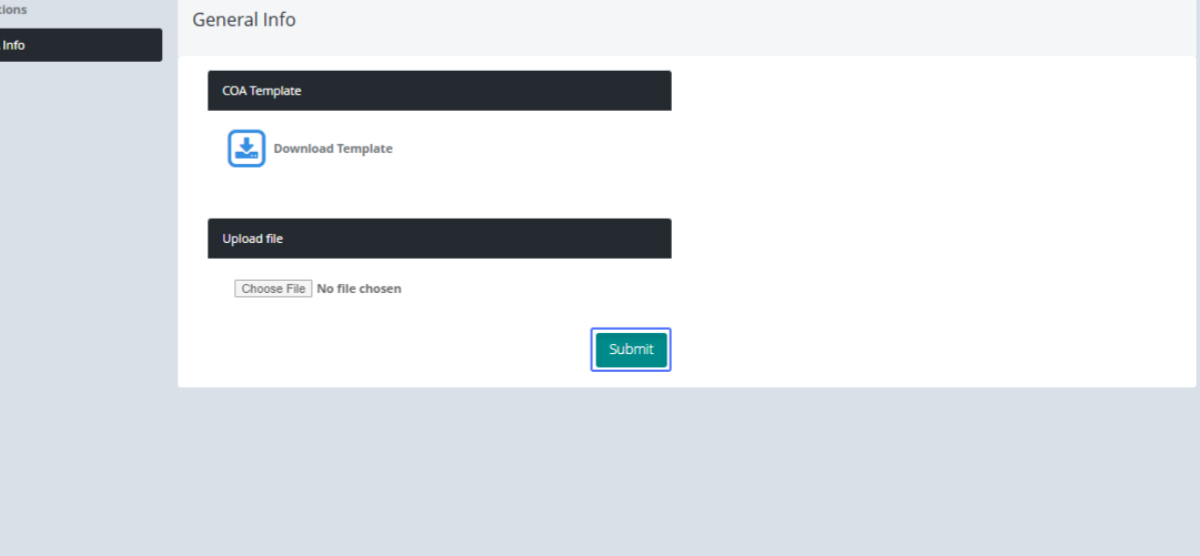
Click on the "Download Template" to download the Excel Sheet.
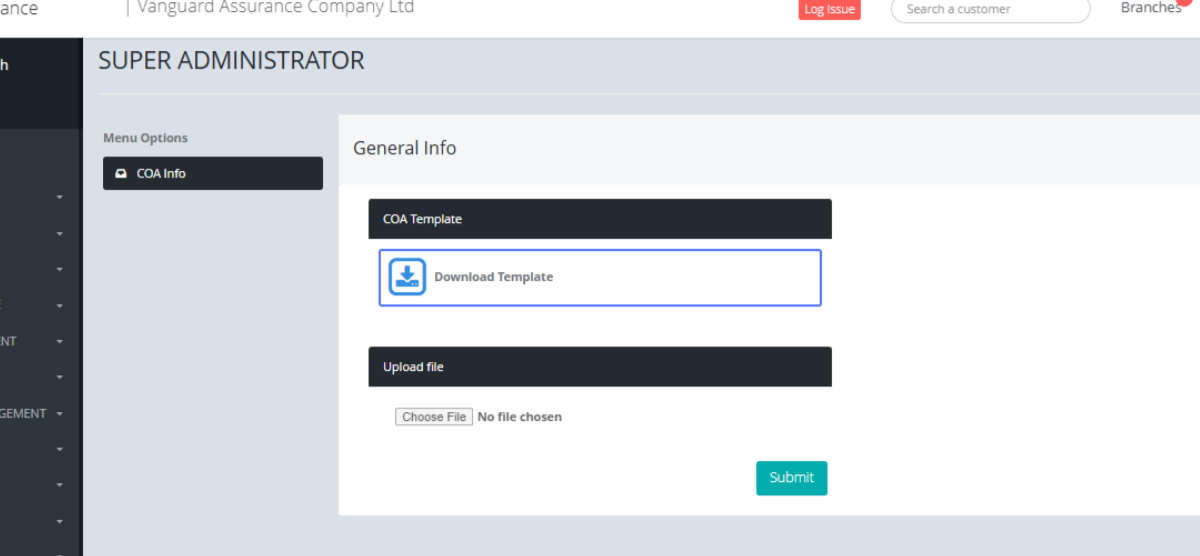
Click on the input to open the dialogue box and upload the updated Excel file
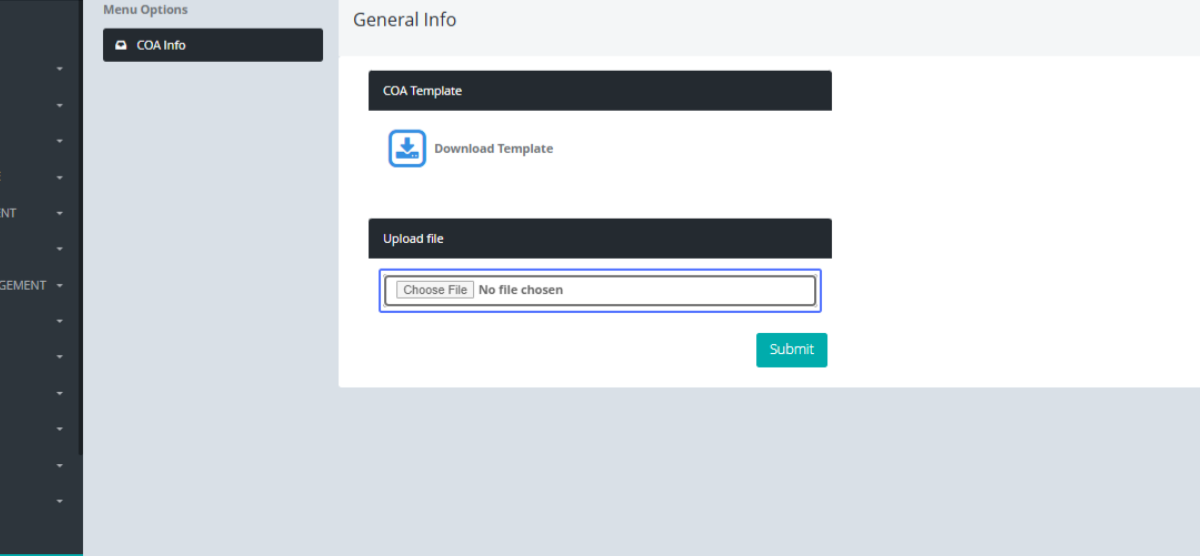
Click on the button "Submit" button to save the Data.
Click on the link "Account Stages" to open the Account stages list
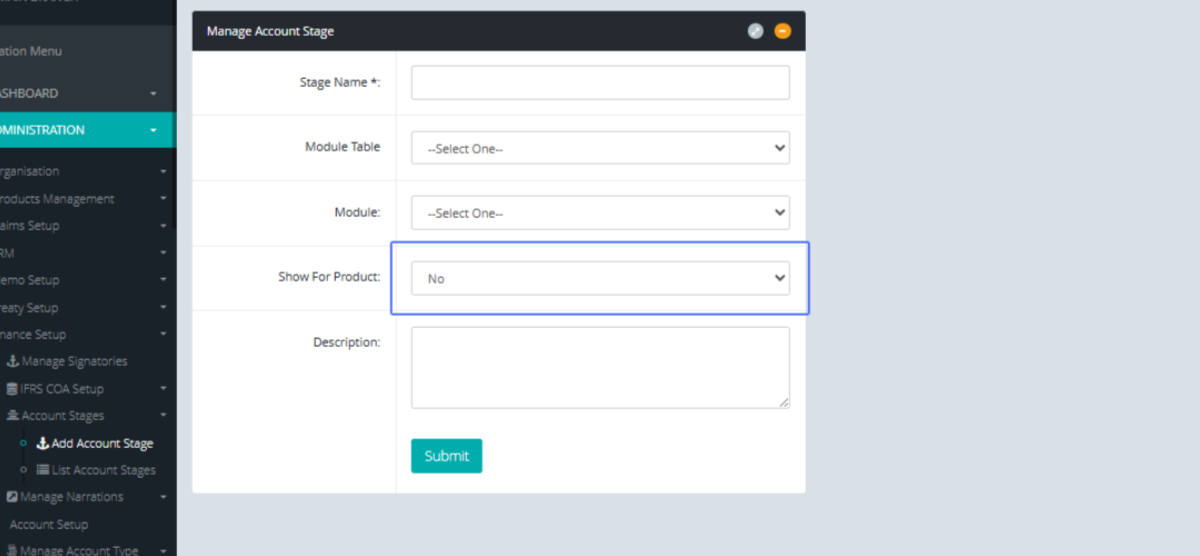
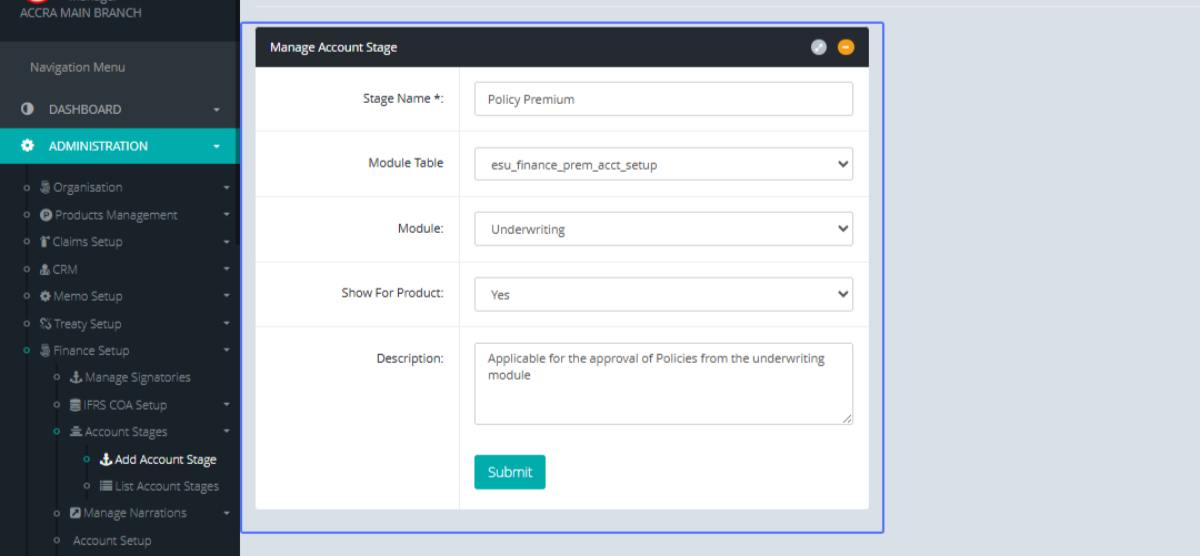
Click on the link "Add Account Stage" to open the Add Account Form
Tab Name: Add Account Stage - GENOVA INSURANCE
Enter the Stage Name within the Input field
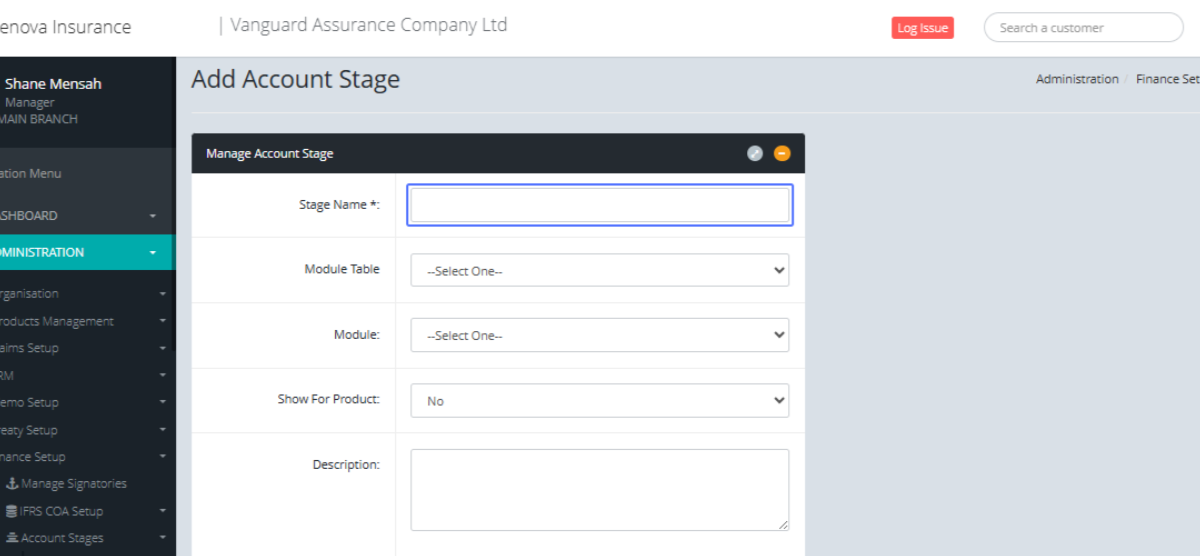
Select the Module Table from the Dropdown List
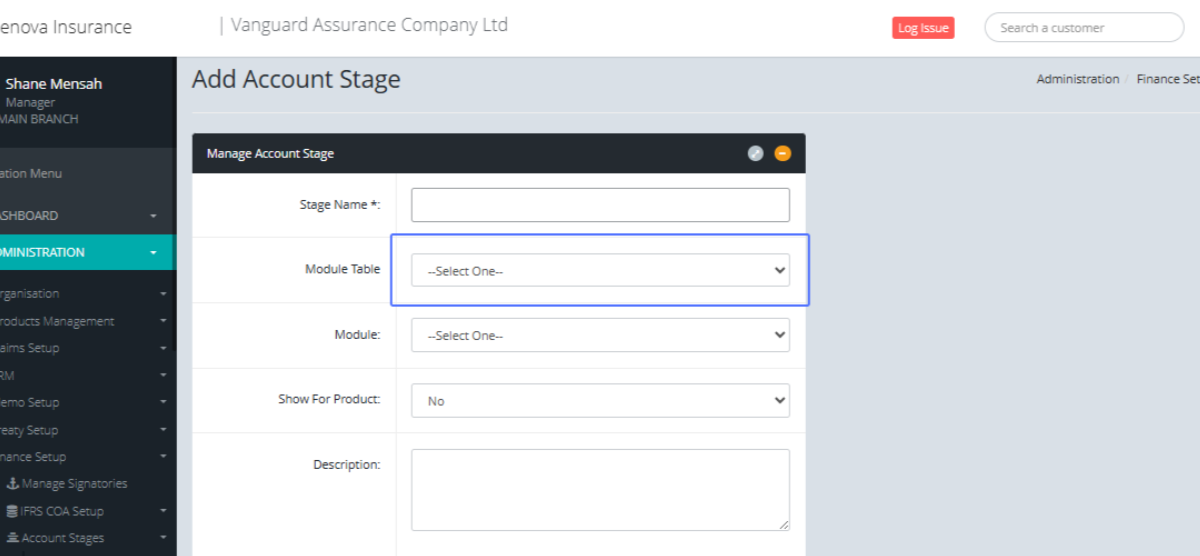
Select the Module from the Drop Down List
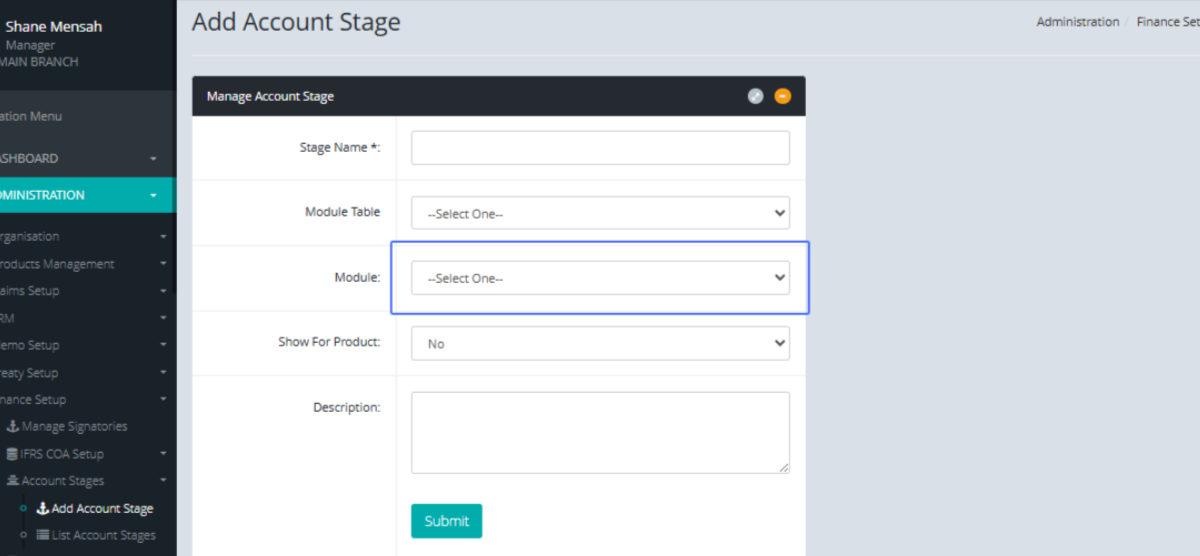
Select the Option if you want to show It for the product with the provided dropdown
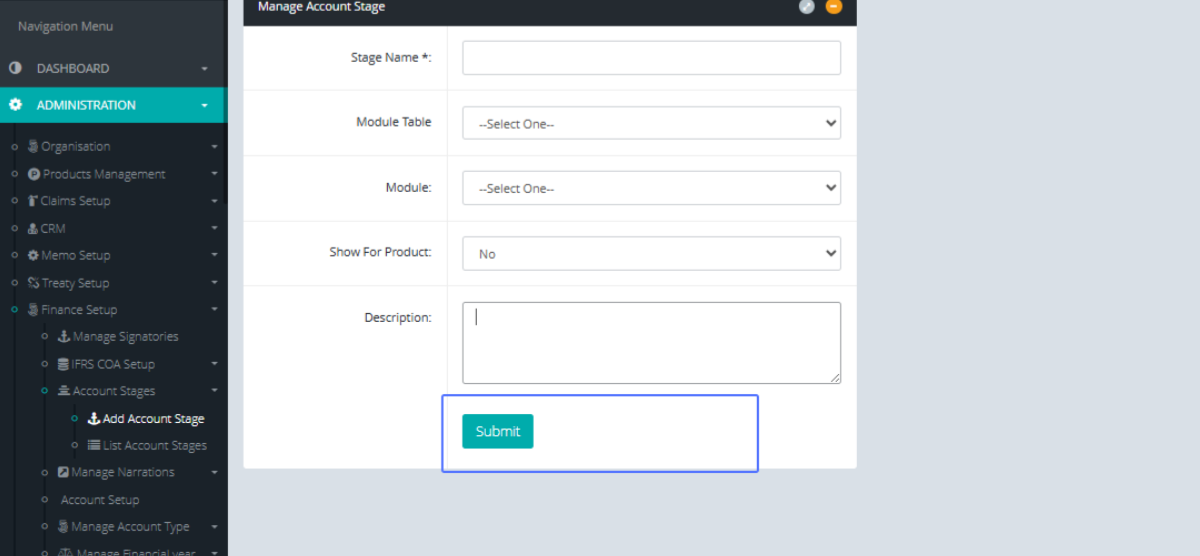
Enter the description into the provided field.
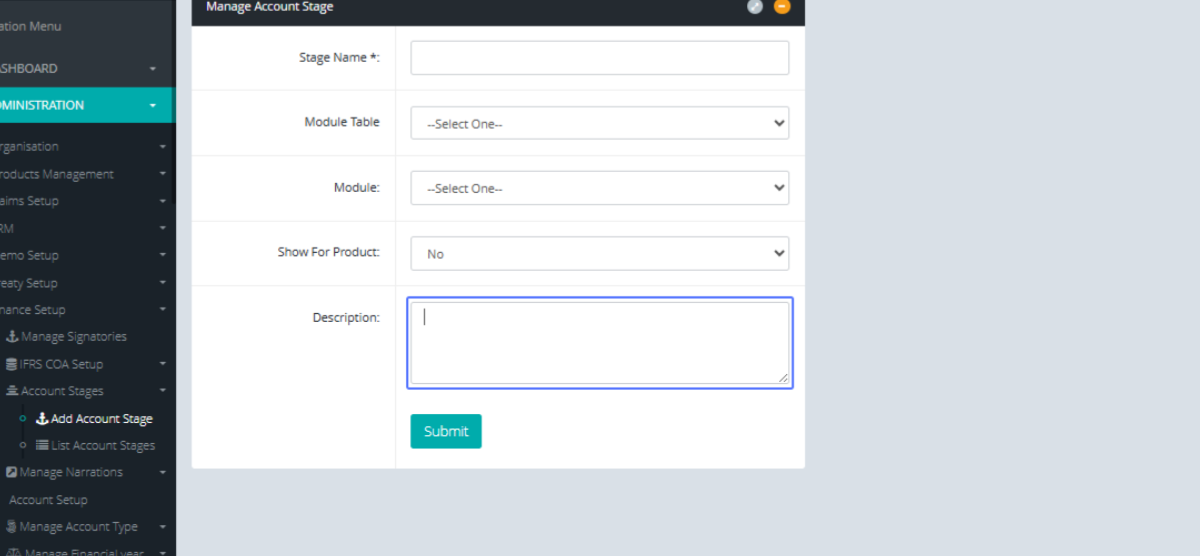
Click on "Submit" to Save the Account Stage
Click on the "List Account Stages" link to access the Account Stages Page.
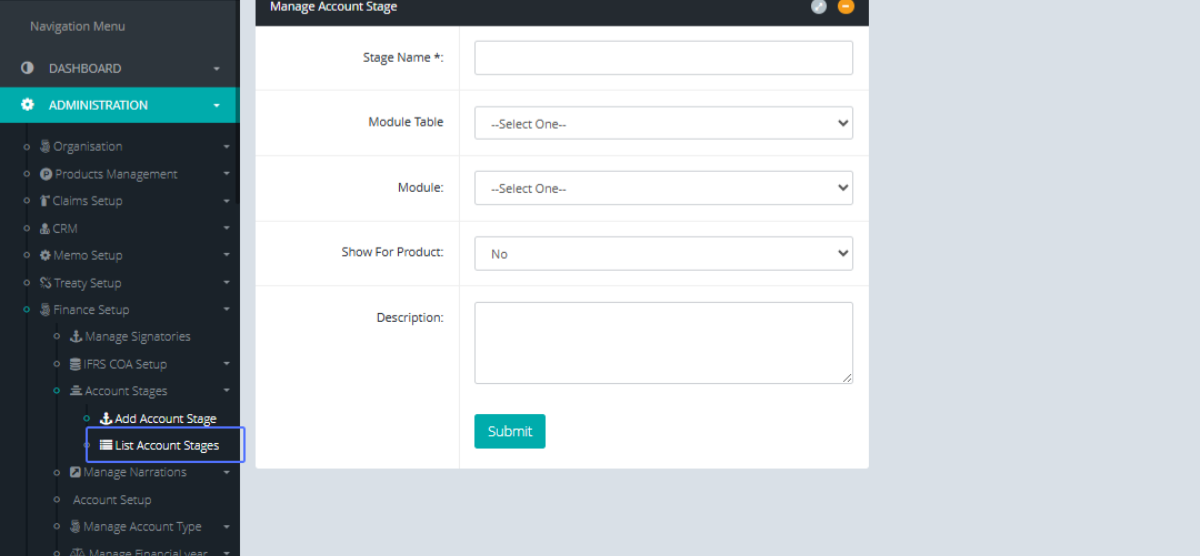
Tab Name: List Account Stages - GENOVA INSURANCE
Click on the "Action" button to see the list of available actions
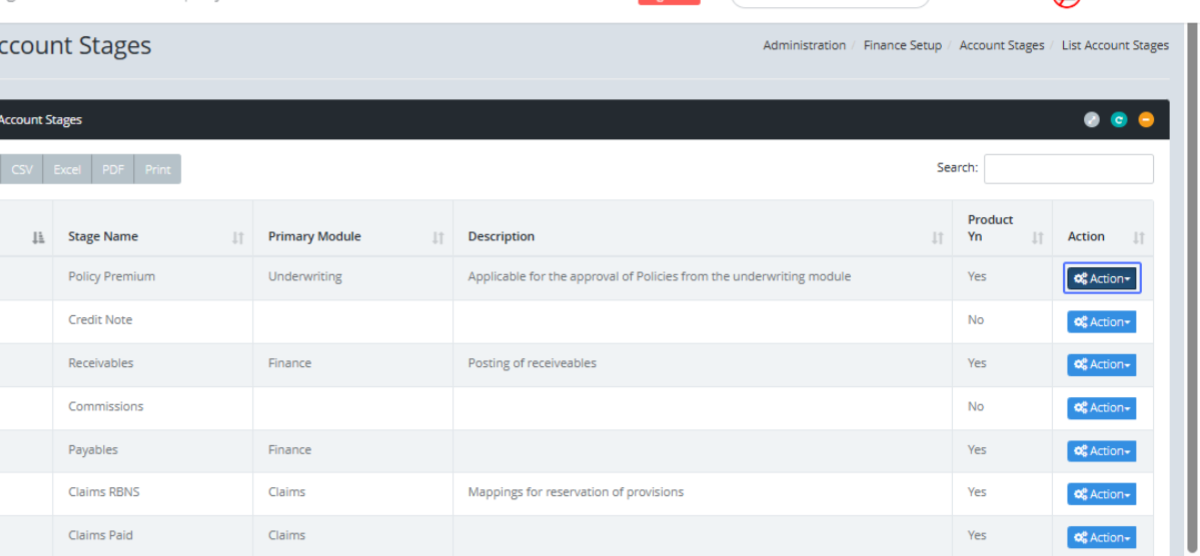
Click on the link "Update" to open the form to update the Account Stage

Tab Name: Add Account Stage - GENOVA INSURANCE
You will be presented to the Account Stage Form
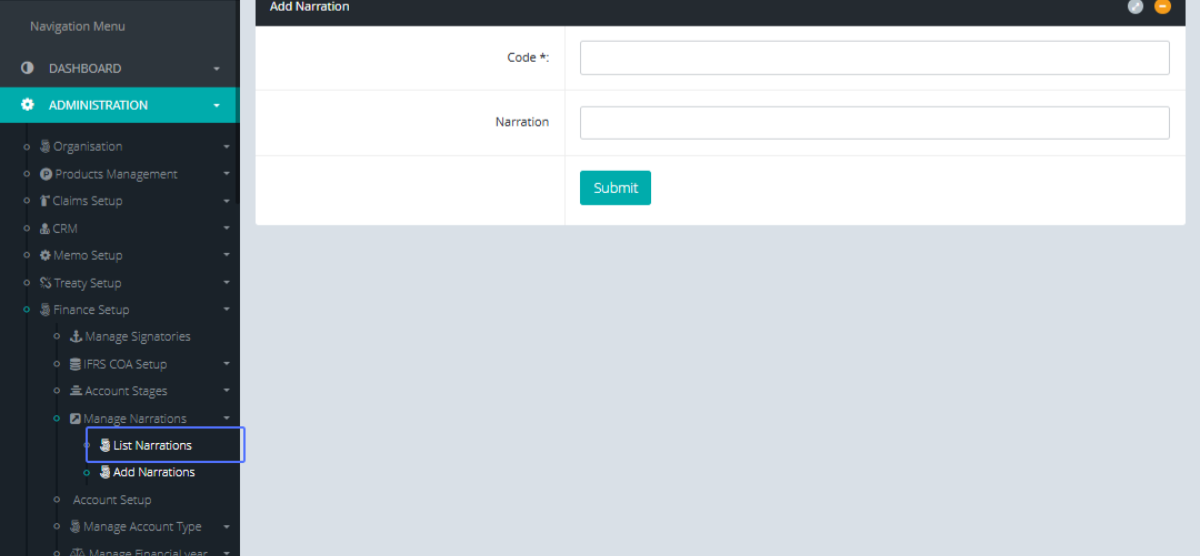
Click on the link "Manage Narrations" link to view the List Items
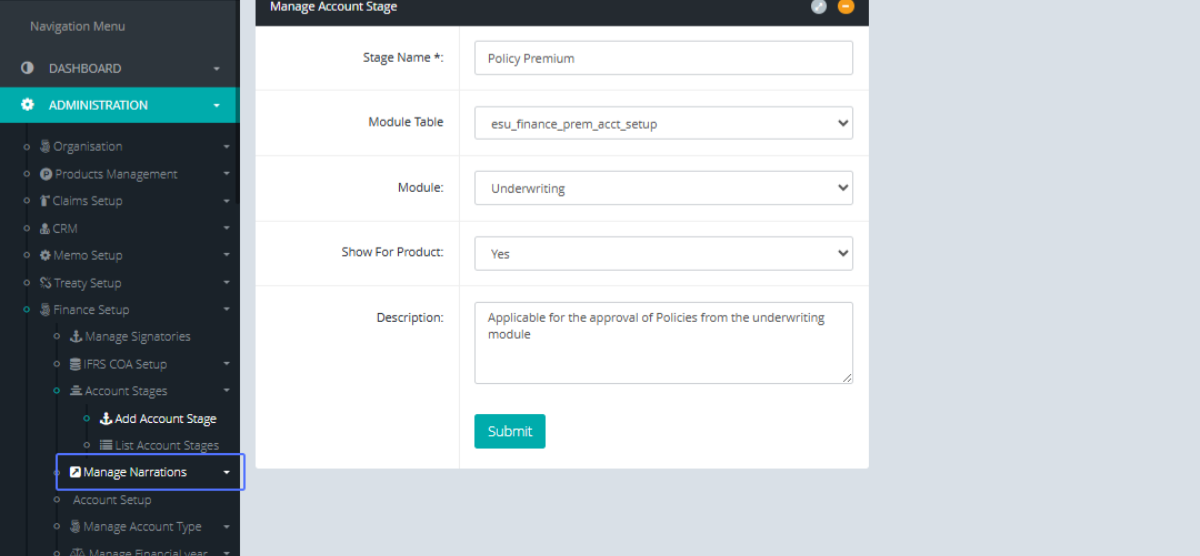
Click on the link "Add Narrations" to add new narrations
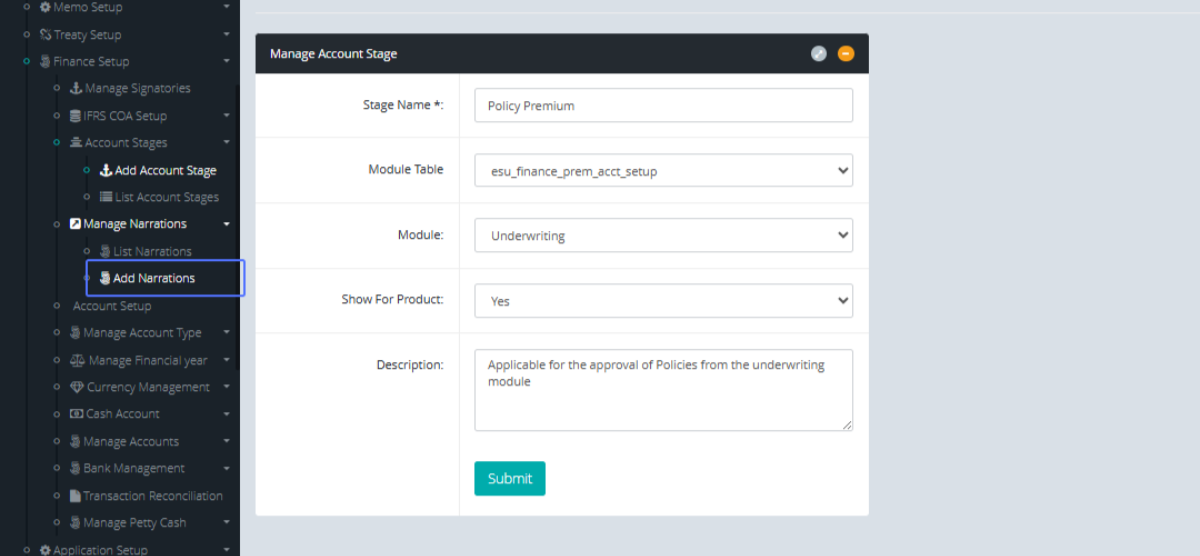
Tab Name: Add Narrations - GENOVA INSURANCE
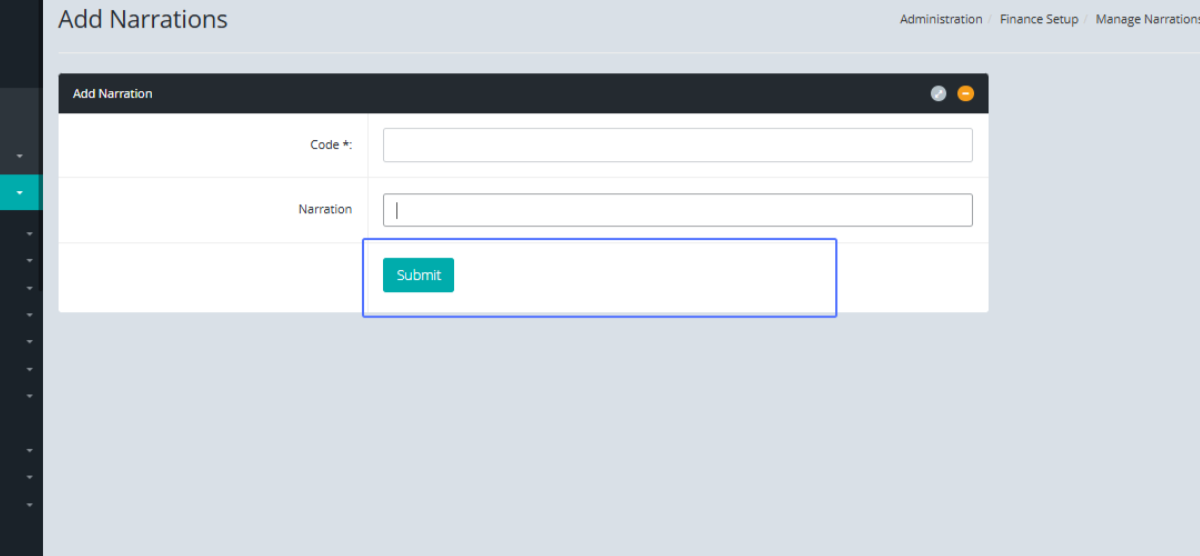
On the Add Narrations page, you will be presented to the Add Narrations from. Enter the Code into the Input field.
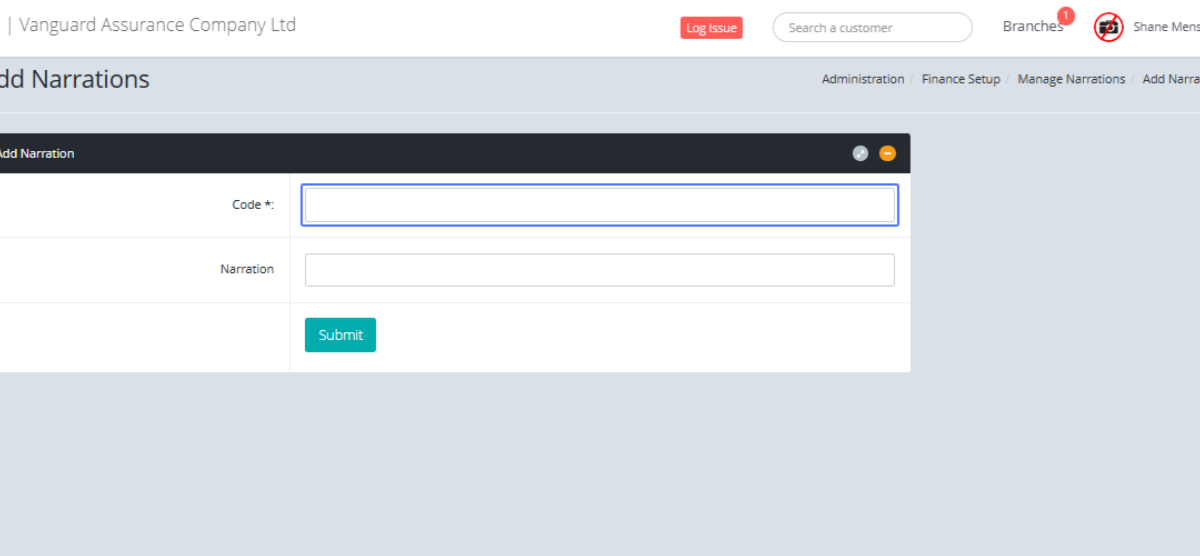
Enter the Narration in the input field provided
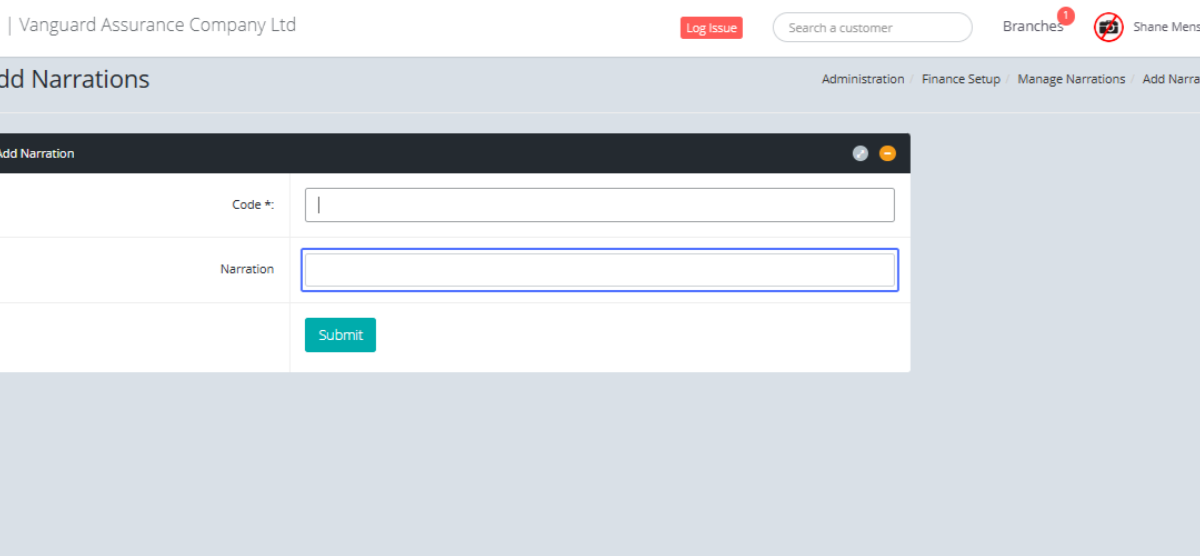
Click on "Submit" to save the narration
Click on the "List Narrations" link to view the existing narrations within the system.
Tab Name: List Narrations - GENOVA INSURANCE
With the listed Narrations, Click on the button "Action" button to open the available actions for the item.
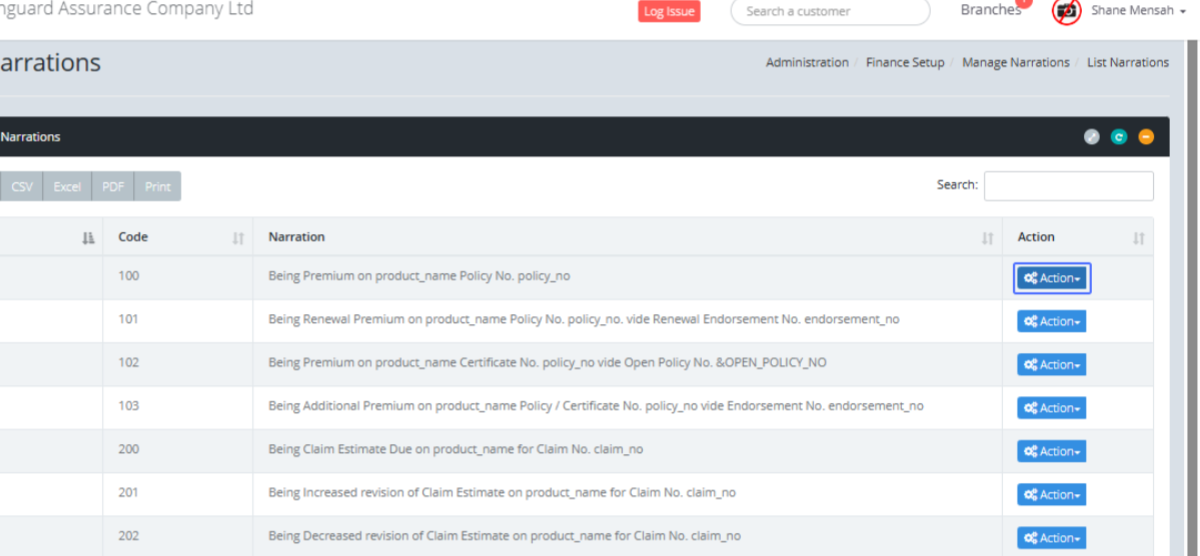
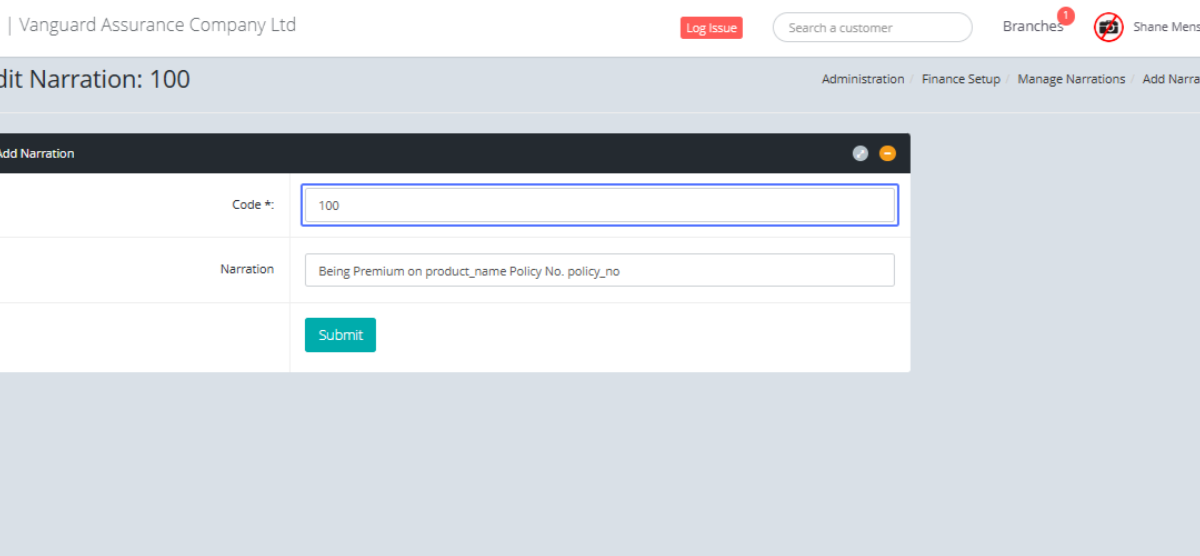
Click on the "Edit" link to edit the specific narration

Tab Name: Add Narrations - GENOVA INSURANCE
On this page, you can make changes to existing Narration within the system.
Enter the new Code to Modify the existing Narration Code.
Enter the new narration to modify the Existing narration.
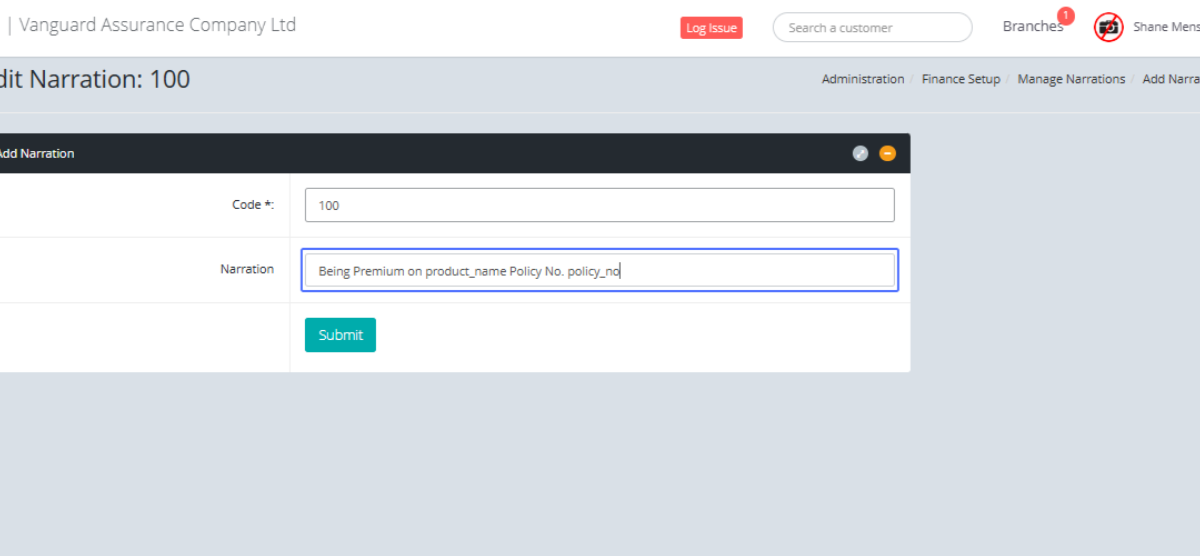
Click on the "Submit" button to save the updated Narration

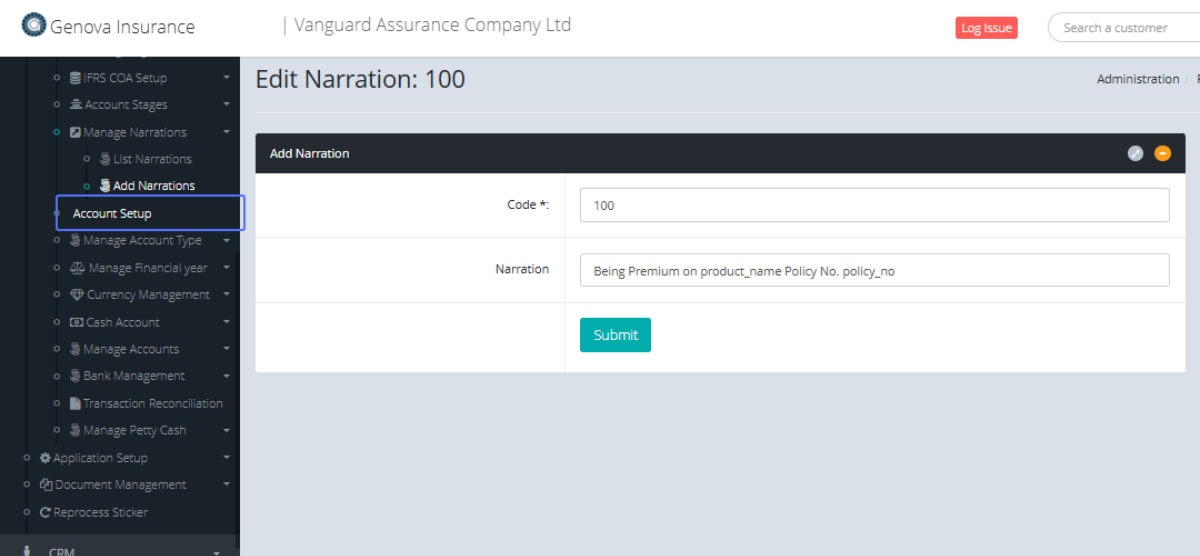
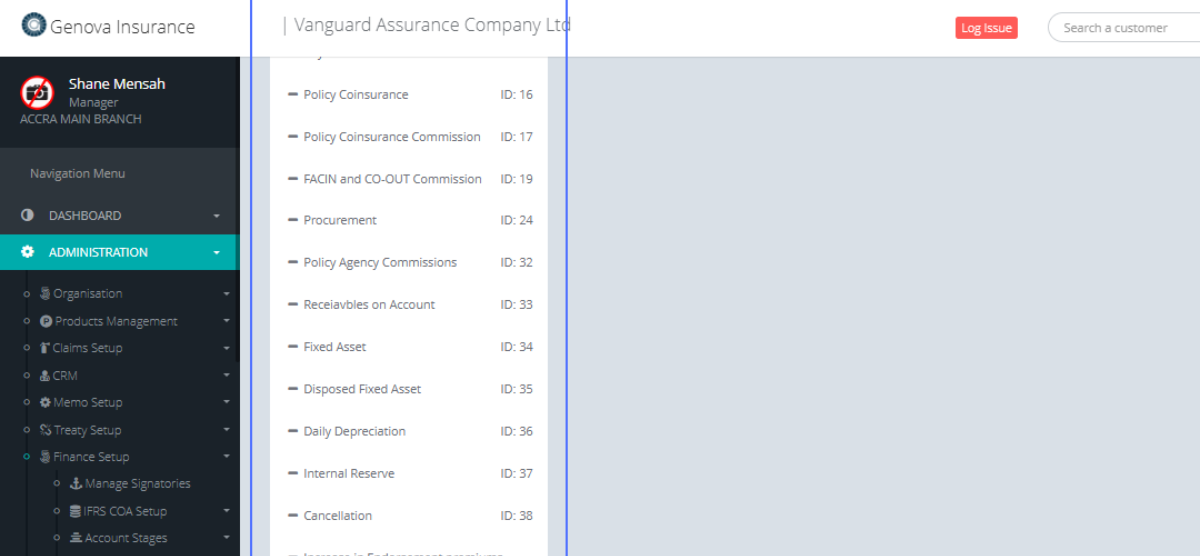
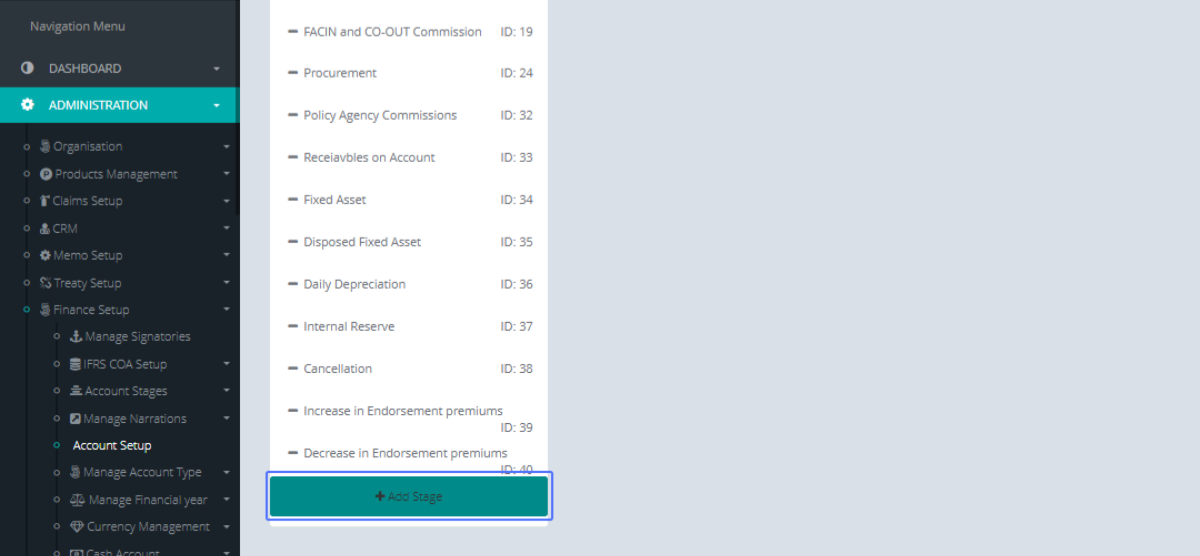
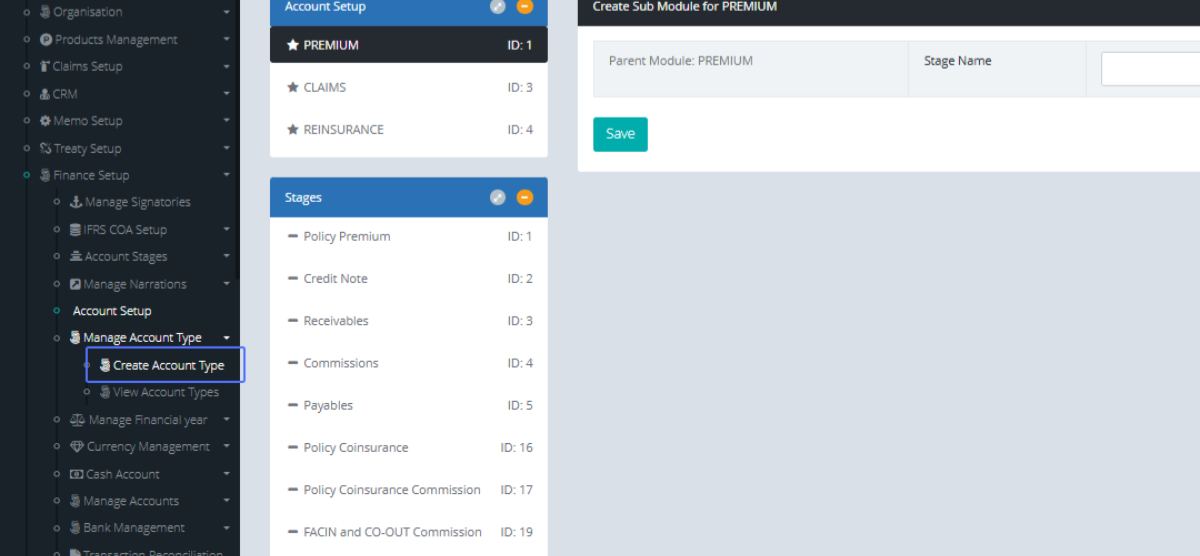
Click on the link "Account Setup" to access the account Setup Page
Tab Name: Account Setup - GENOVA INSURANCE
On the Account Setup page, you can see a list of items that have ben setup on the left side of the screen.
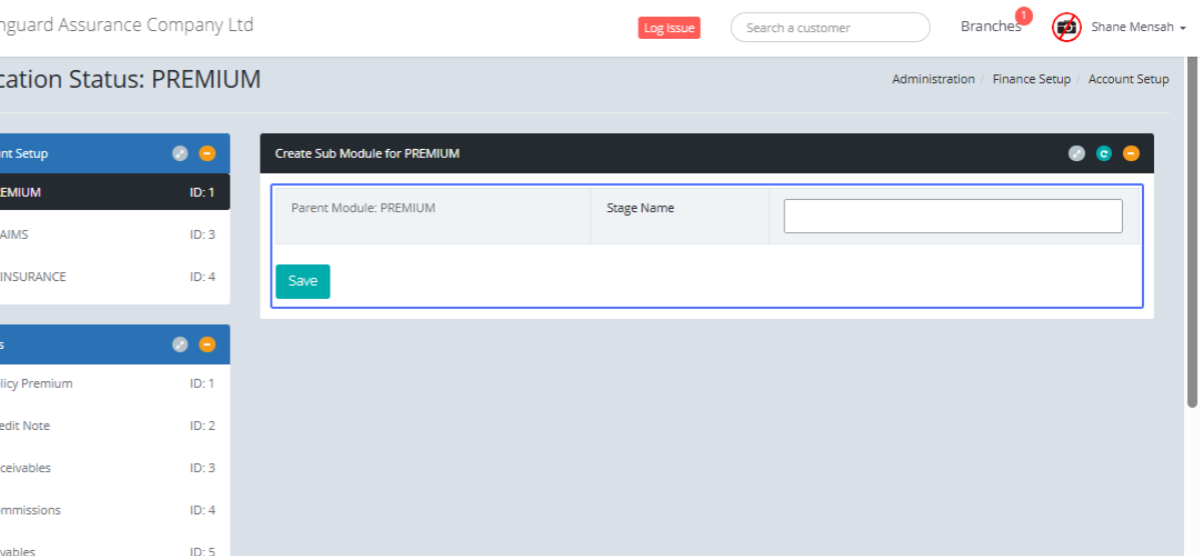
Click on the "Add Stage" button to add a new stage
Enter the Stage name within the provided input.
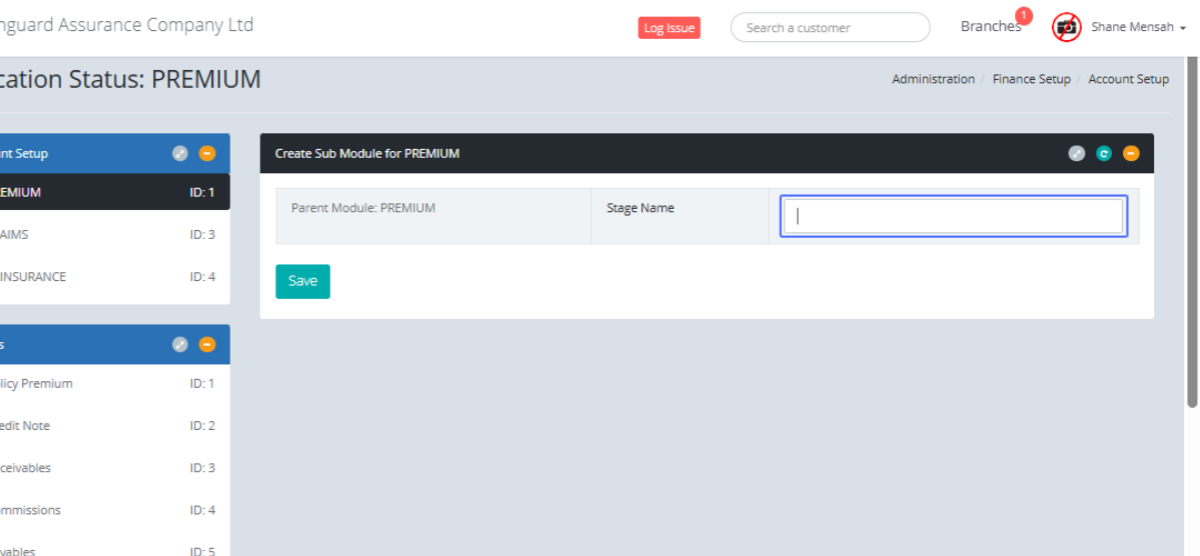
Click on the Save button to save the new sub module for the listed item
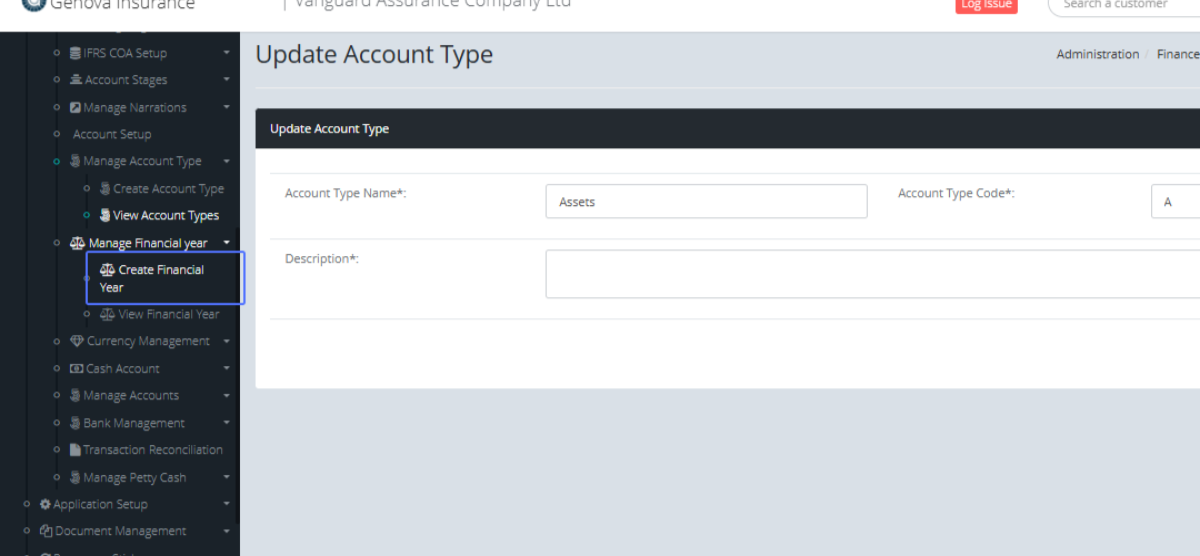
Click on the link "Manage Account Type" to see the listed Options

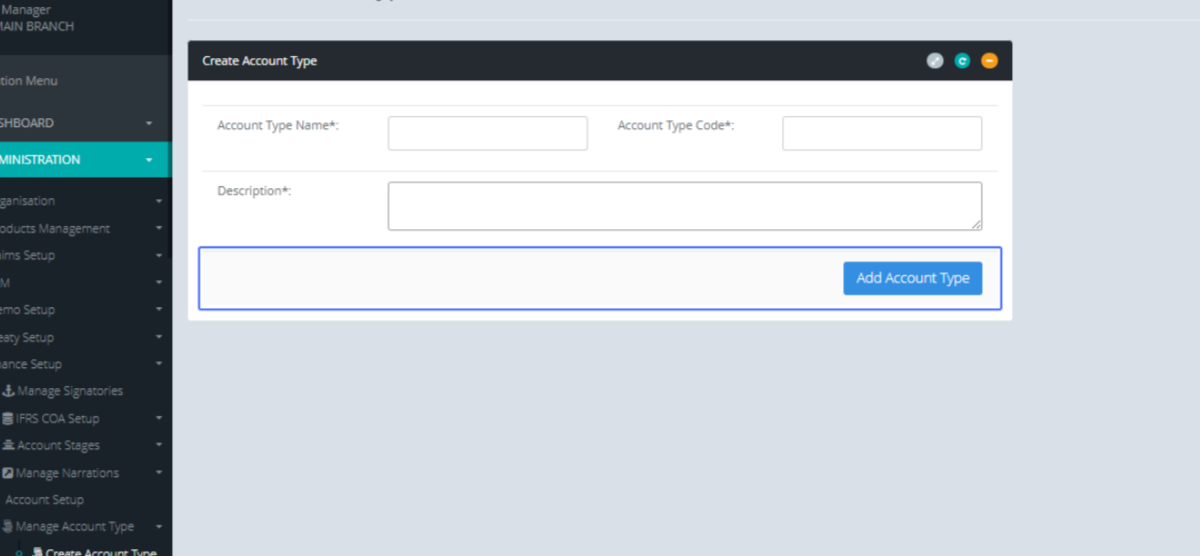
Click on the link "Create Account Type" to get navigated to the Create Account Type page
Tab Name: Create Account Type - GENOVA INSURANCE
Within the Create Account type page, Enter the Account type name within the Input field that has been provided.
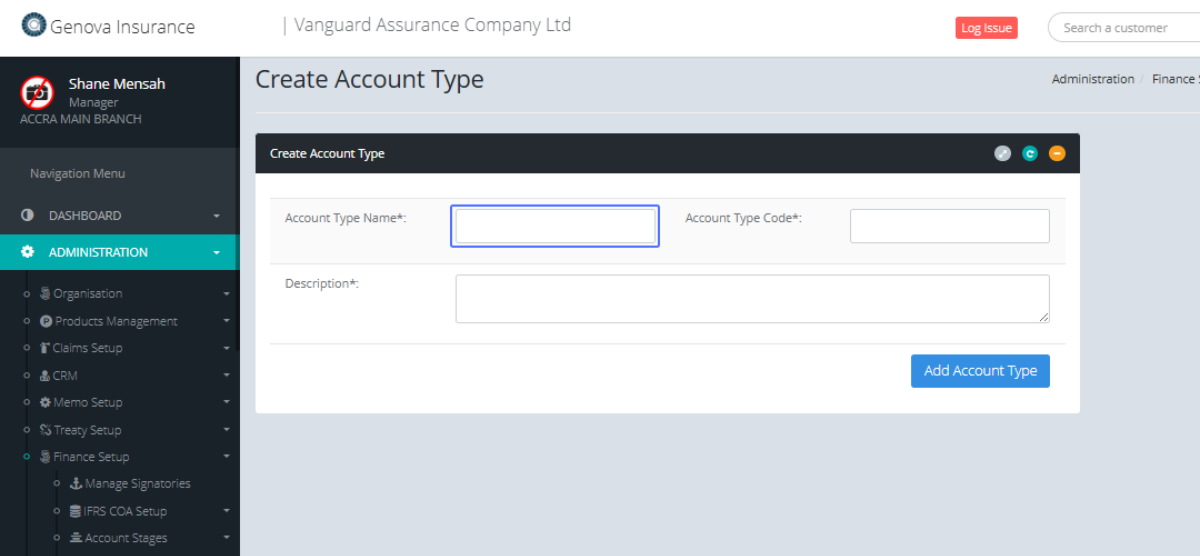
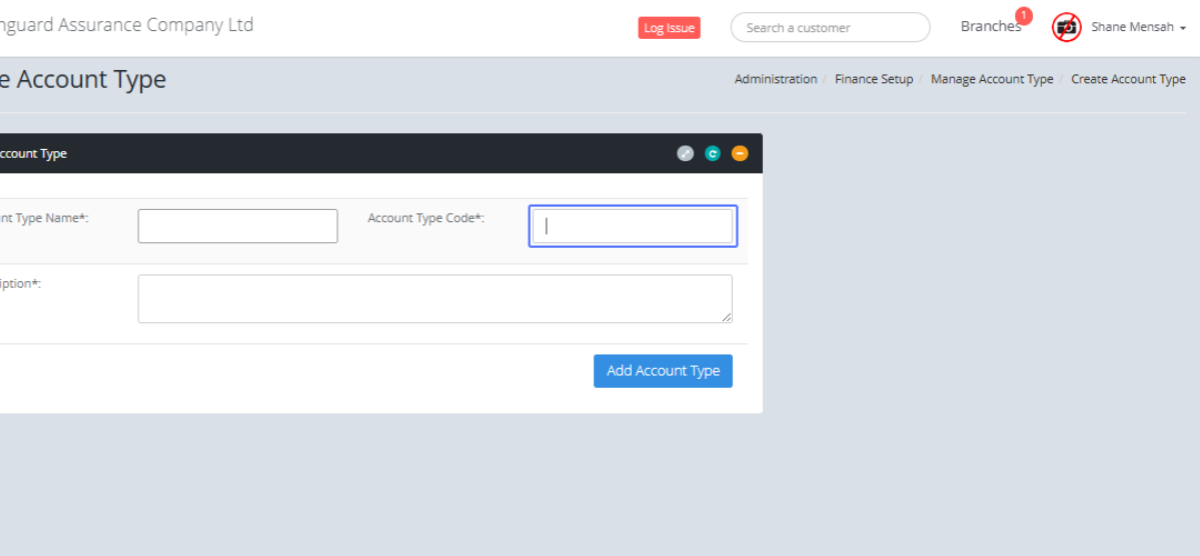
Enter the Account Type Code within the input field that has been provided
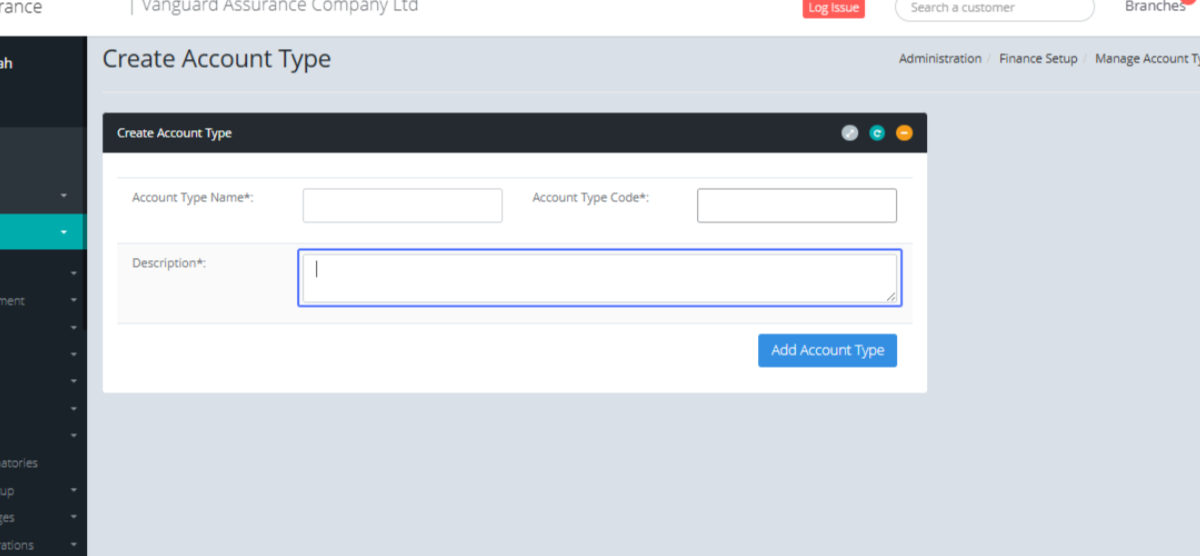
Enter the Description within the Description Box that has been provided.
Click on the Add Account Type to save the New Account Type.
Click on the link "View Account Types" to view the account Type list

Tab Name: View Account Types - GENOVA INSURANCE
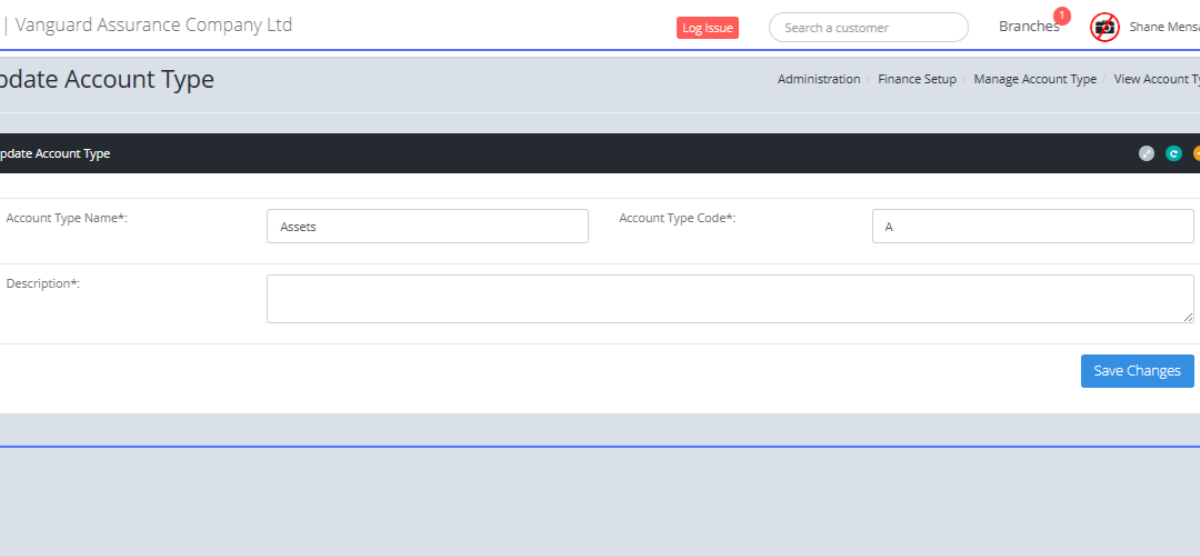
Within the list, click on the Edit Button to edit the particular Account type.
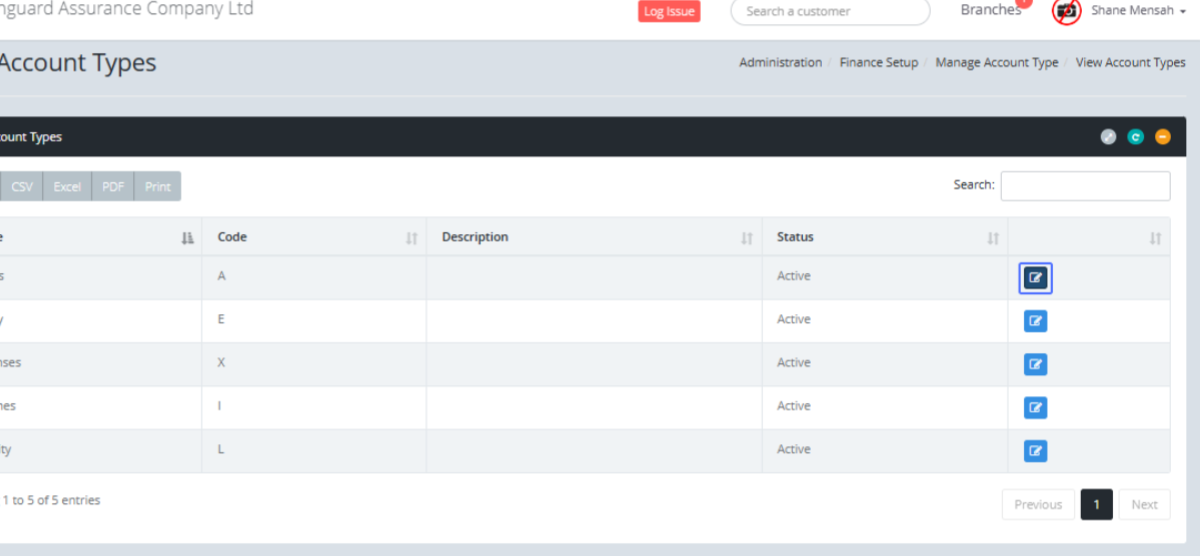
This will open the form to edit the selected Account type.
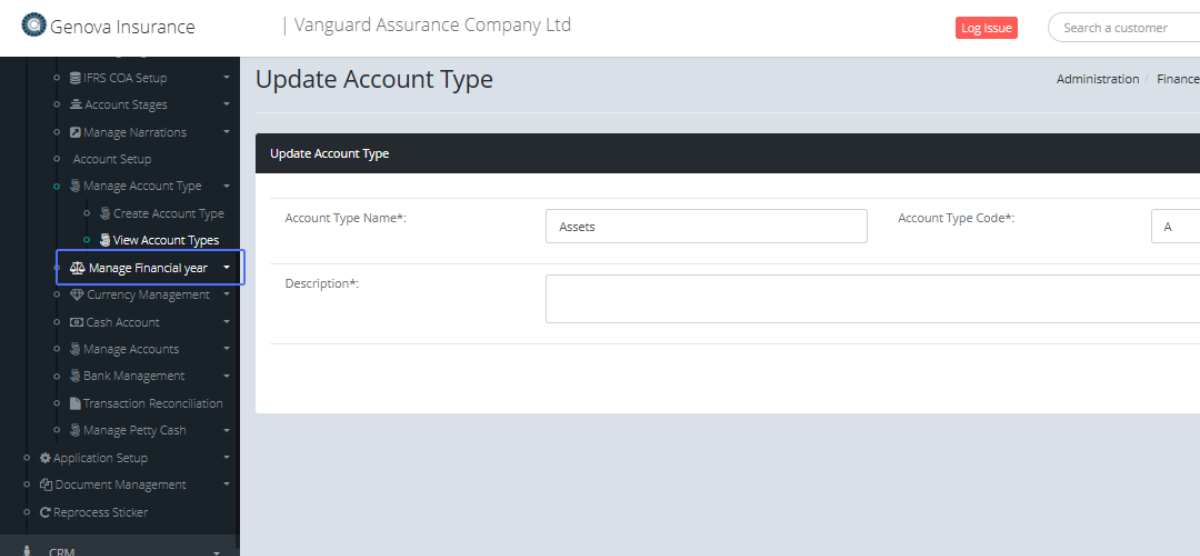
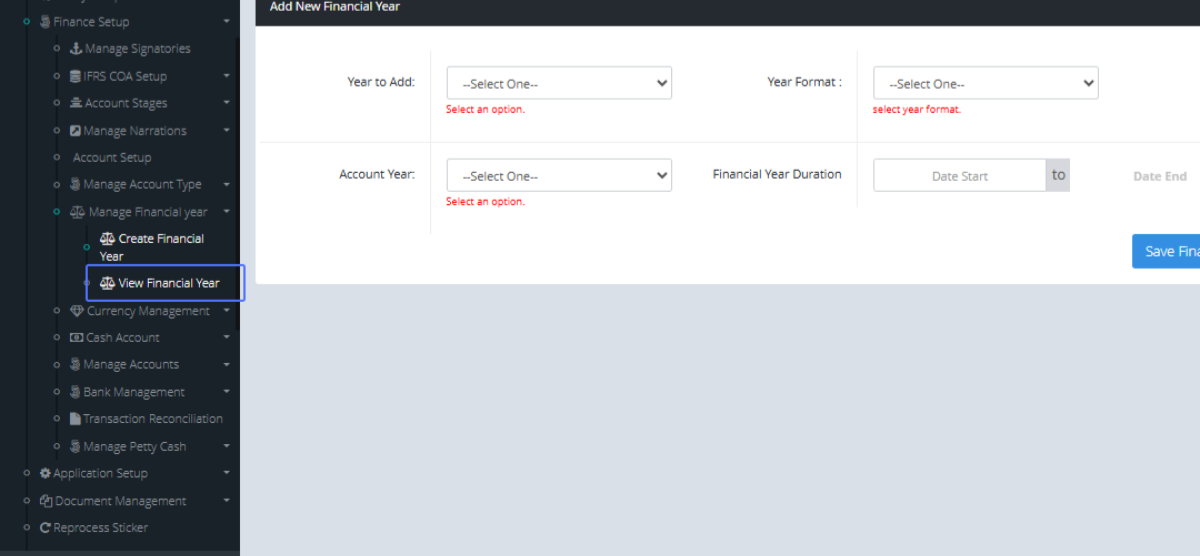
Click on the link "Manage Financial year" to see the list Items
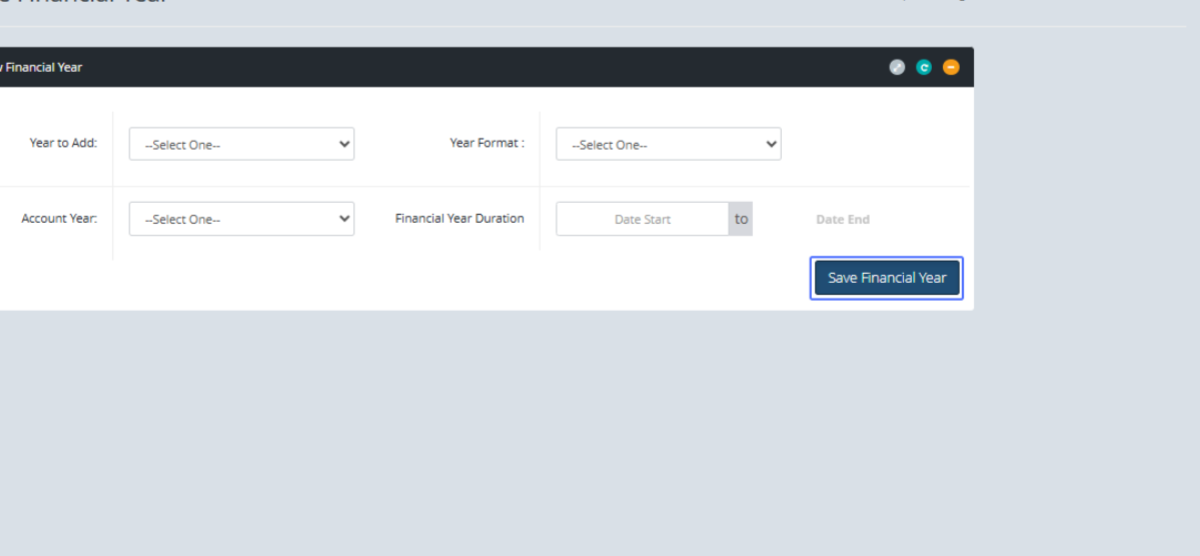
Click on the link "Create Financial Year" to access the Create Financial year form.
Tab Name: Create Financial Year - GENOVA INSURANCE
Within the form, Select the Year to Add from the dropdown list.
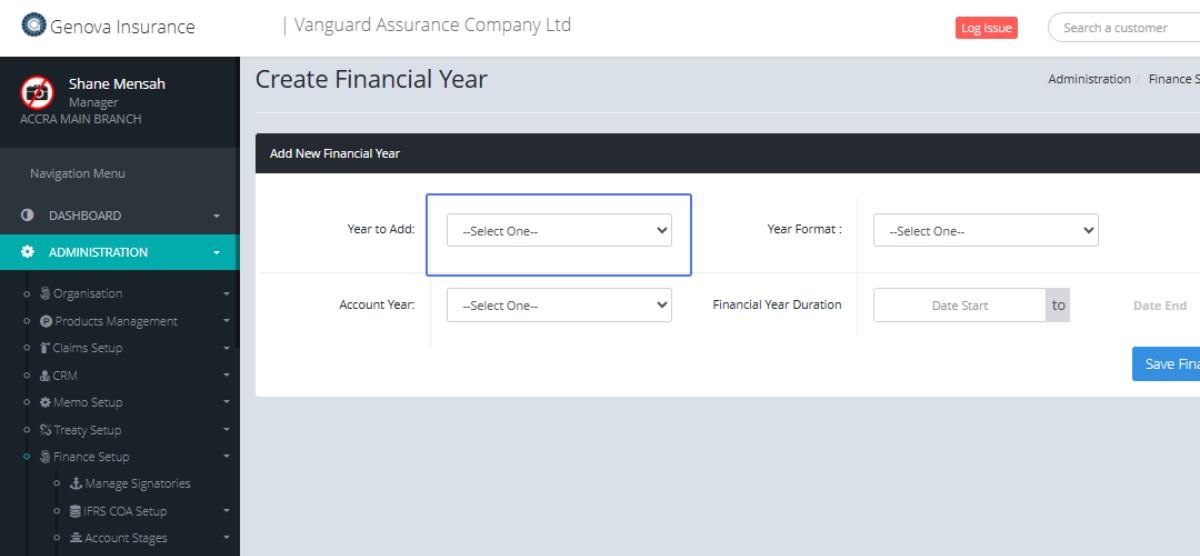
Select the referred year format from the Dropdown List
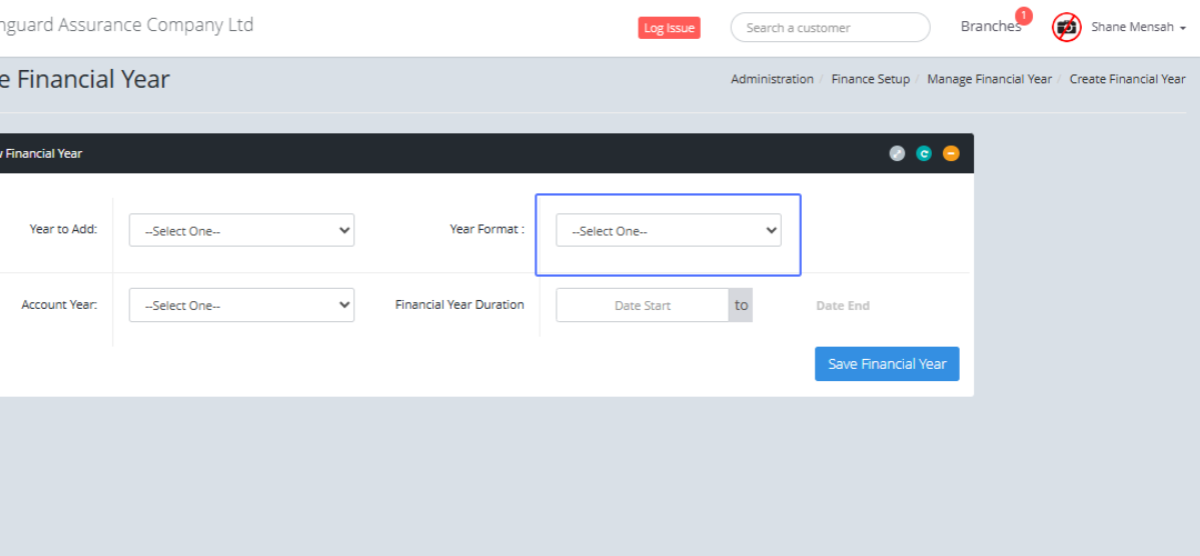
Select the Account year from the dropdown List
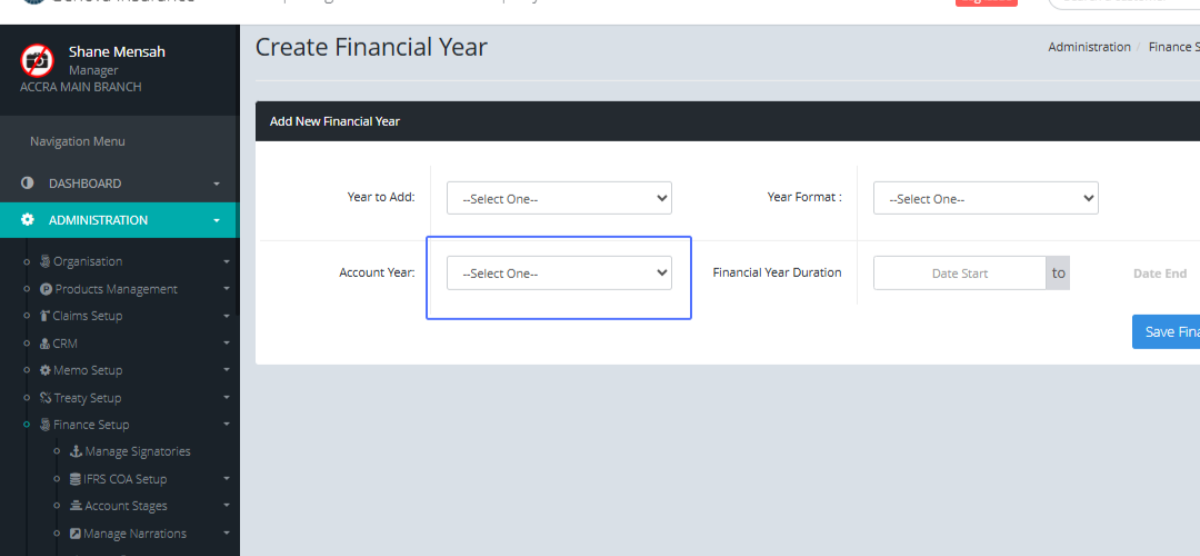
Select the Financial Year Duration by selecting the applicable Start and End Date
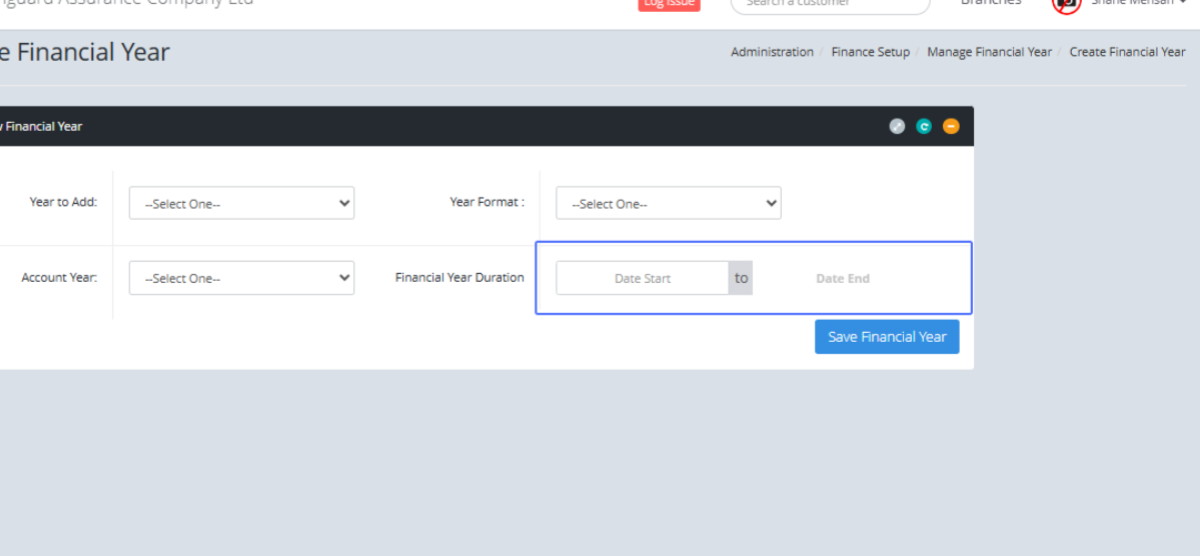
Click on the button "Save Financial Year" to save the created Financial Year
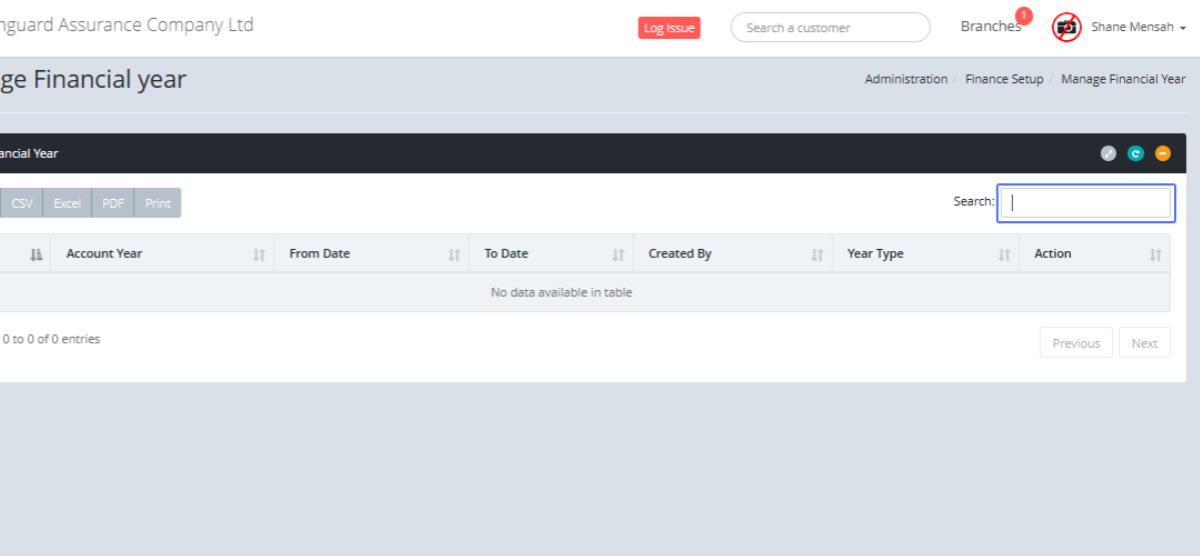
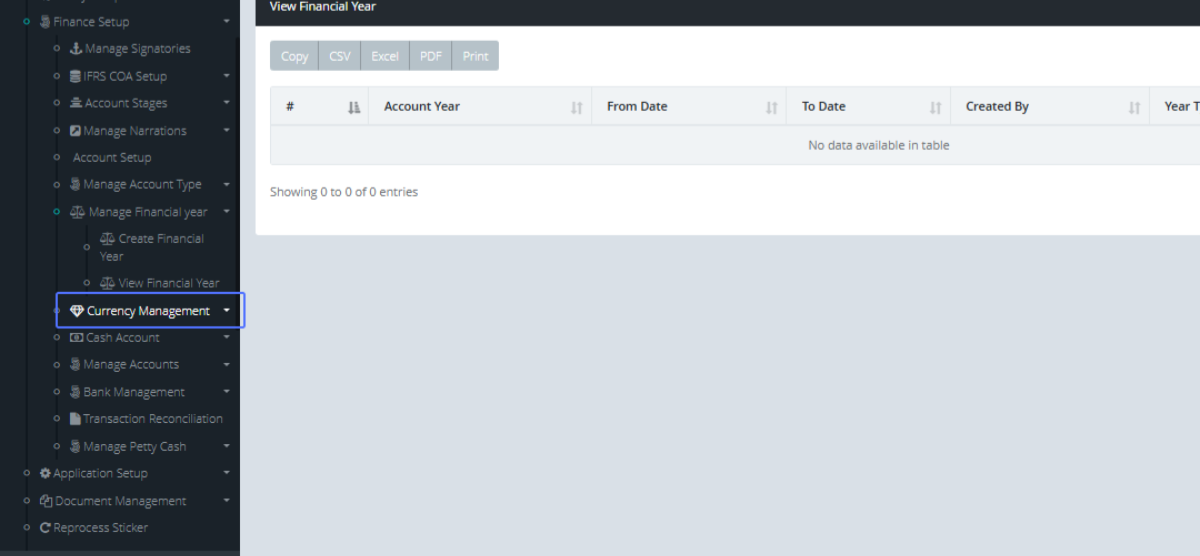
Click on the link "View Financial Year" to view the Financial year page.
Tab Name: Manage Financial year - GENOVA INSURANCE
Click on the input "Search" to Search for any item listed
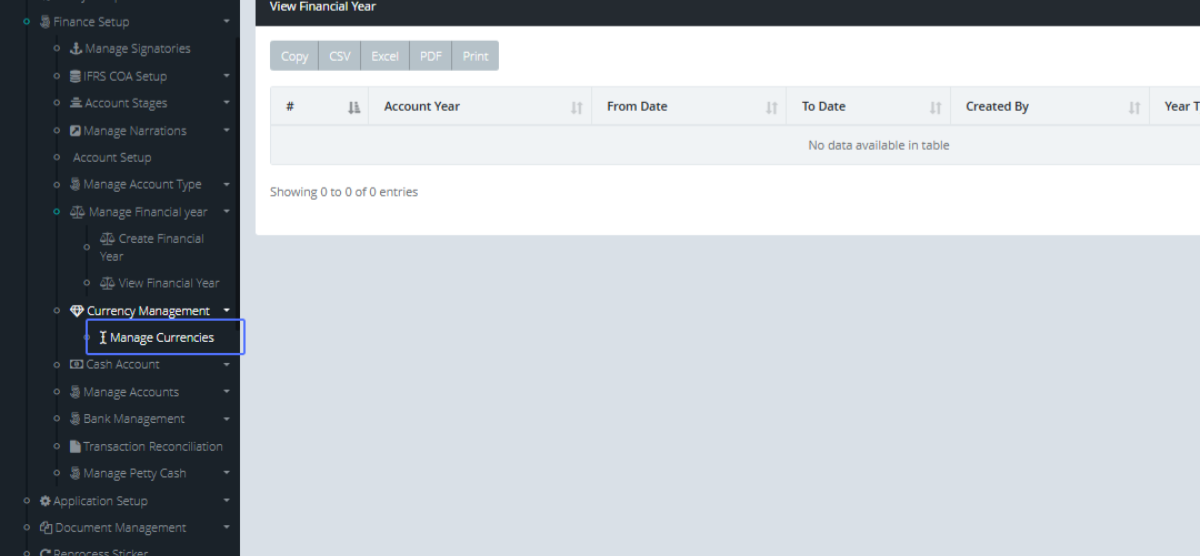
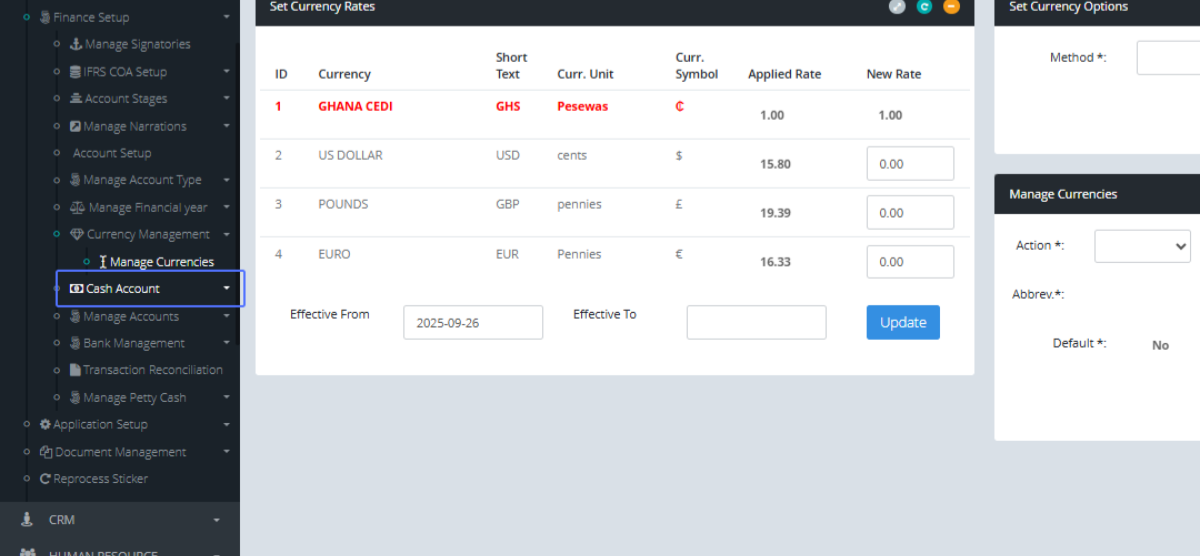
Click on the link "Currency Management" to access the Currency Management List
Click on the link "Manage Currencies" to get access to the Manage Currency Form
Tab Name: Manage Currencies - GENOVA INSURANCE
Within the manage Currencies, you can see the Currencies that have been added within the system.
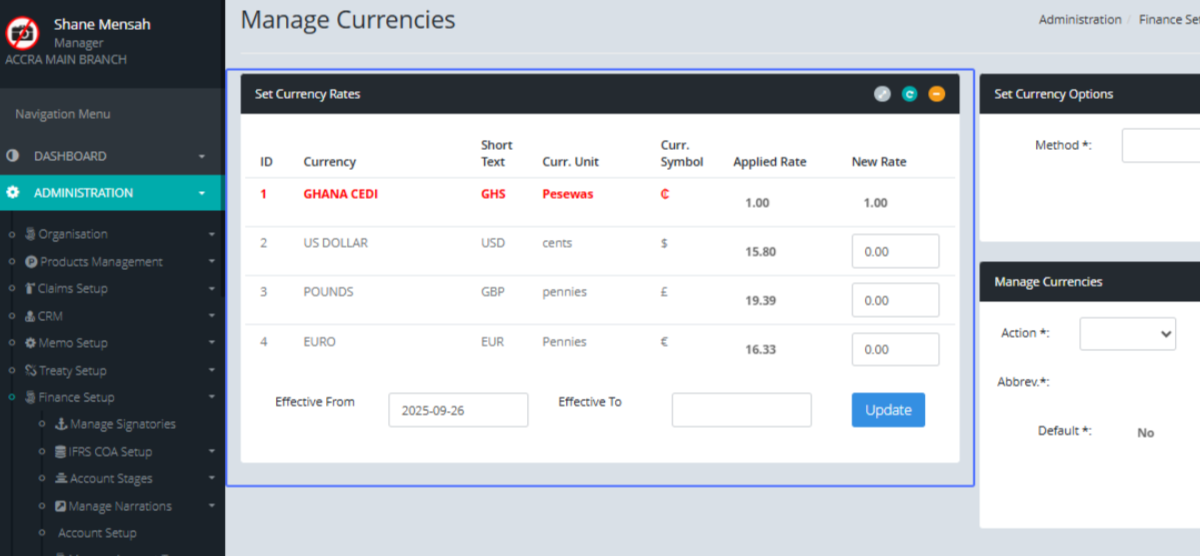
Click the Update button to update any change that have been made to the existing currencies.
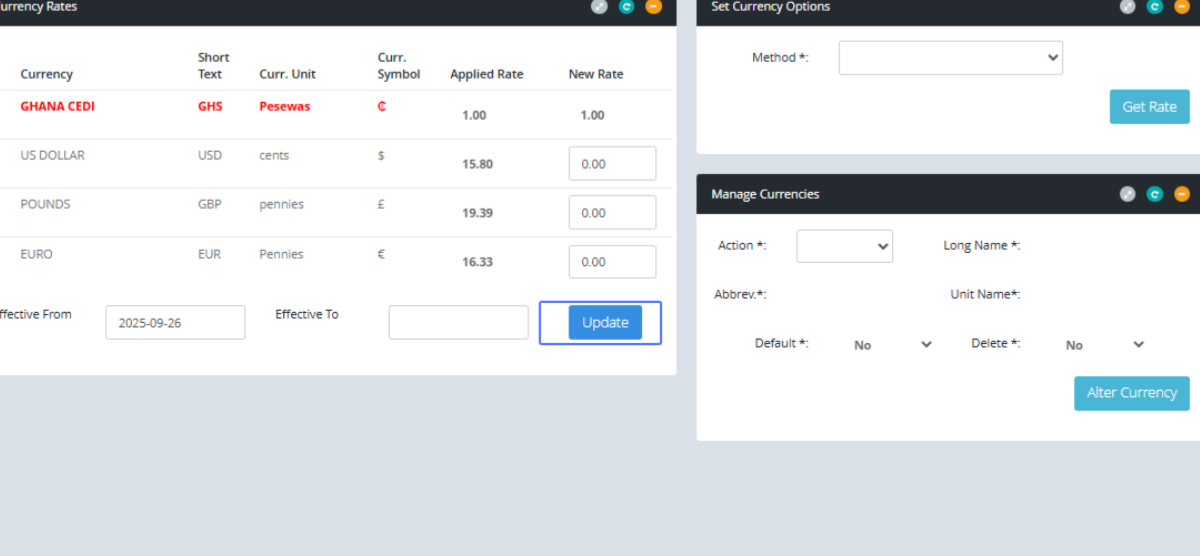
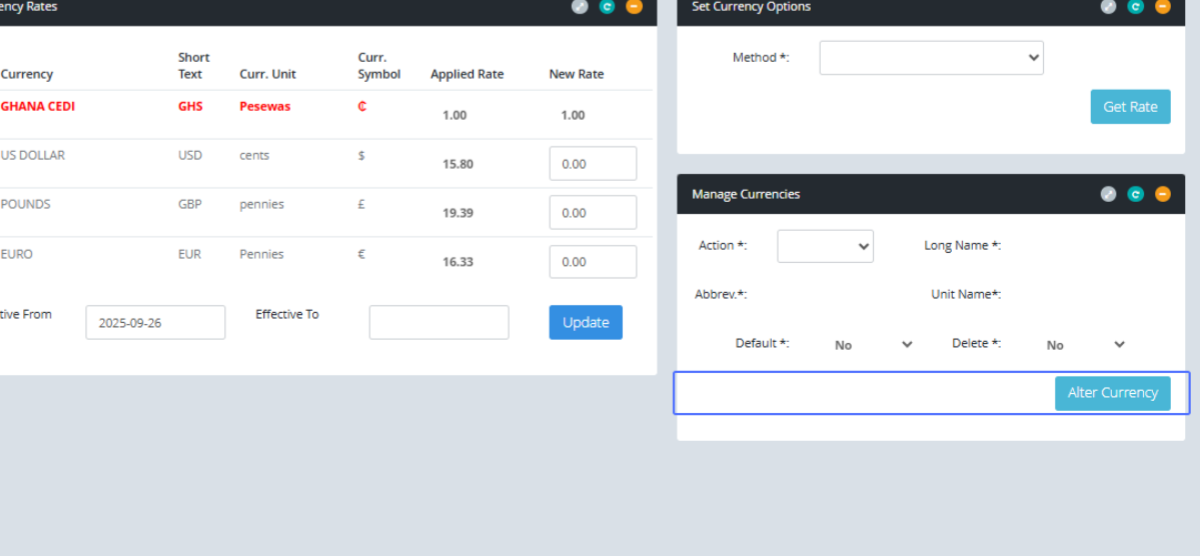
On the left-hand side of the page, we can manage Currency options by selecting the method within the provided dropdown.

Click on the "Get Rate" button to get the rate of the selected item
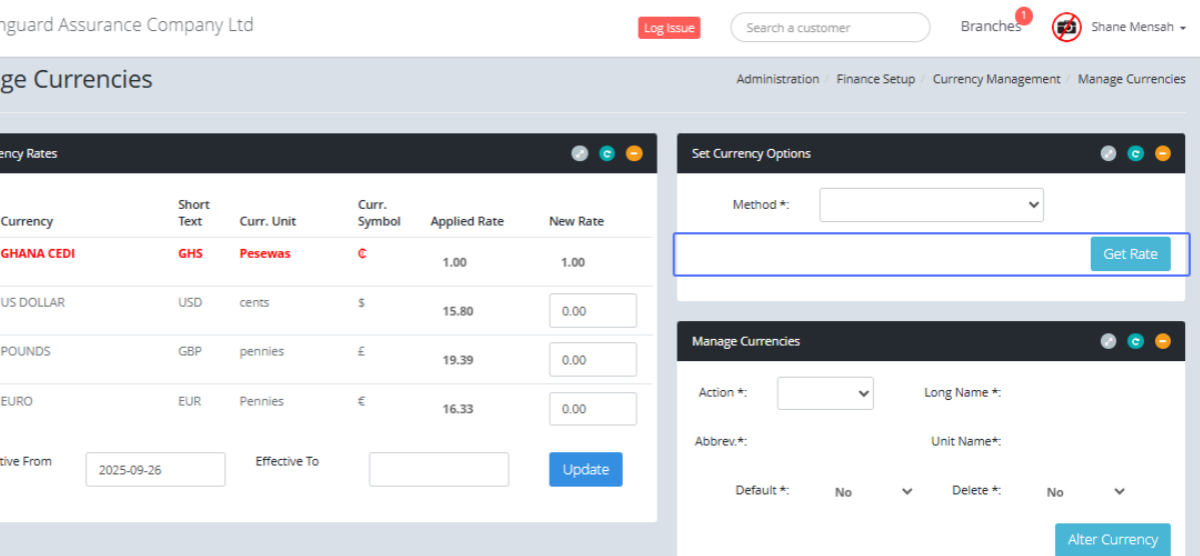
Within the Manage Currencies section, Select the Action from the provided list, which populates the other fields

Click on the "Alter Currency" button to Alter Currency.
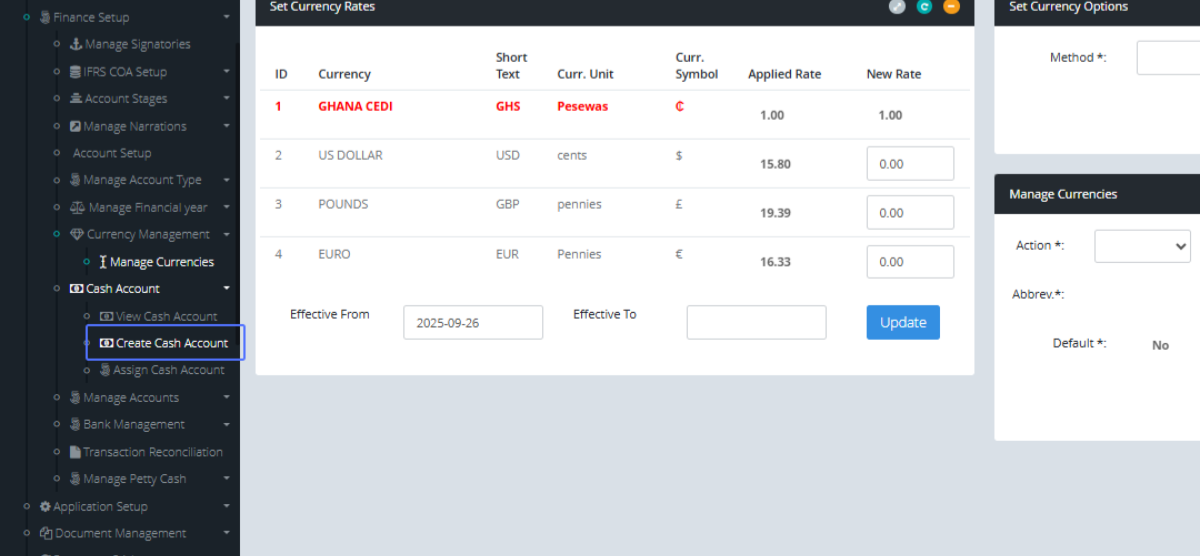
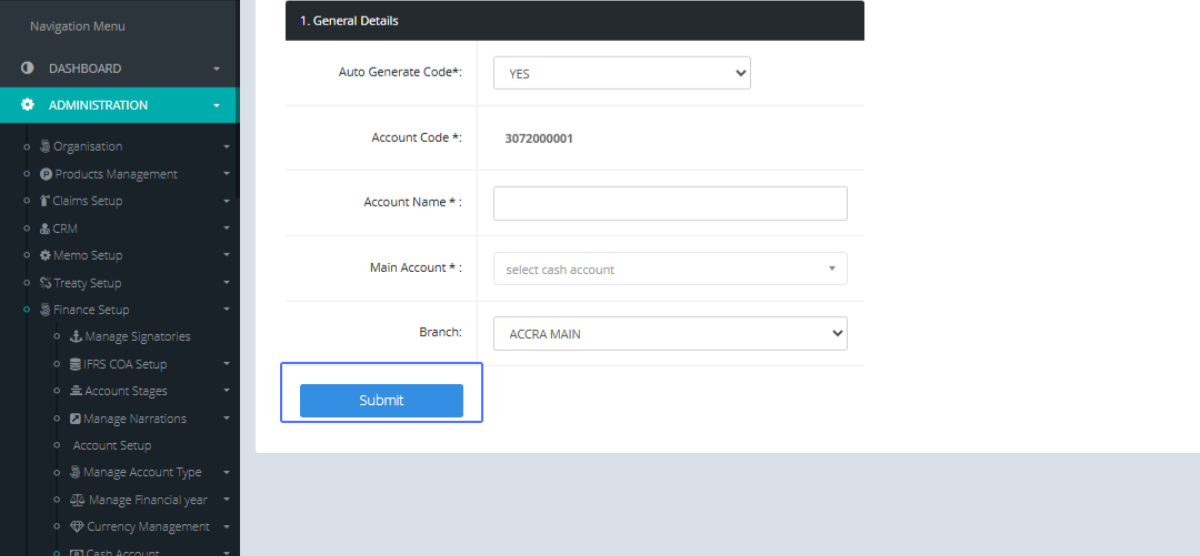
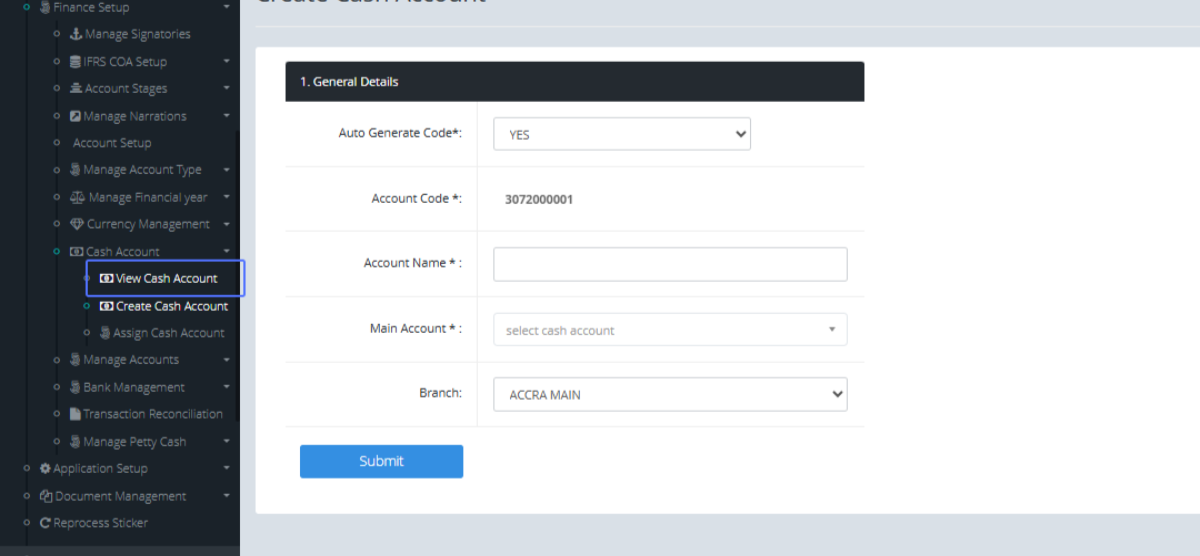
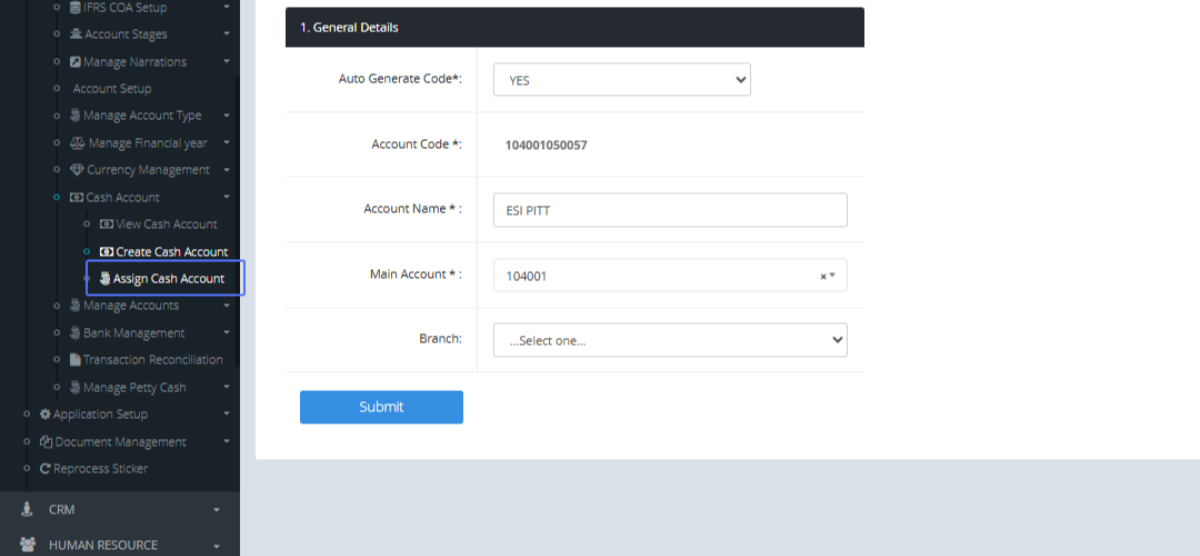
Click on the link "Cash Account" to view the Cash Account list
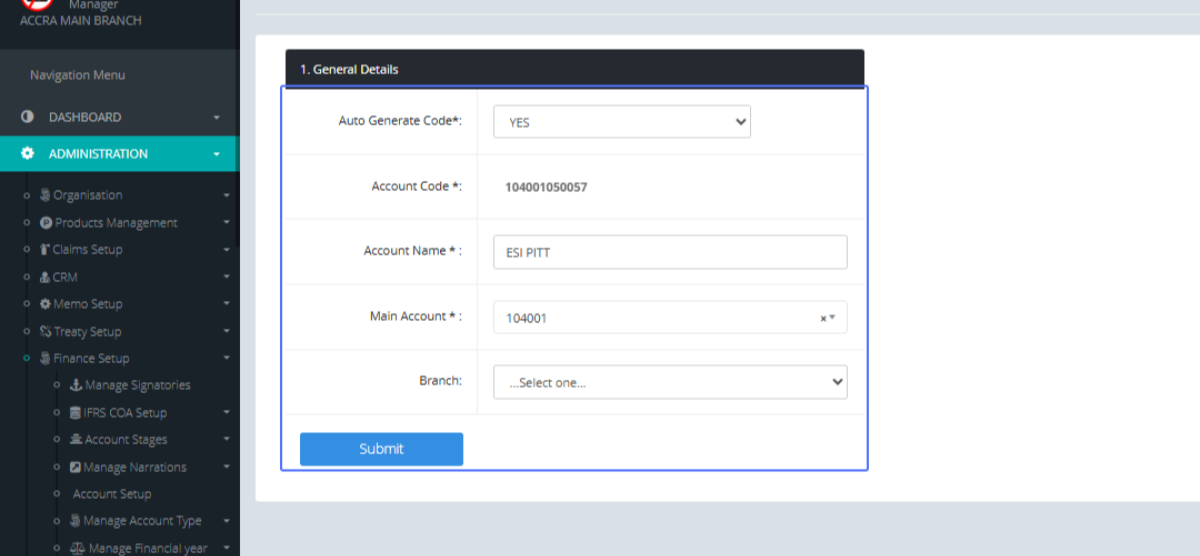
Click on the link "Create Cash Account" to access the Create cash account form.
Tab Name: Create Cash Account - GENOVA INSURANCE
Select the Auto generate Code Option (Yes/No) from the item dropdown
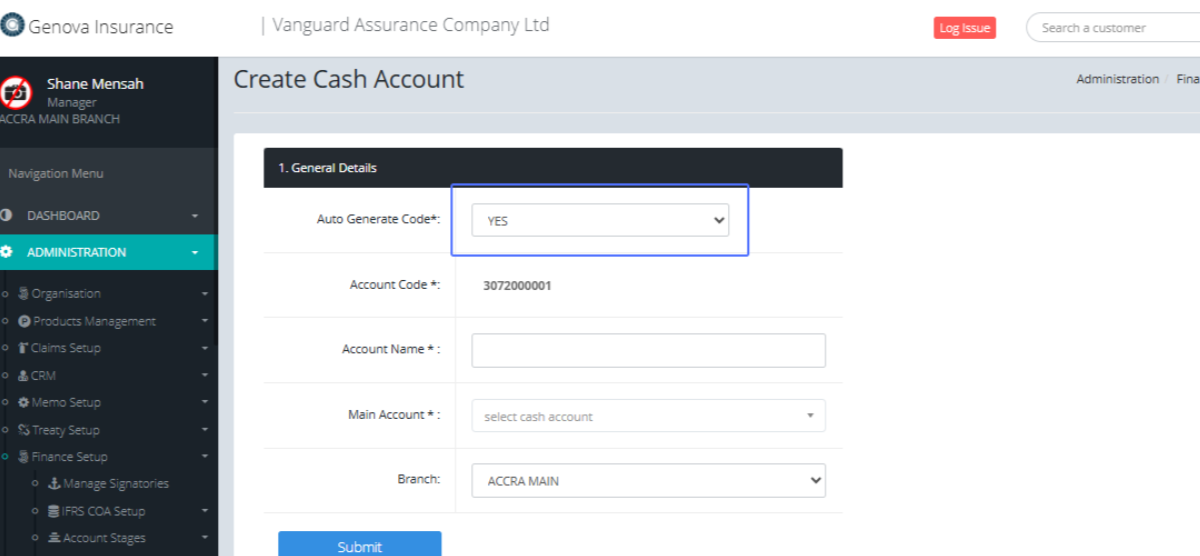
The Account Code will already be generated for you
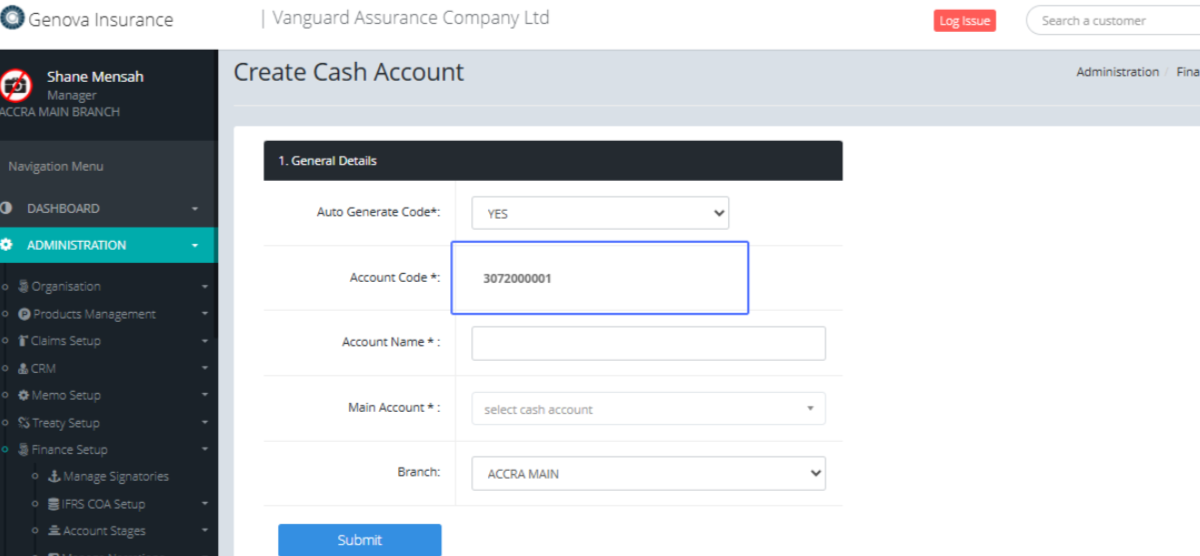
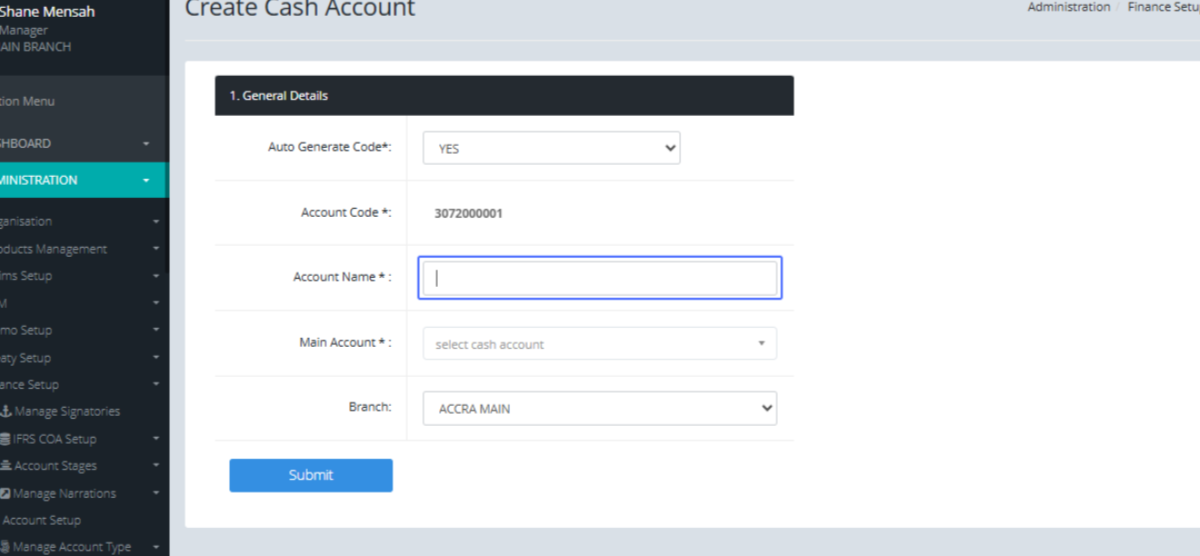
Enter the Account name within the provided input
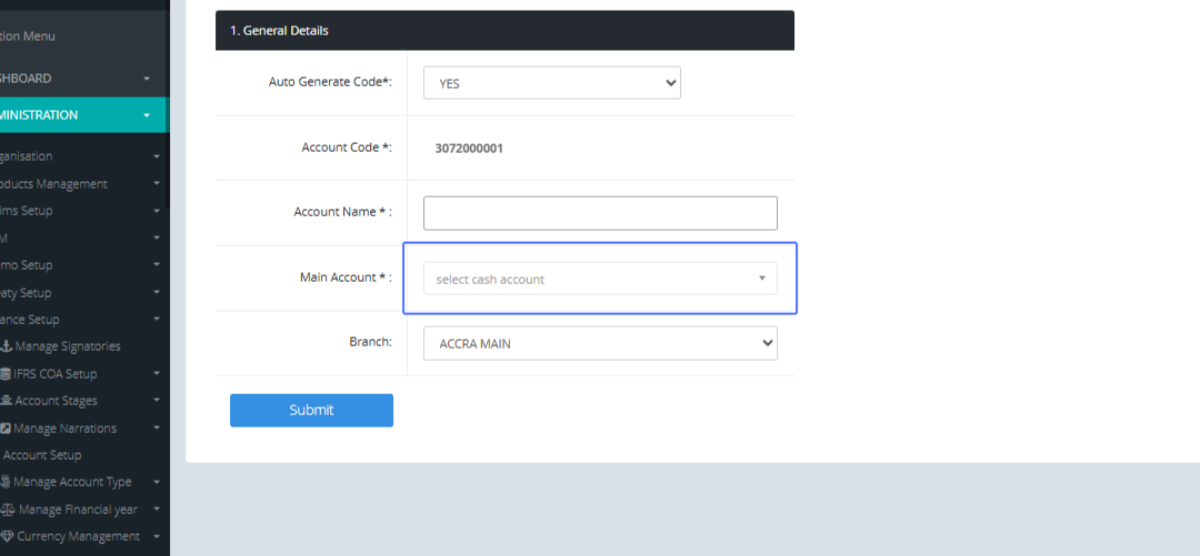
Select the Main Account within the list provided
Select the Branch from the provided dropdown list
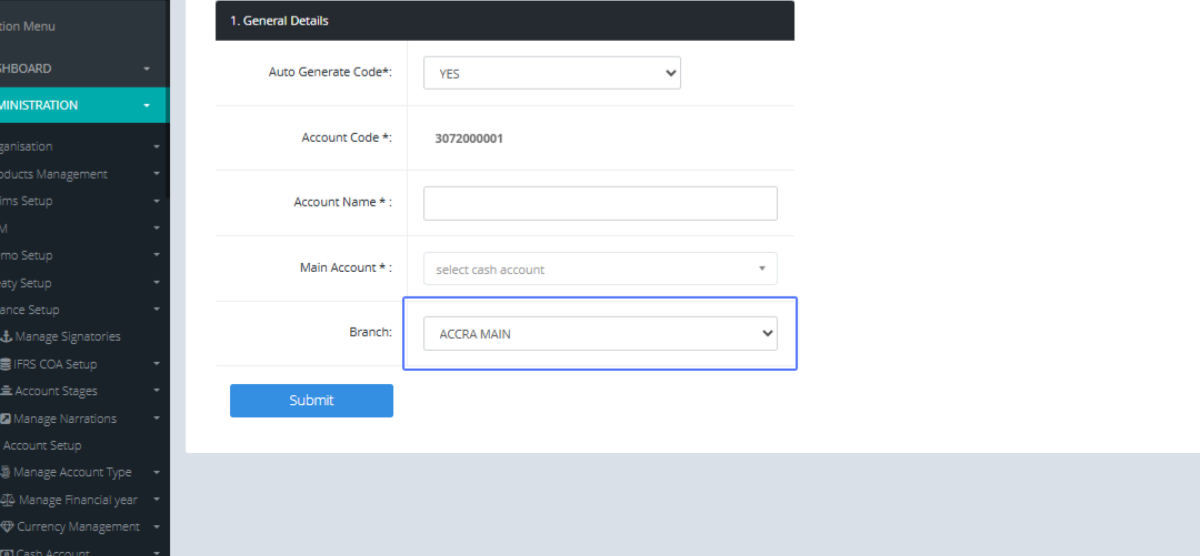
Click on the Submit button to save the Information
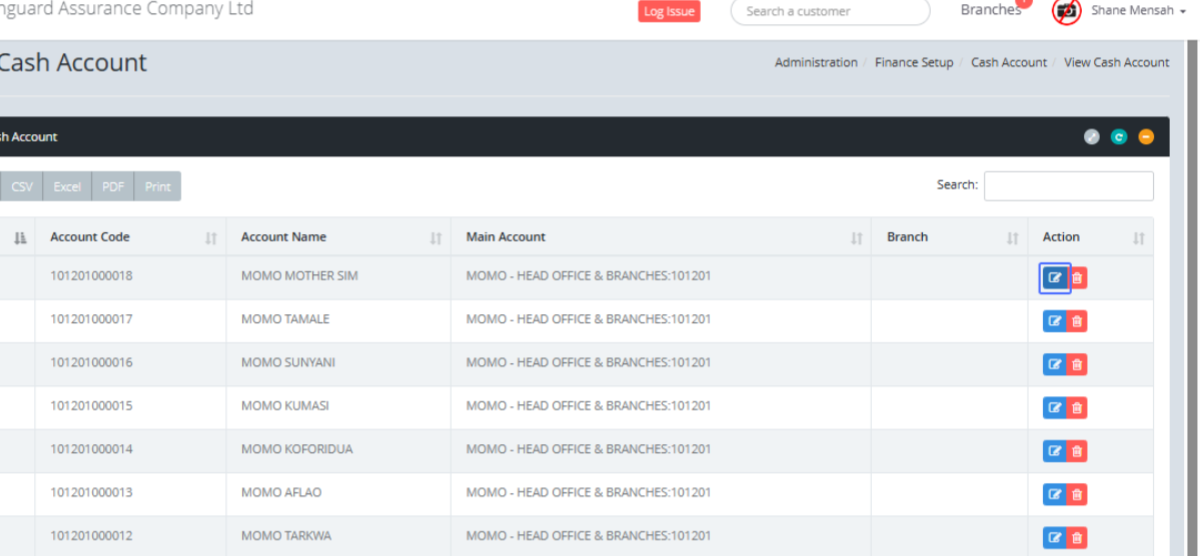
Click on the link "View Cash Account" to access the Cash Account List.
Tab Name: View Cash Account - GENOVA INSURANCE
Click on the Edit button to edit a Cash Account within the list.
Tab Name: Create Cash Account - GENOVA INSURANCE
You can then see the Details of the saved Cash Account within the form.
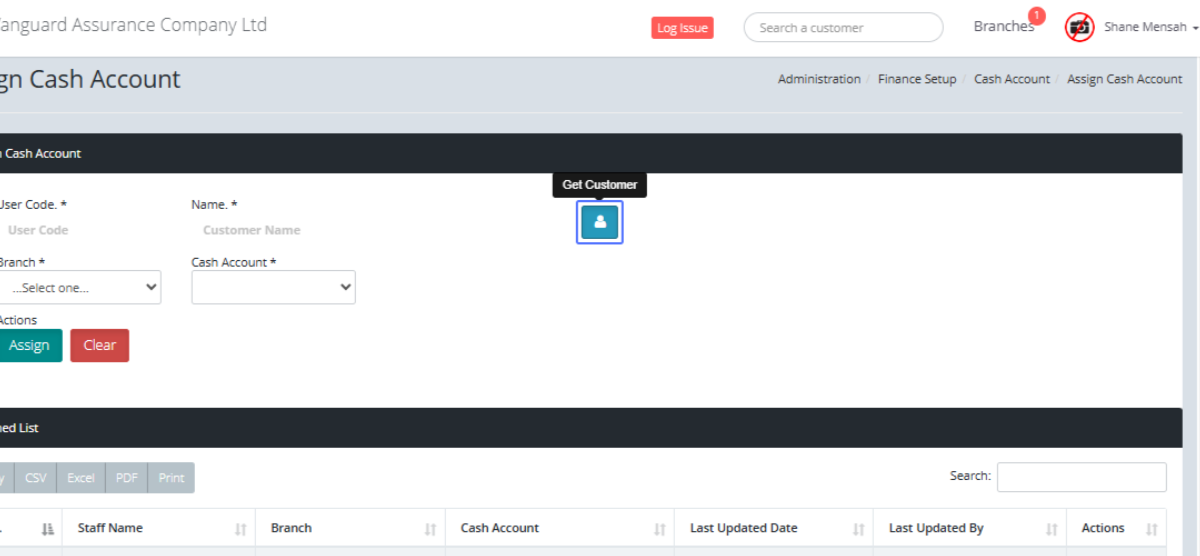
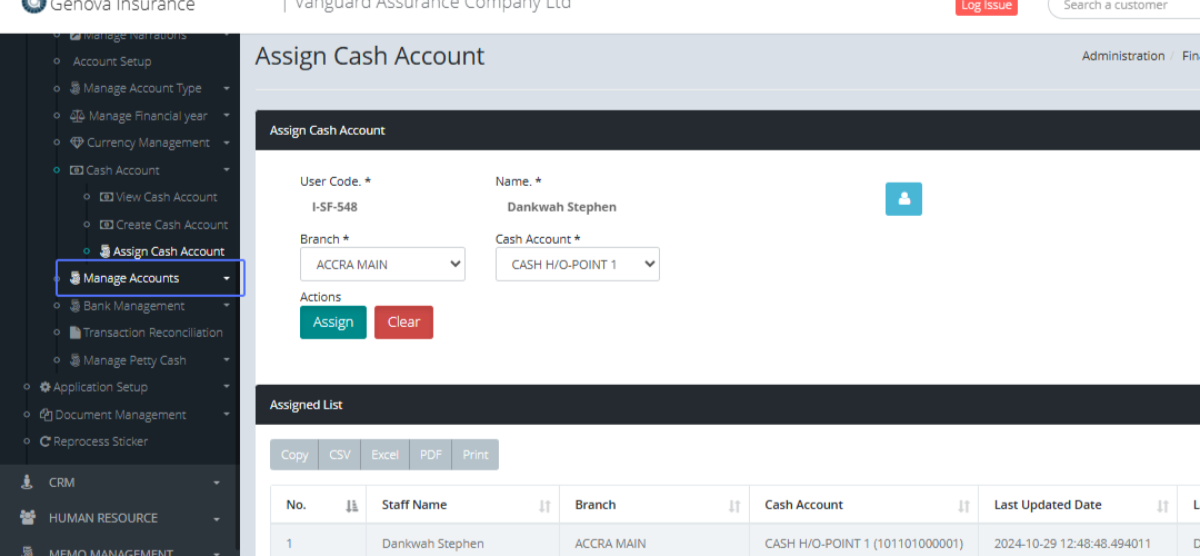
Click on the link "Assign Cash Account" to view the Assign Cash Account Page
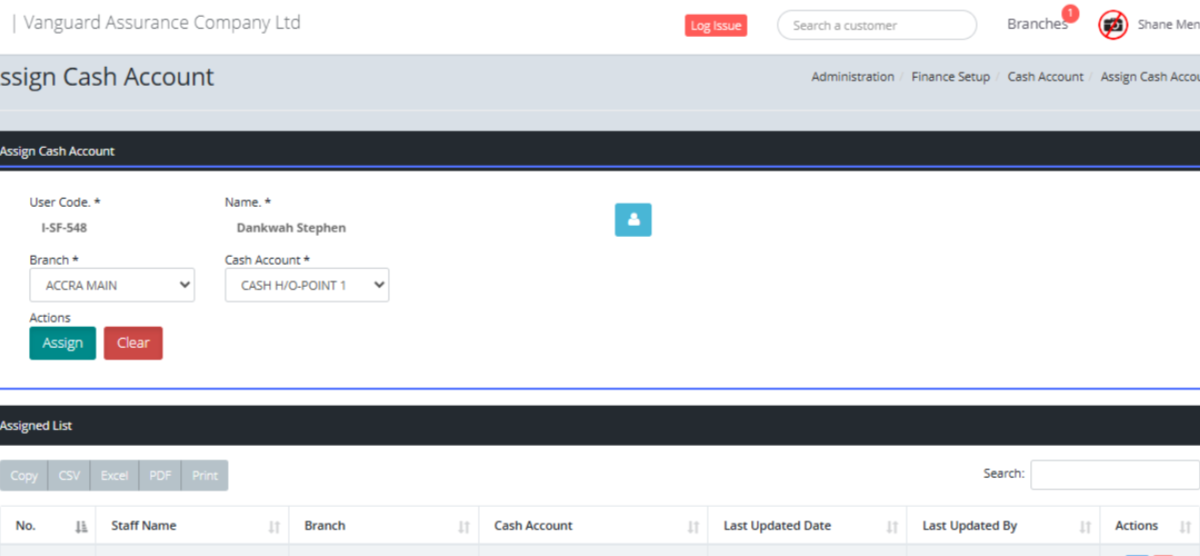
Tab Name: Assign Cash Account - GENOVA INSURANCE
Enter the User Code within the provided field.
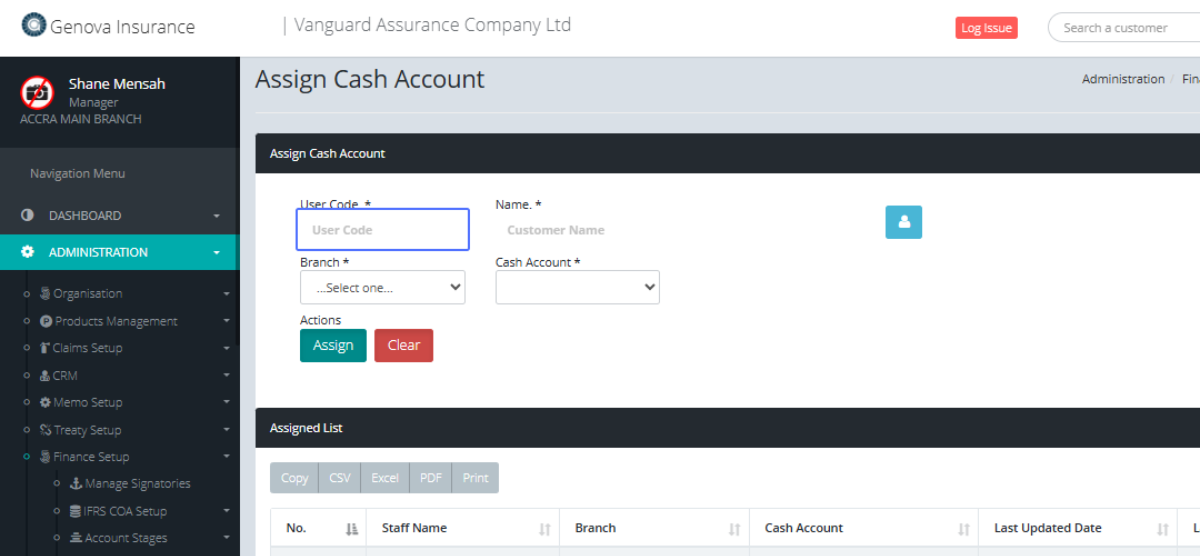
Enter the Name within the provided field
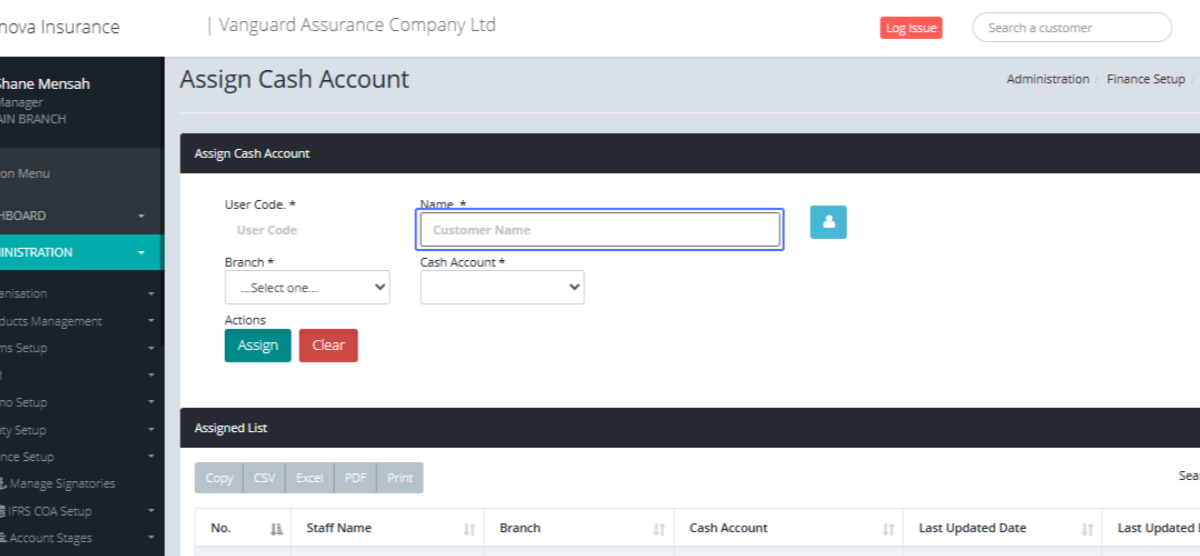
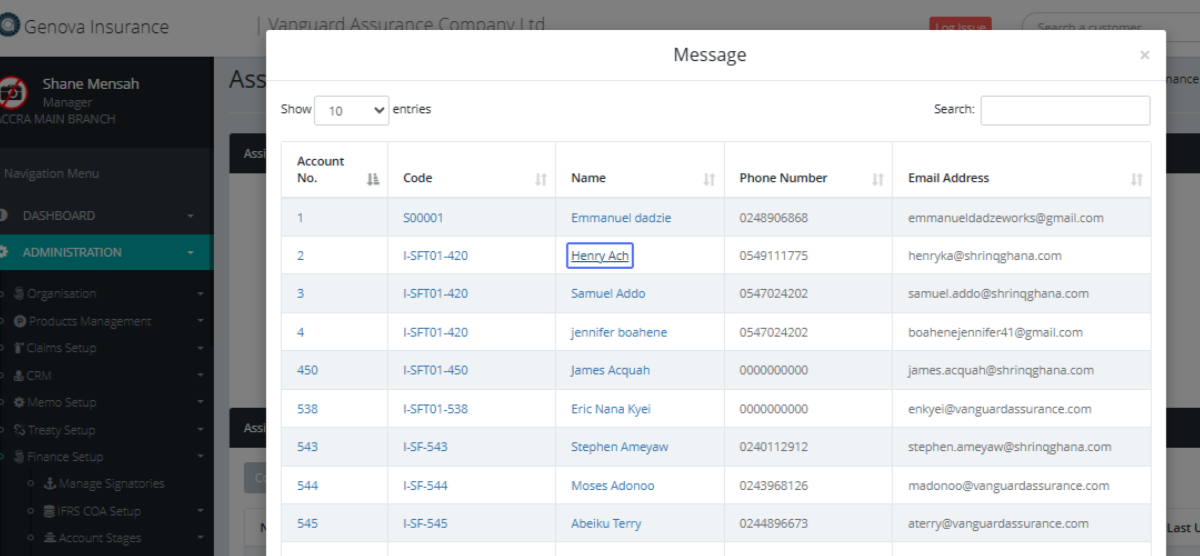
Or Click on the button "Get Customer" so select an existing customer
Click on the Customer name or code to select the Customer
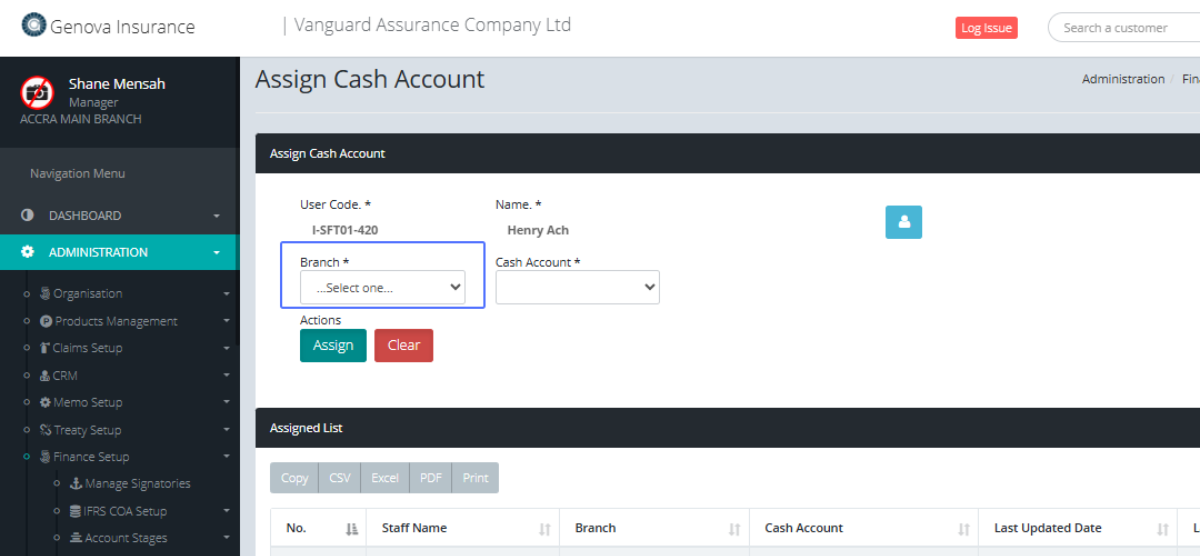
Select the Branch from the provided dropdown list
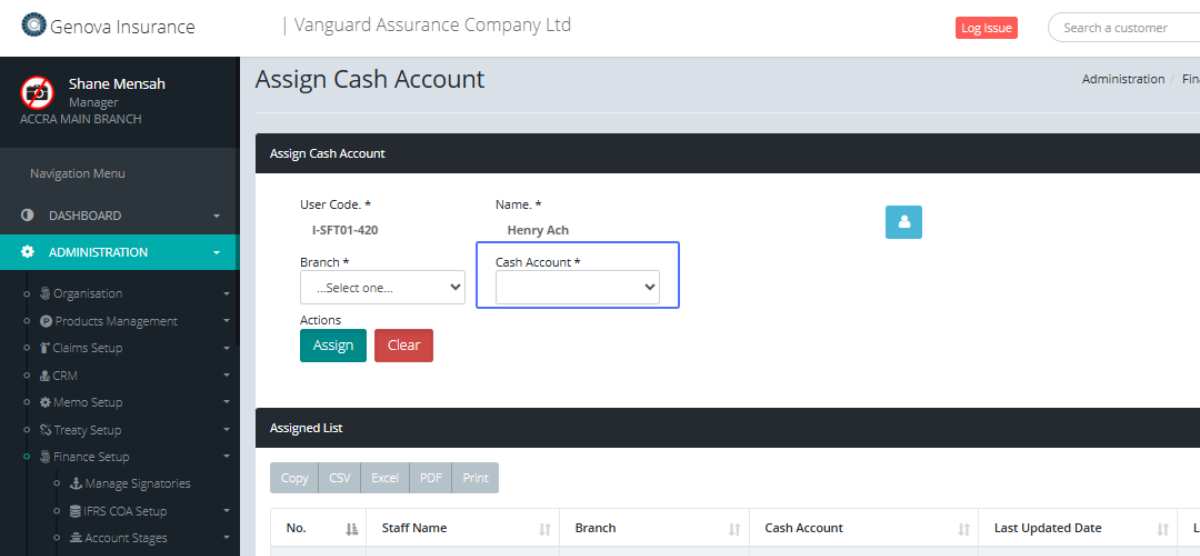
Select the Cash Account from the provided Dropdown list
User can then click the Assign button to save or Clear to remove the items within the section
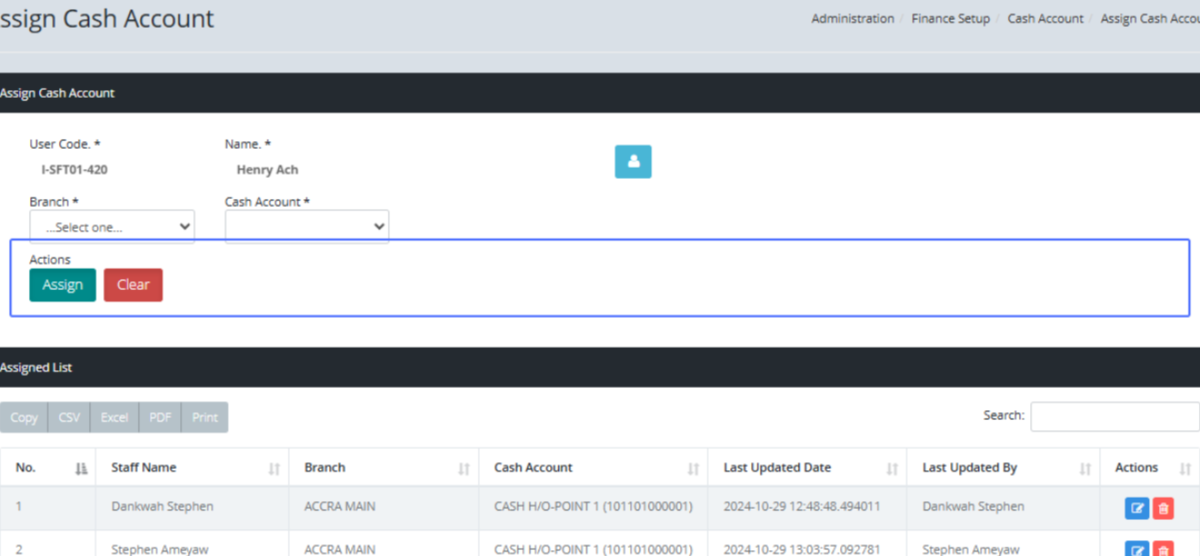
The assigned list section shows the list of the assigned Cash Accounts
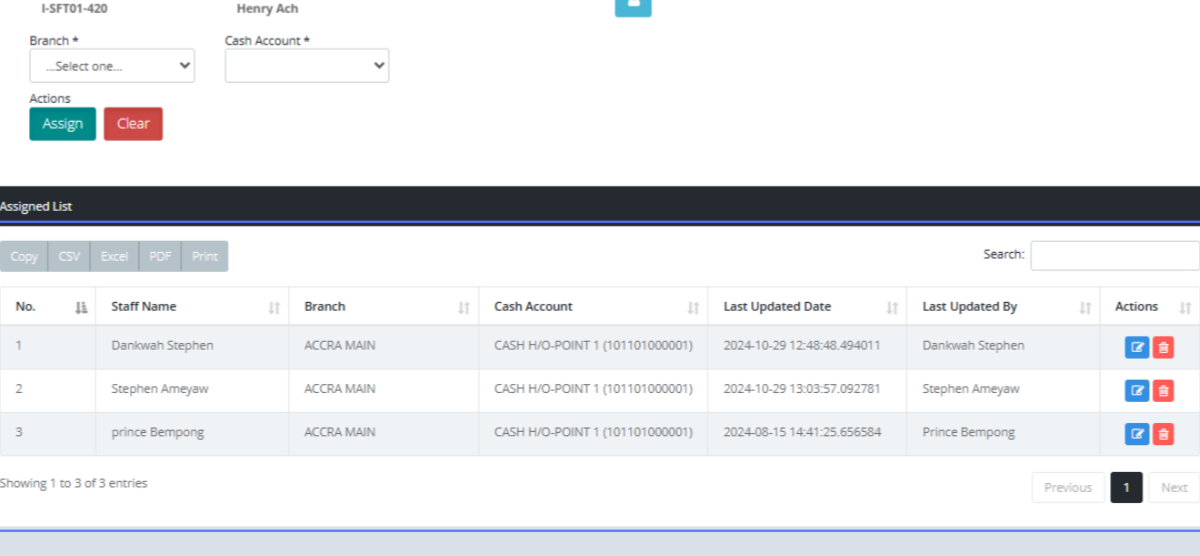
Click on the Edit Button to edit the selected item
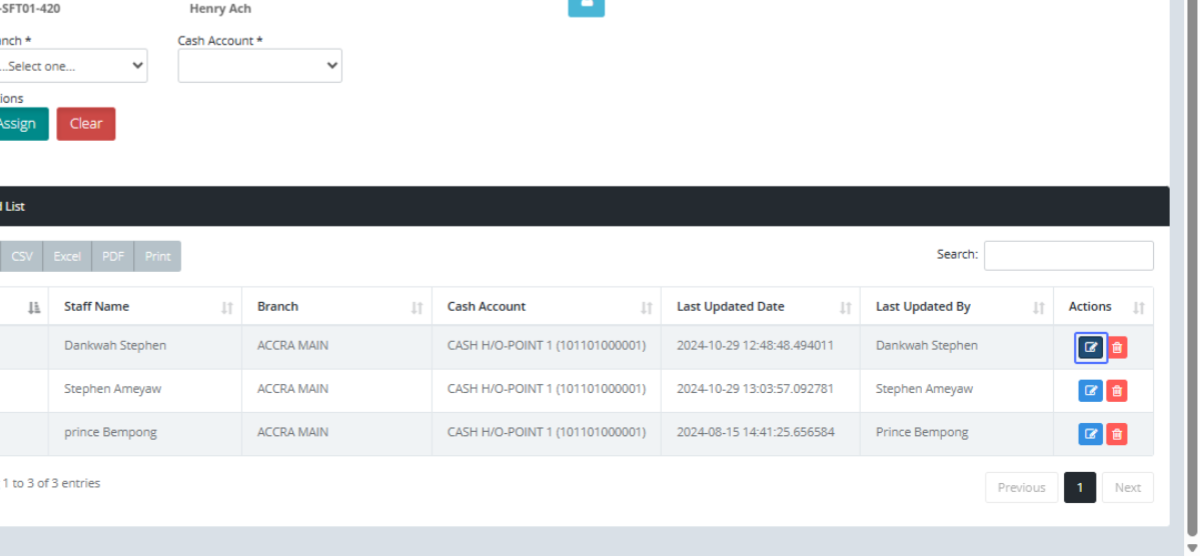
You will then be assigned to the Assigned Cash Account form for the selected user.
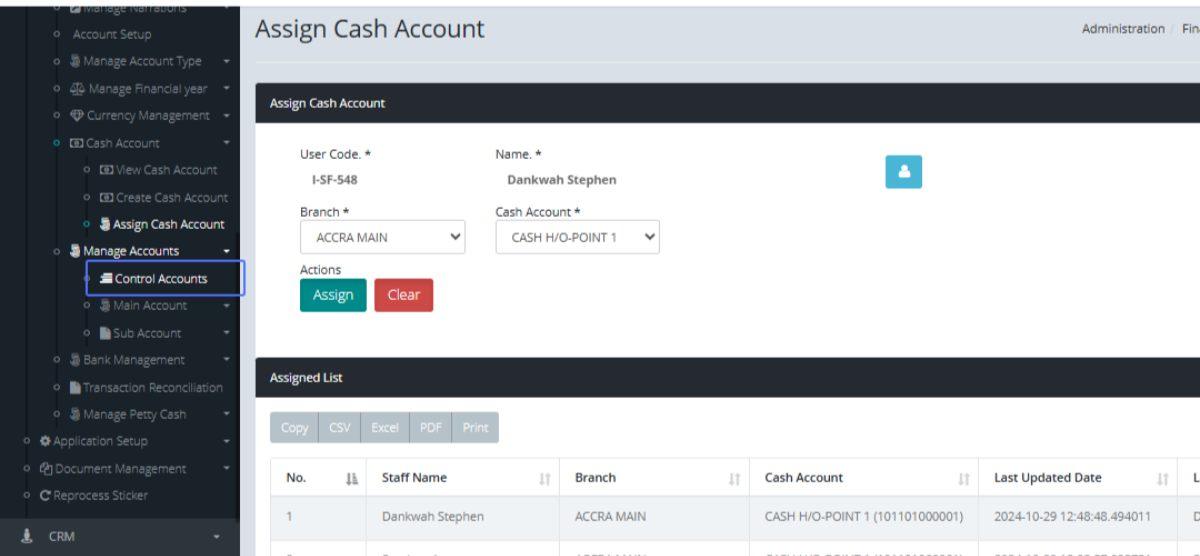
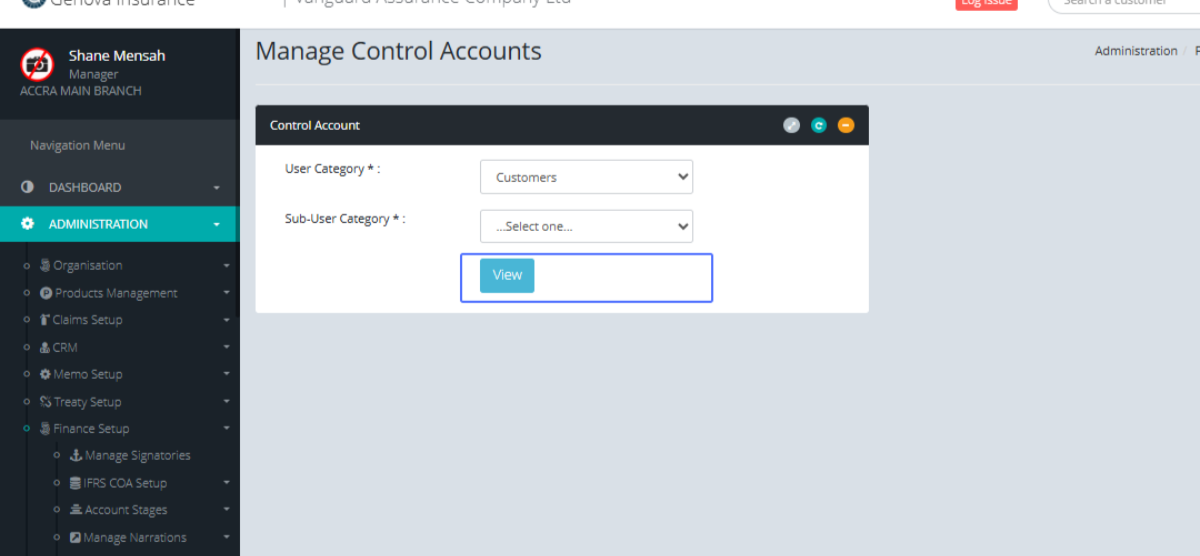
Click on the link "Manage Accounts" to view the dropdown list
Click on the link "Control Accounts" to navigate to the Control Accounts page
Tab Name: Control Accounts - GENOVA INSURANCE
You will be presented with a form to Manage Control accounts. Select the User category from the provided dropdown
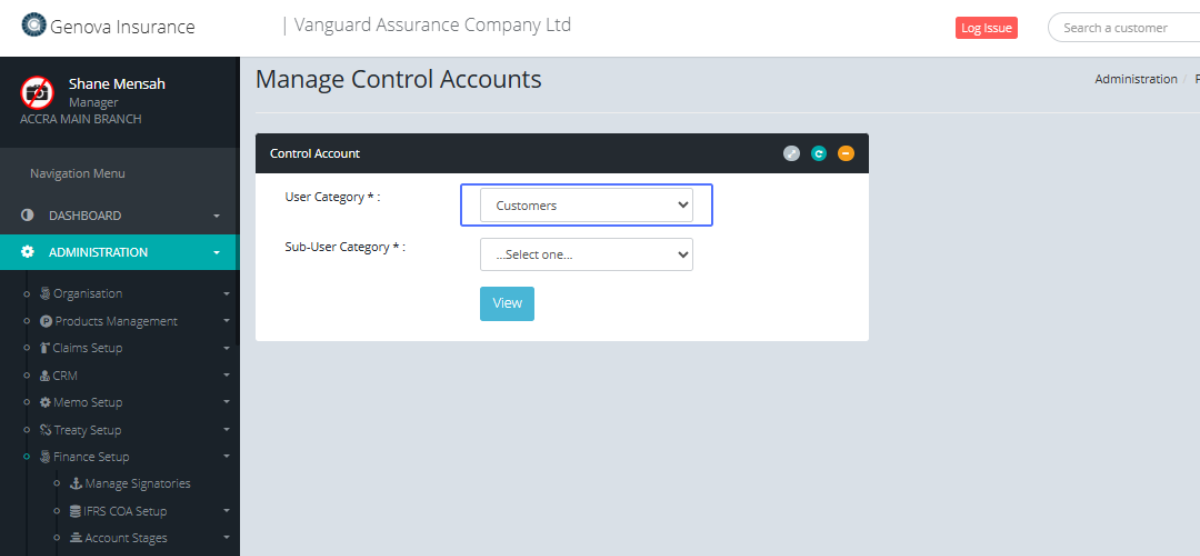
Select the Sub User Category from the provided dropdown.
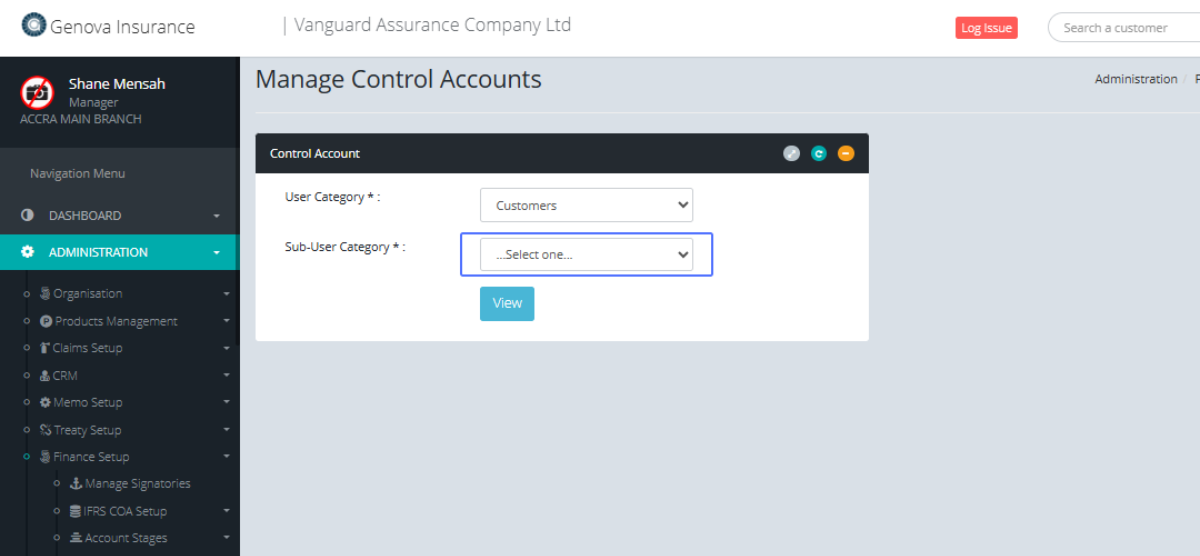
Click on the "View" button to view the existing Control Account if any
Click on the link "Main Account" to access the main account list.
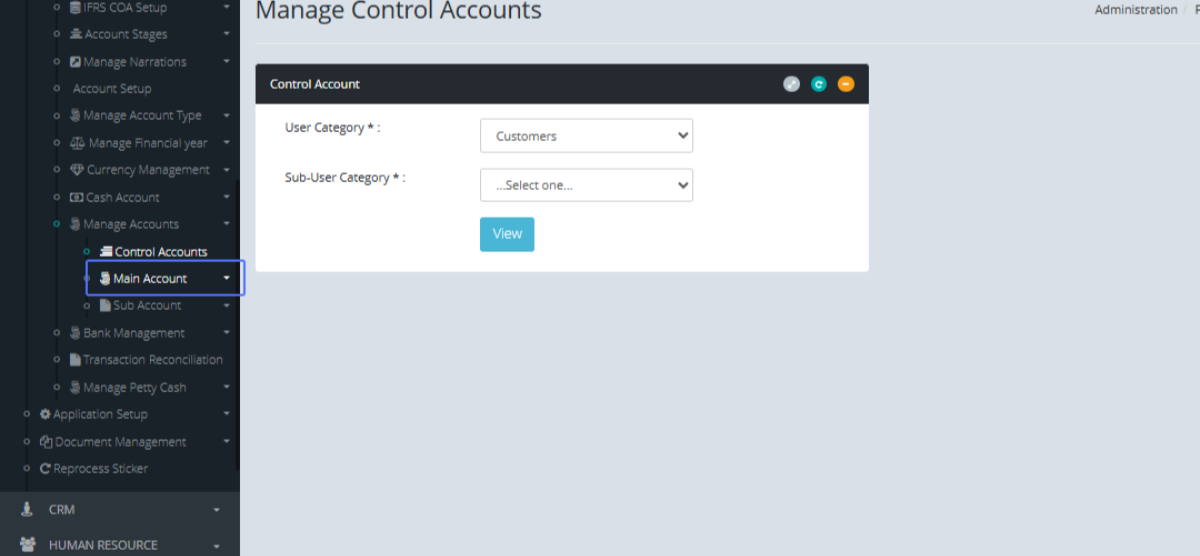
Click on the link "Create Main Account" to access the main account form.
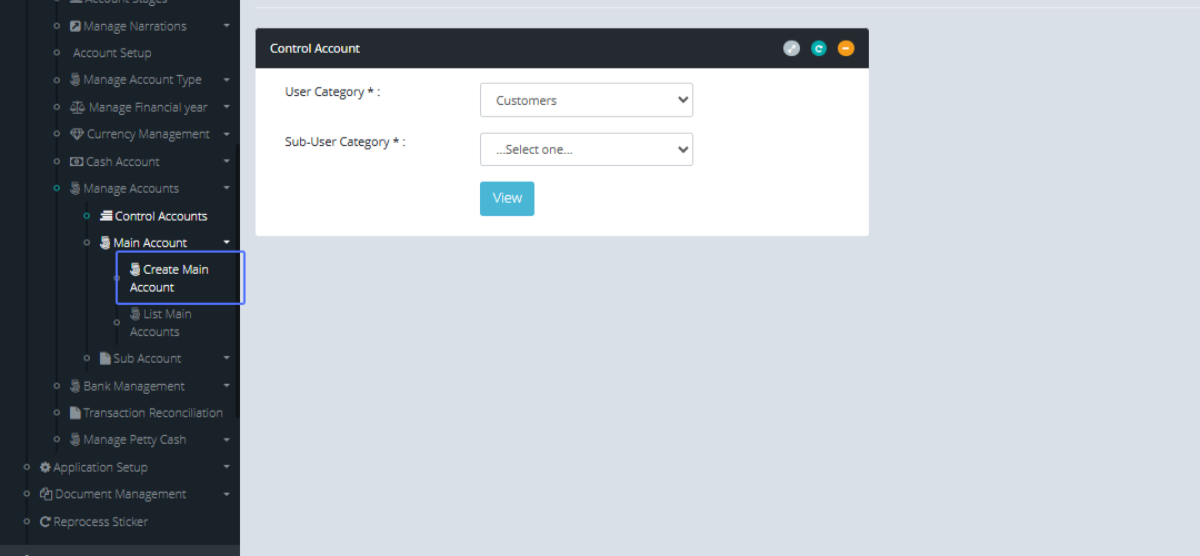
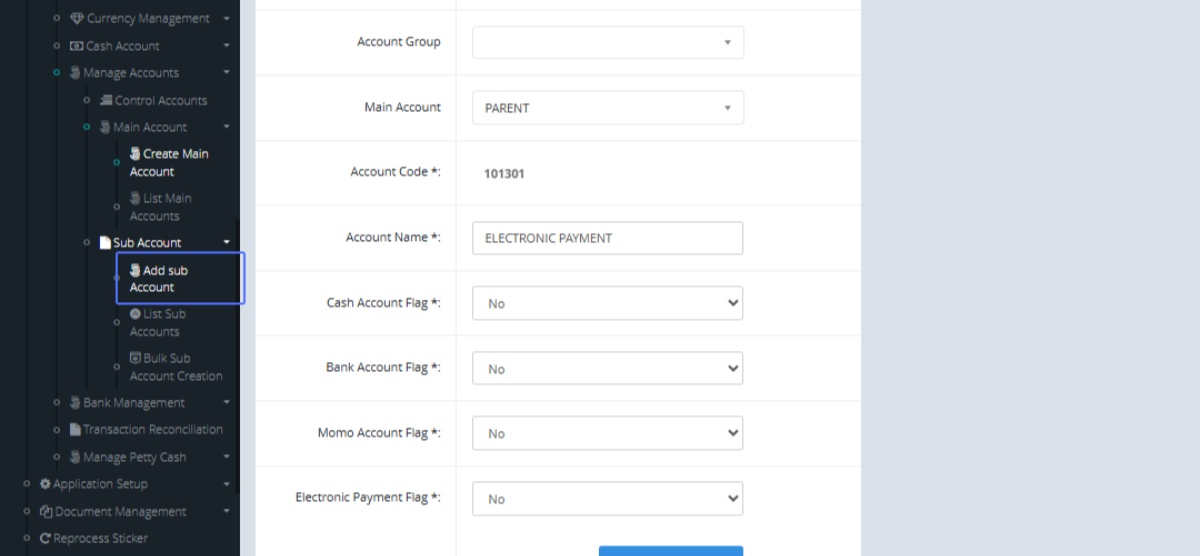
Tab Name: Create Main Account - GENOVA INSURANCE
Select the Account Type from the provided dropdown list
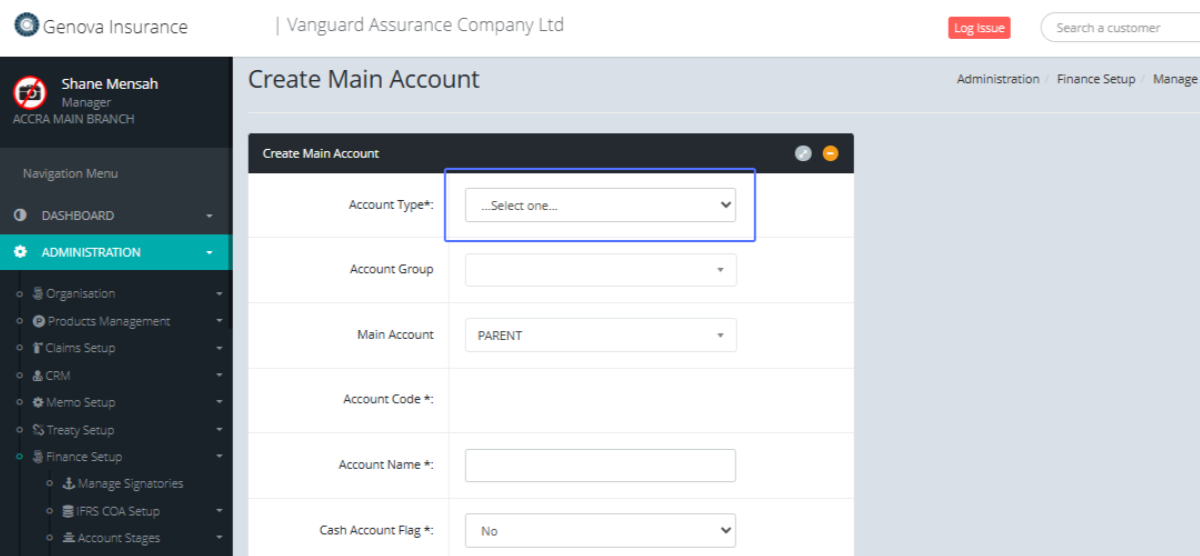
Select the Account Group from the provided Dropdown
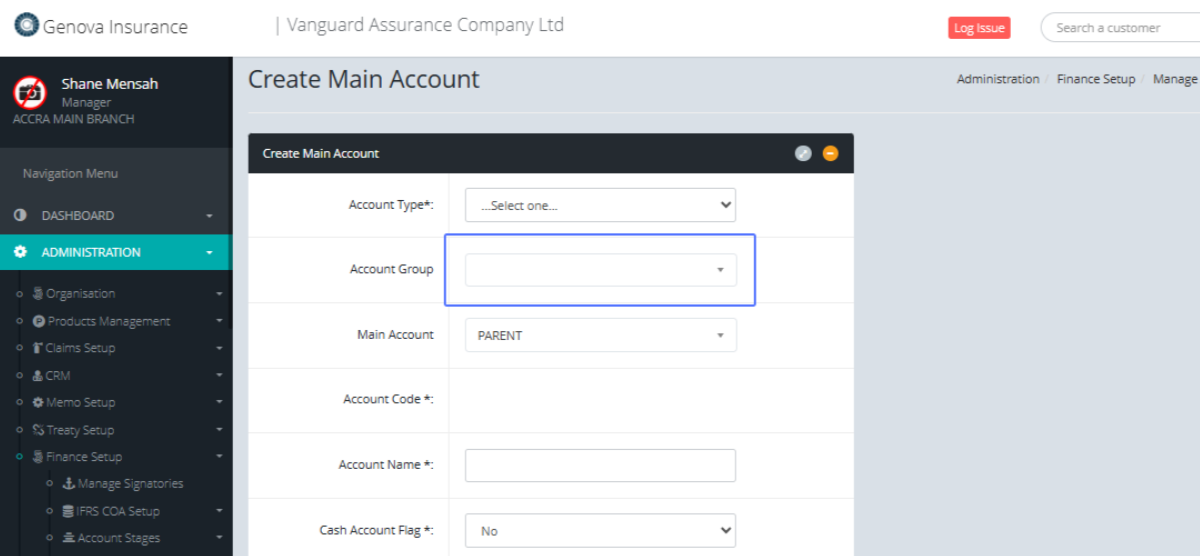
Select the Main account from the provided dropdown items

Enter the Account Code within the provided field
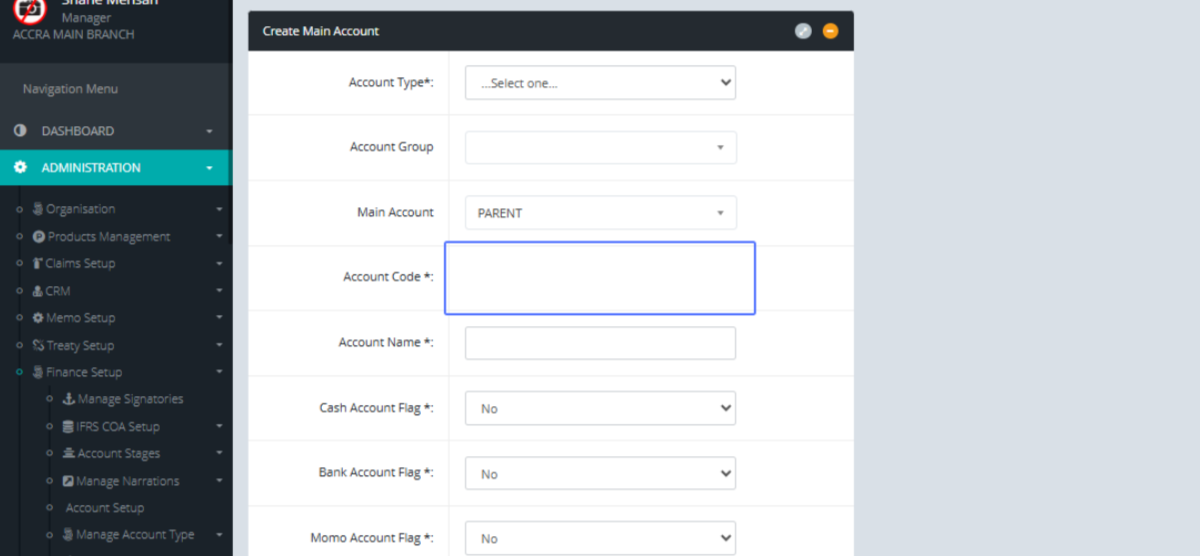
Enter the Account Name within the provided field
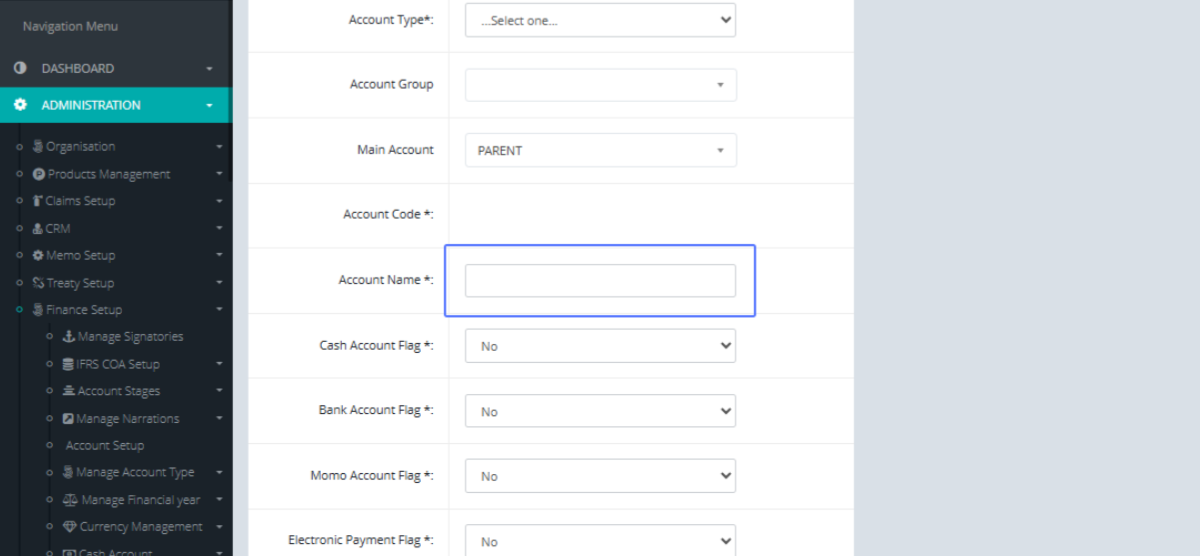
Select within the provided dropdown if the Cash Account Flag options (Yes/No)
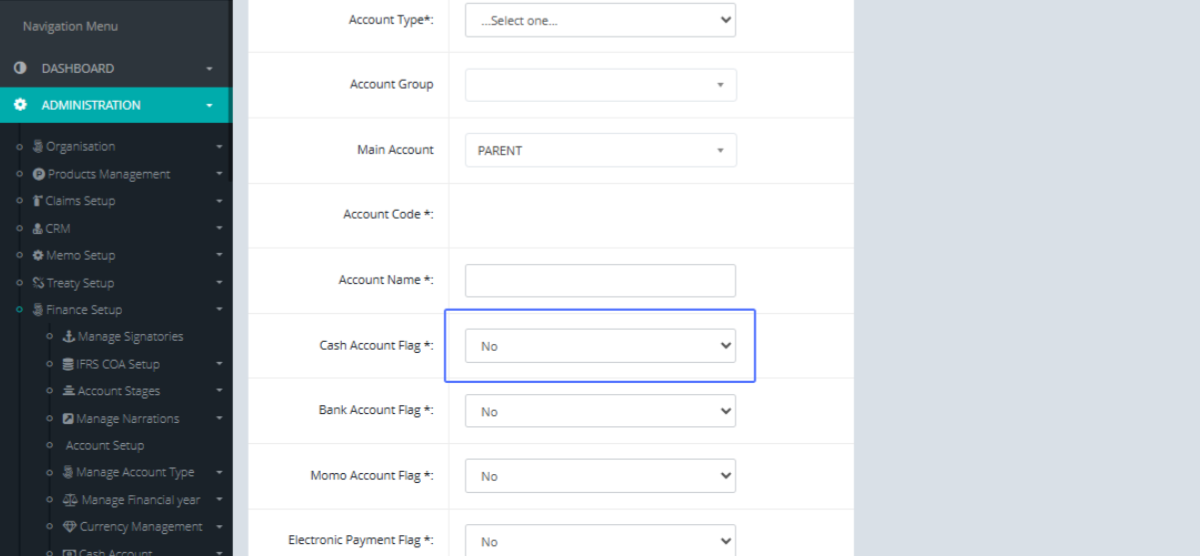
Select within the provided dropdown if the Bank Account Flag options (Yes/No)
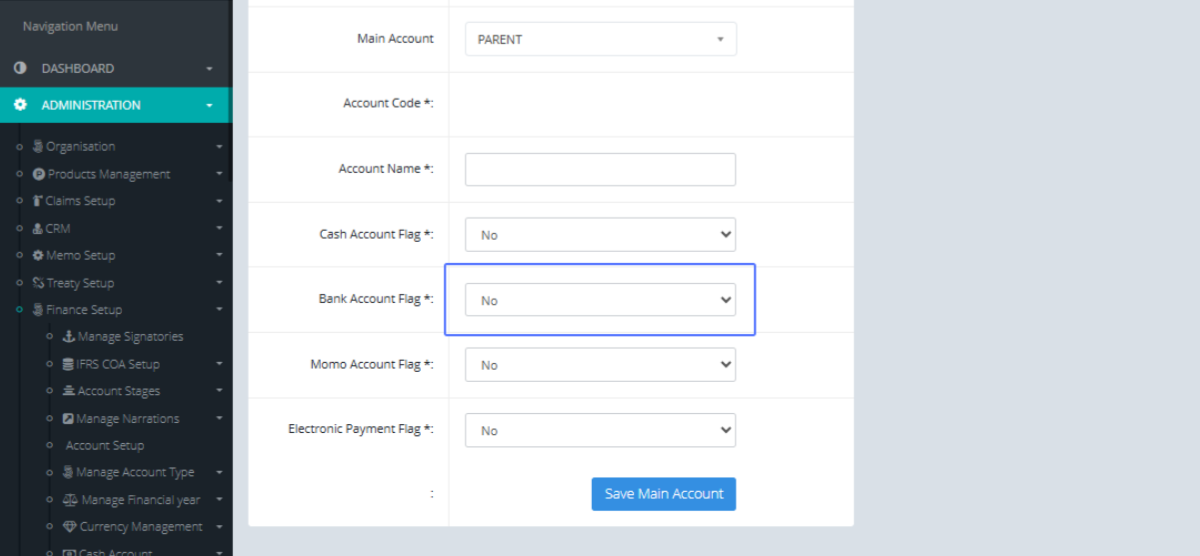
Select the Momo Account Flag options from the provided dropdown list
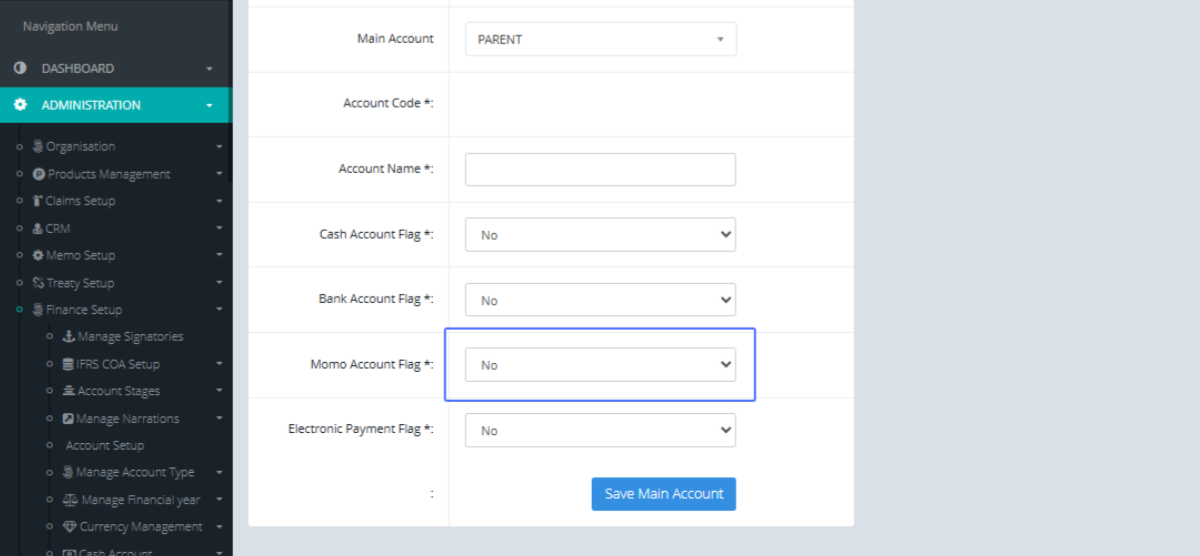
Select the Electronic Payments Flag from the provided dropdown list
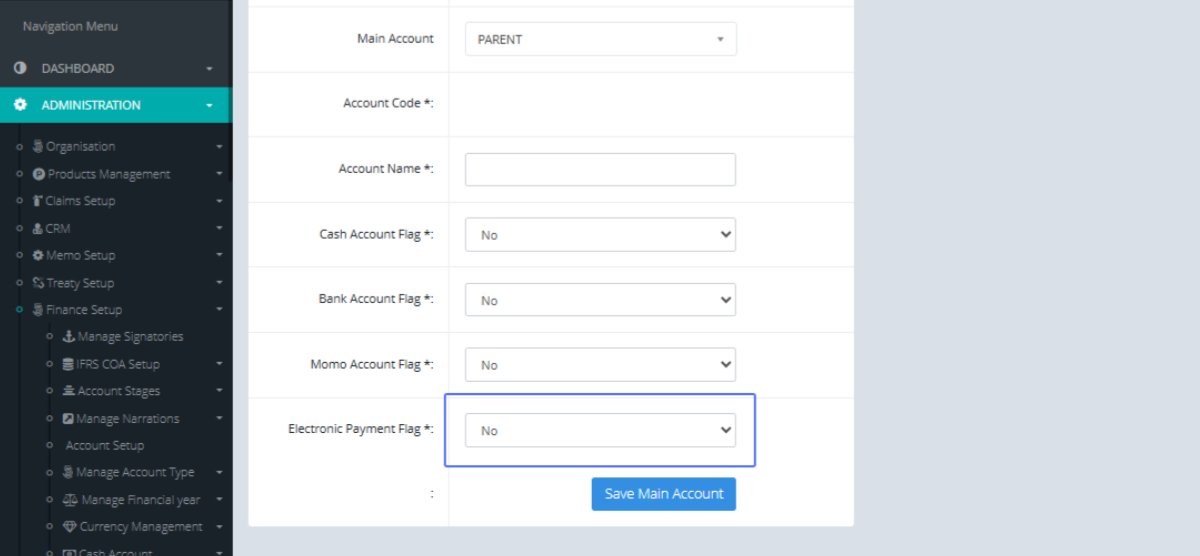
Click on the “Save Main Account” button to Save the main Account

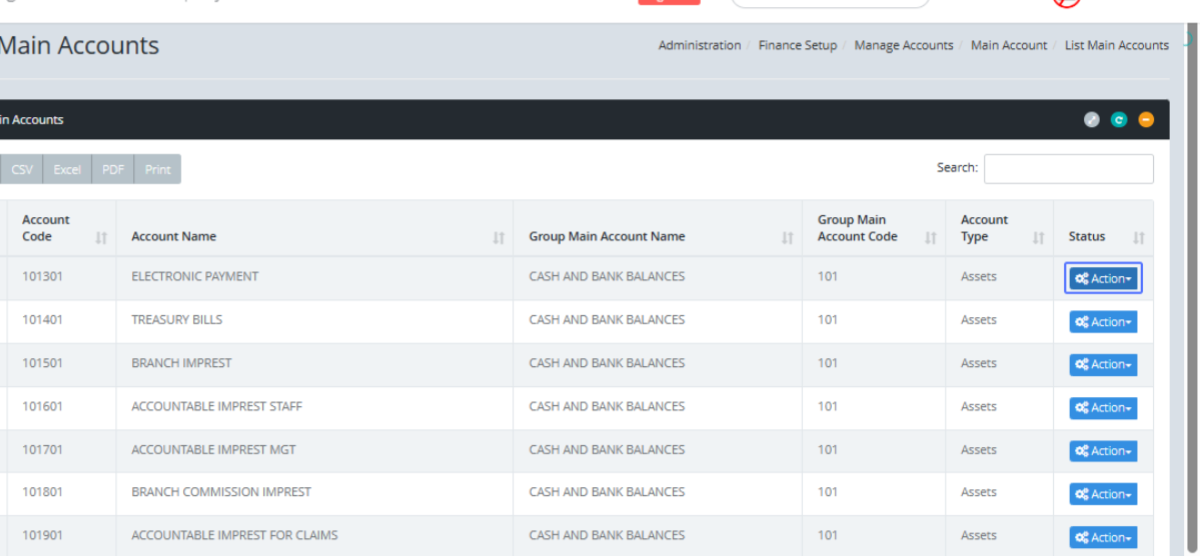
Click on the link "List Main Accounts" to access the Main account List
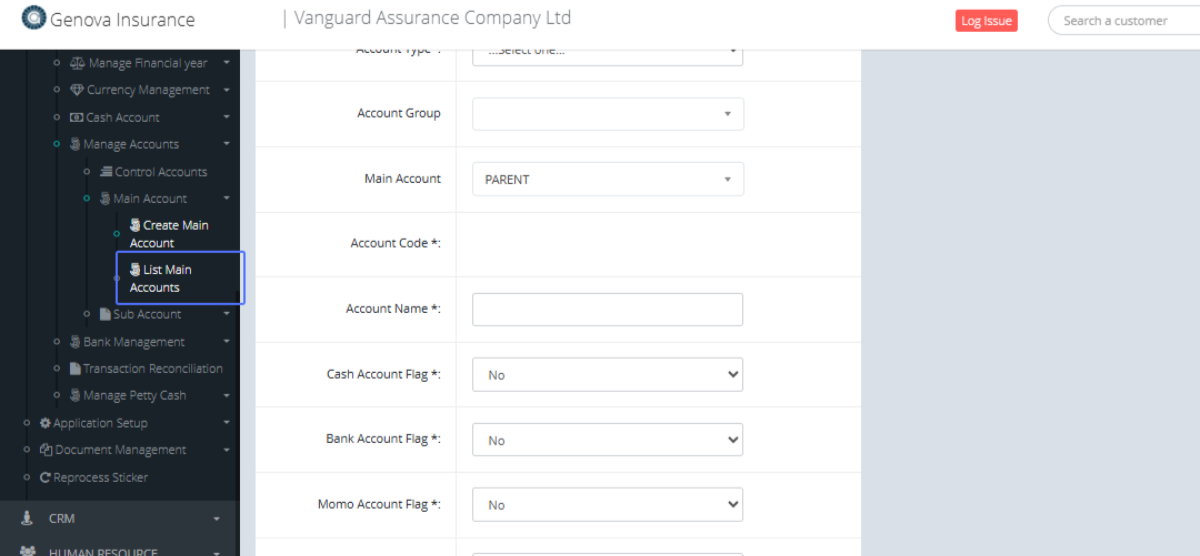
Tab Name: List Main Accounts - GENOVA INSURANCE
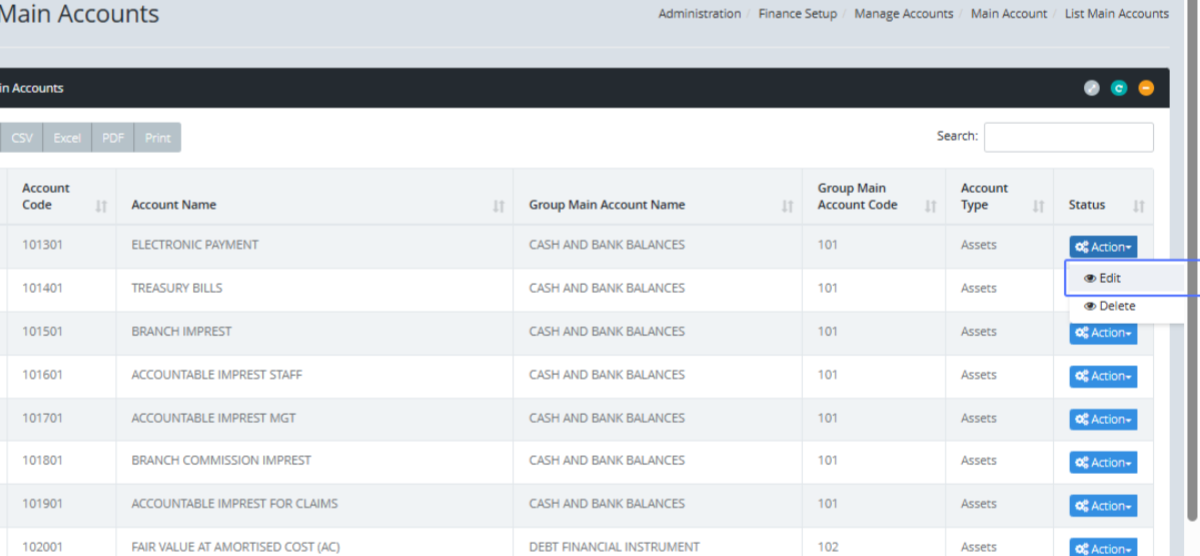
Within the list, Click on the “Action” button of the specific item to see the available actions
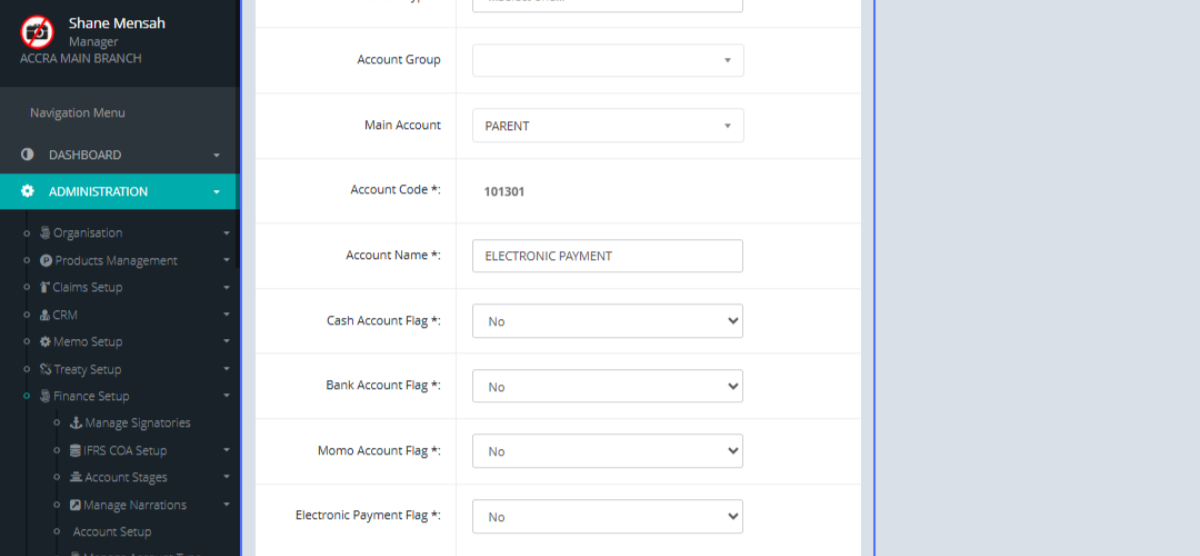
Click on the link "Edit" to navigate to the main account edit form.
Tab Name: Create Main Account - GENOVA INSURANCE
You will be show the Existing main Account from fields that you can make changes to
Click on the link "Sub Account" to get the sub account list options
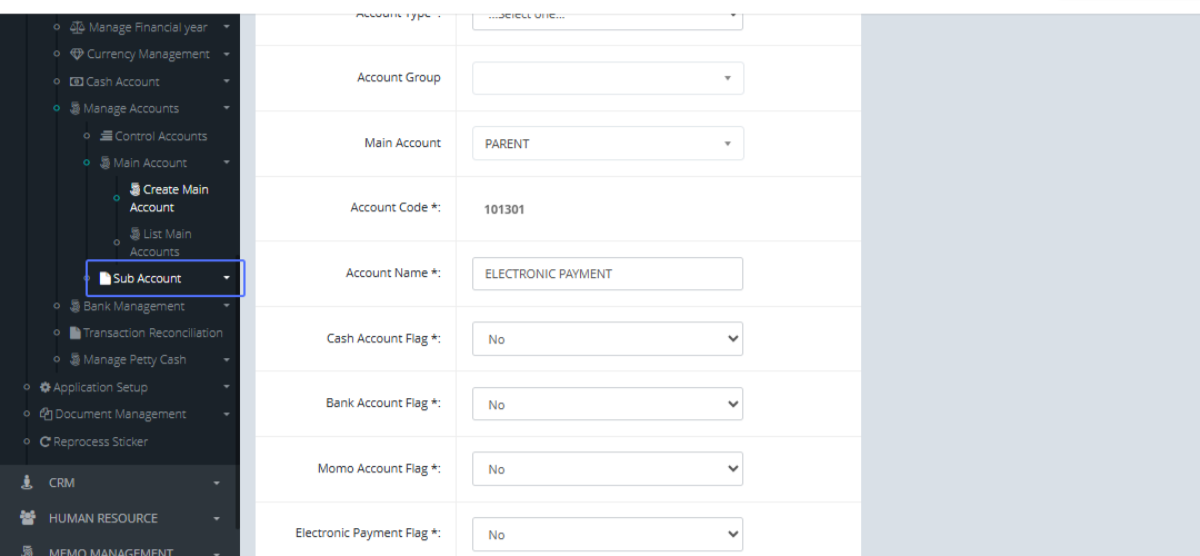
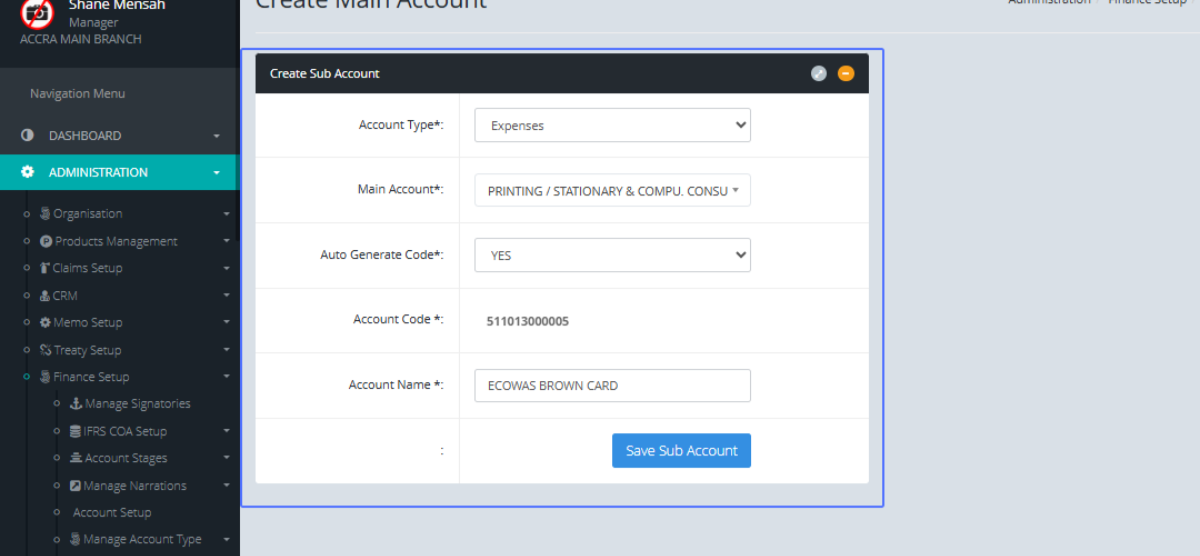
Click on the link "Add sub Account" to get navigated to the Add Sub Account form
Tab Name: Add sub-Account - GENOVA INSURANCE
On the Create Sub Account Page, Select the Account Type from the provided drop down
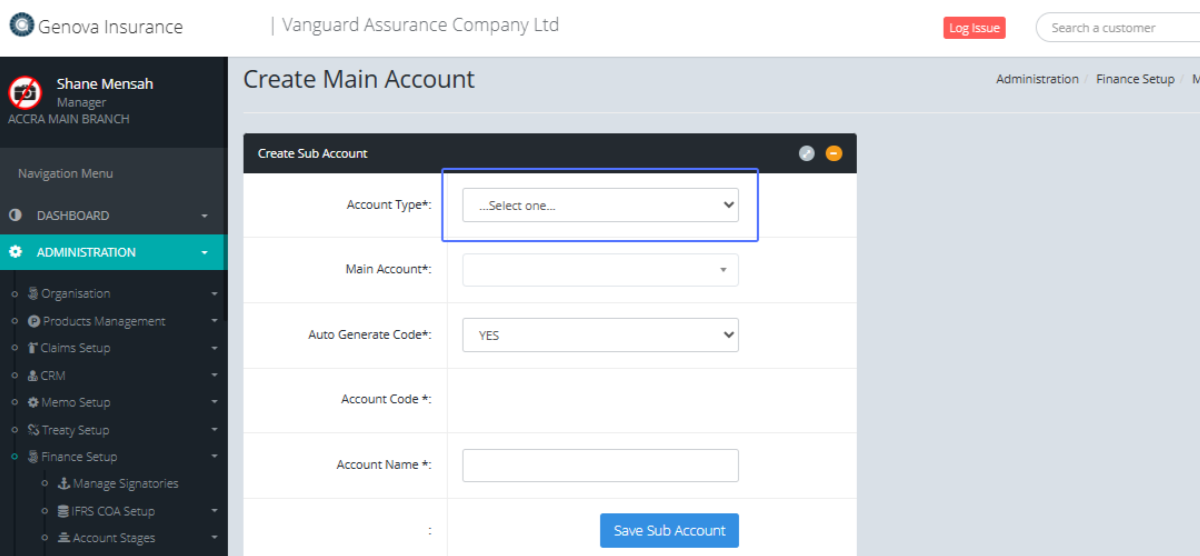
Select the Main Account from the provided dropdown list.
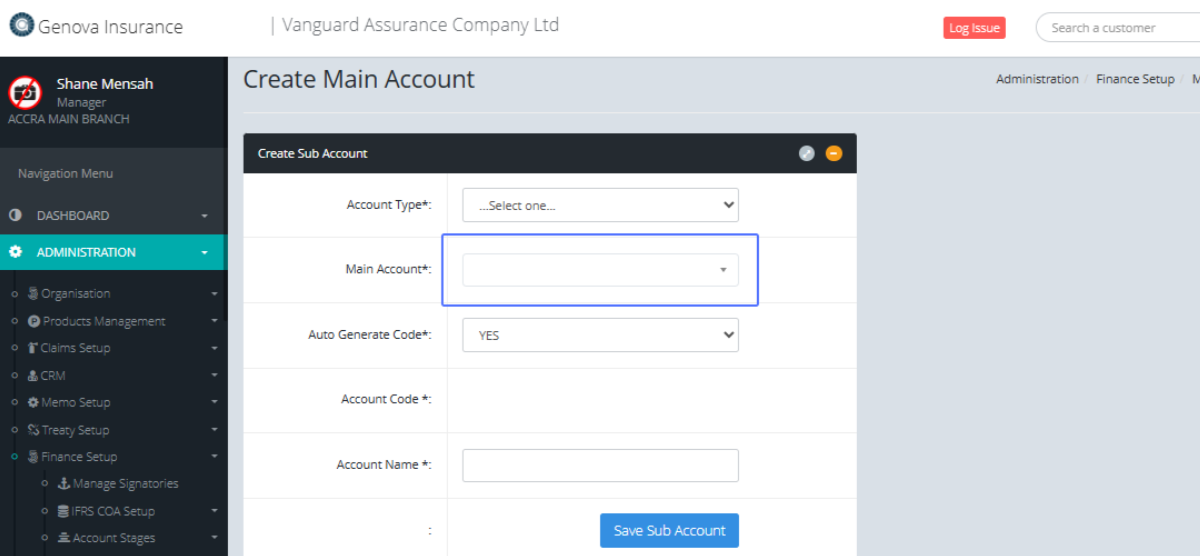
Select the Option to Auto Generate Code from the provided drop down List
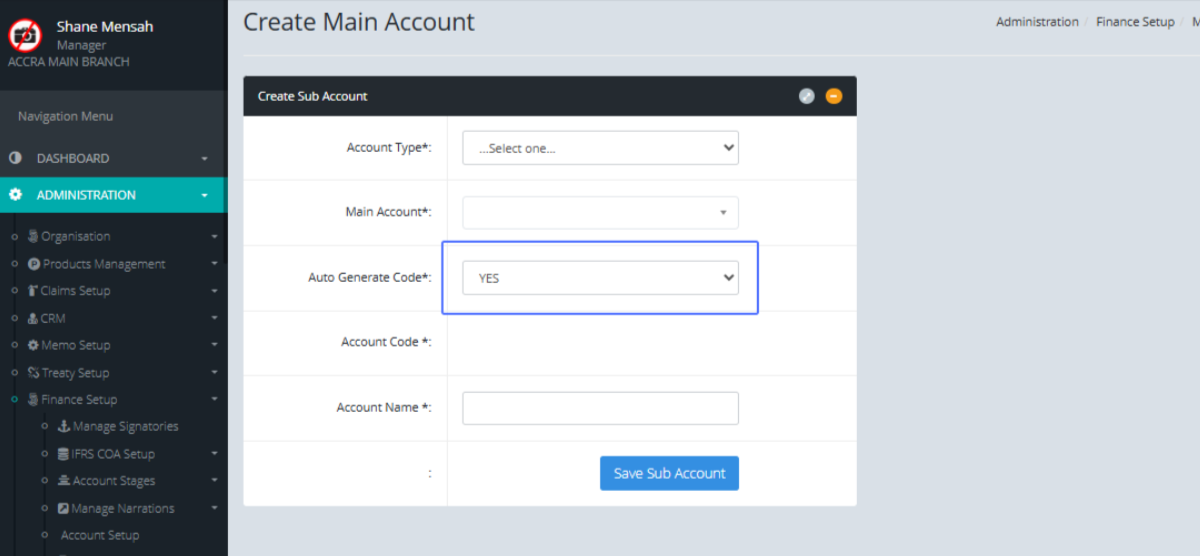
Enter the Account Code within the provided field.
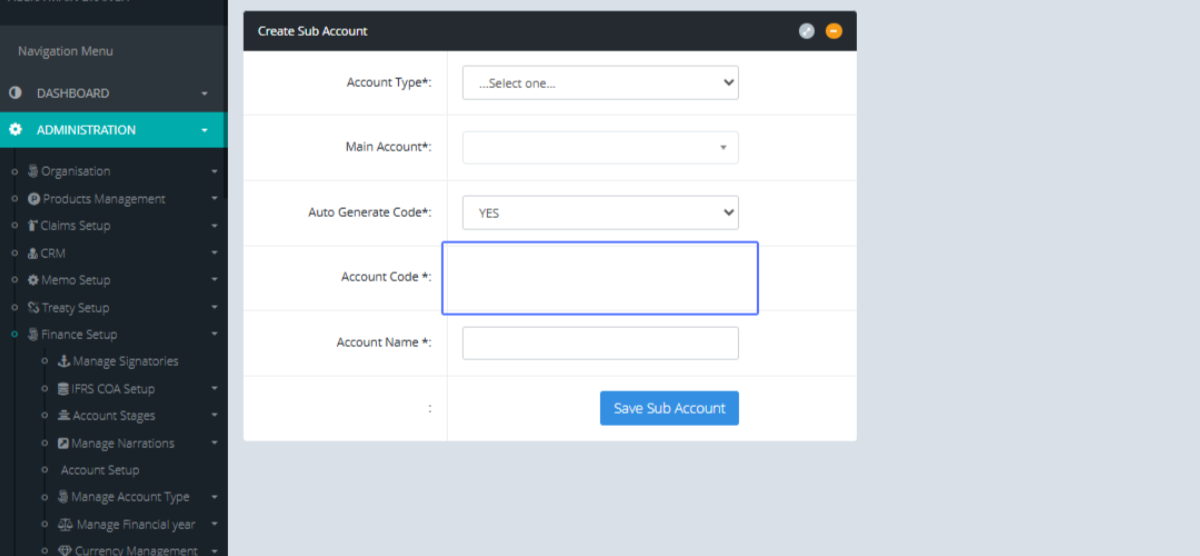
Enter the Account Name within the provided field

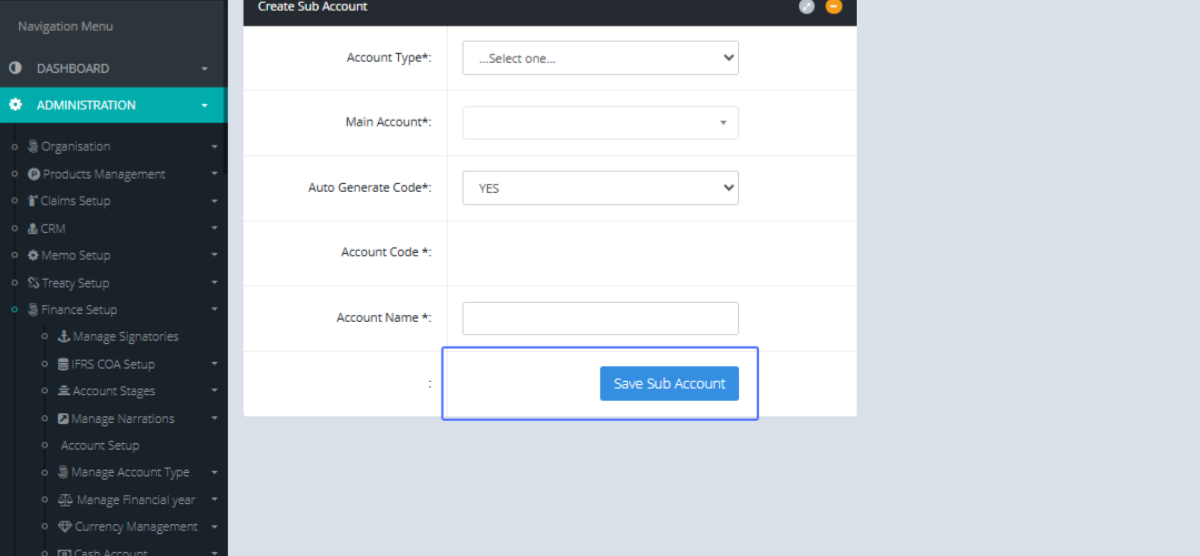
Click on the Save Sub Account button to save the newly added sub account.
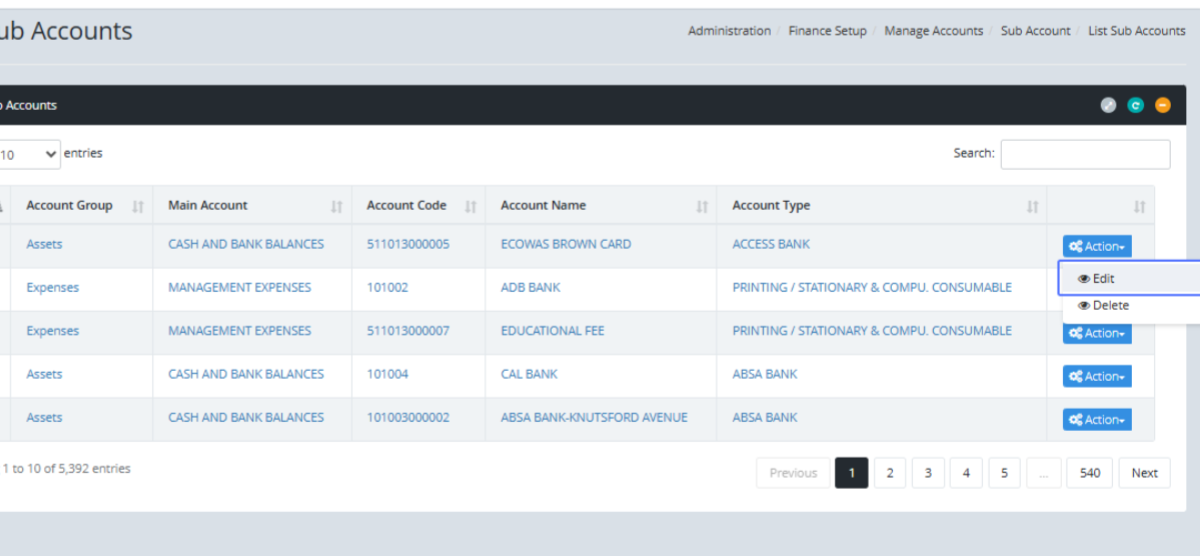
Click on the link "List Sub Accounts" to show the sub account list
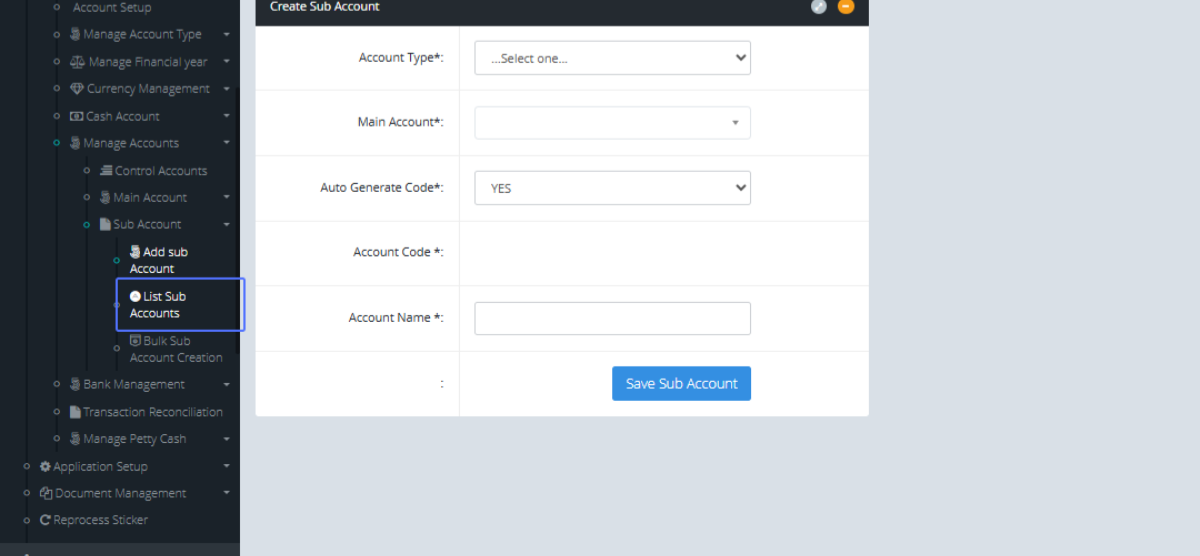
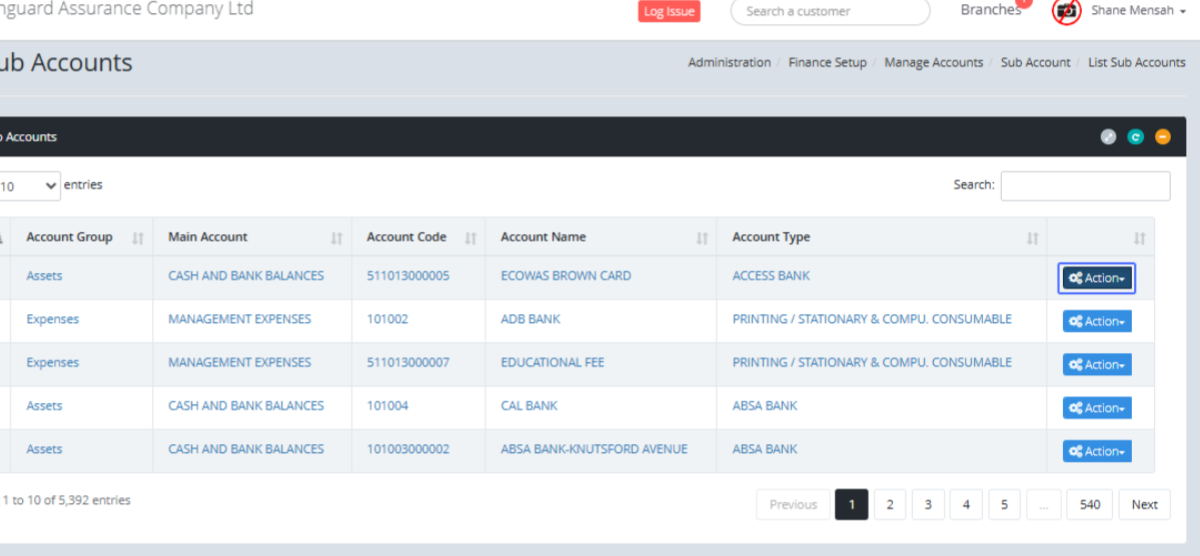
Tab Name: List Sub Accounts - GENOVA INSURANCE
Click on the "Action" button to get the available actions for the selected Sub Account
Click on the link "Edit" to edit the specific item
Tab Name: Add sub-Account - GENOVA INSURANCE
You will be presented with the form for the existing sub account to make changes.
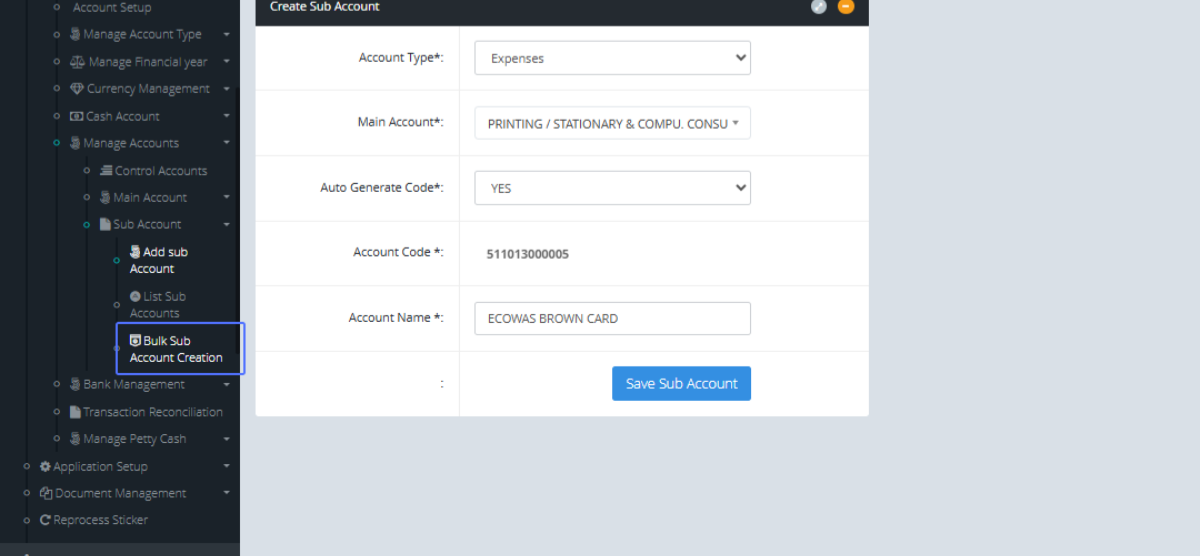
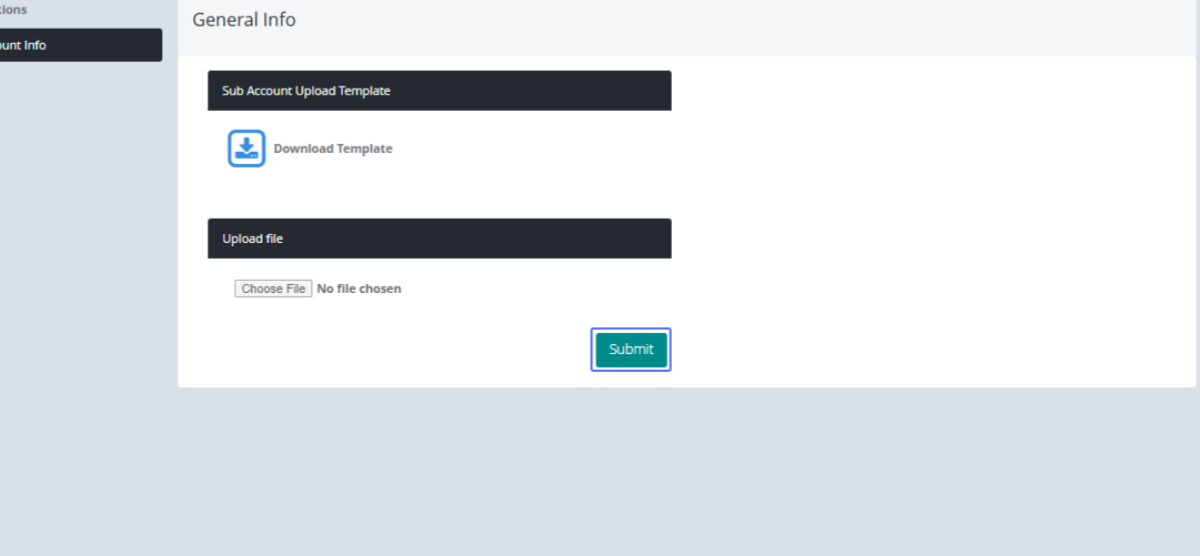
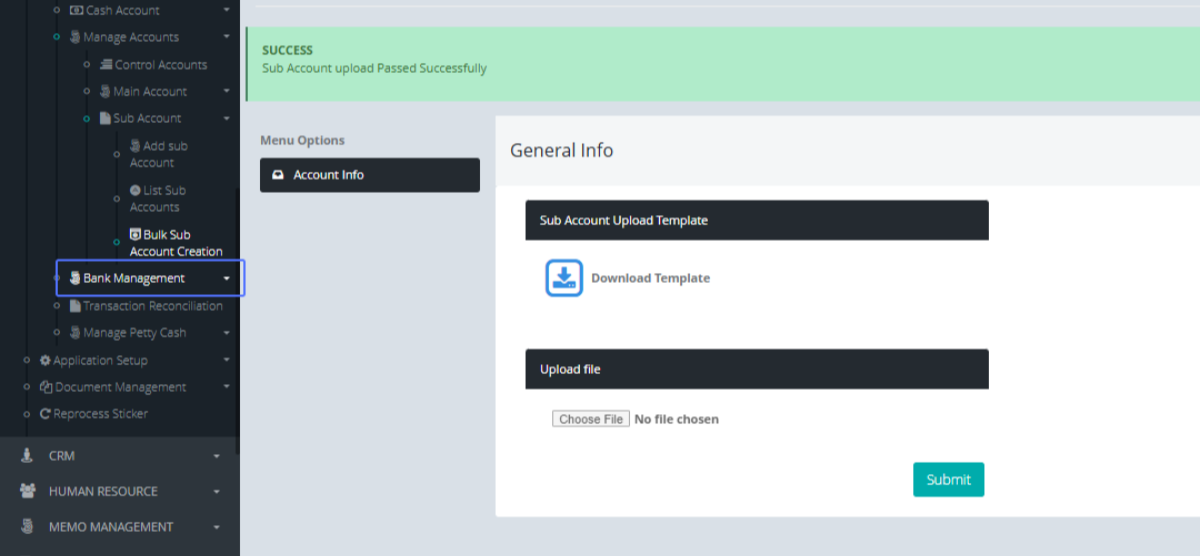
Click on the link "Bulk Sub Account Creation" to get access to the Bulk sub account Page
Tab Name: Bulk Sub Account Creation - GENOVA INSURANCE
Click on "Download Template" button to download the excel template.
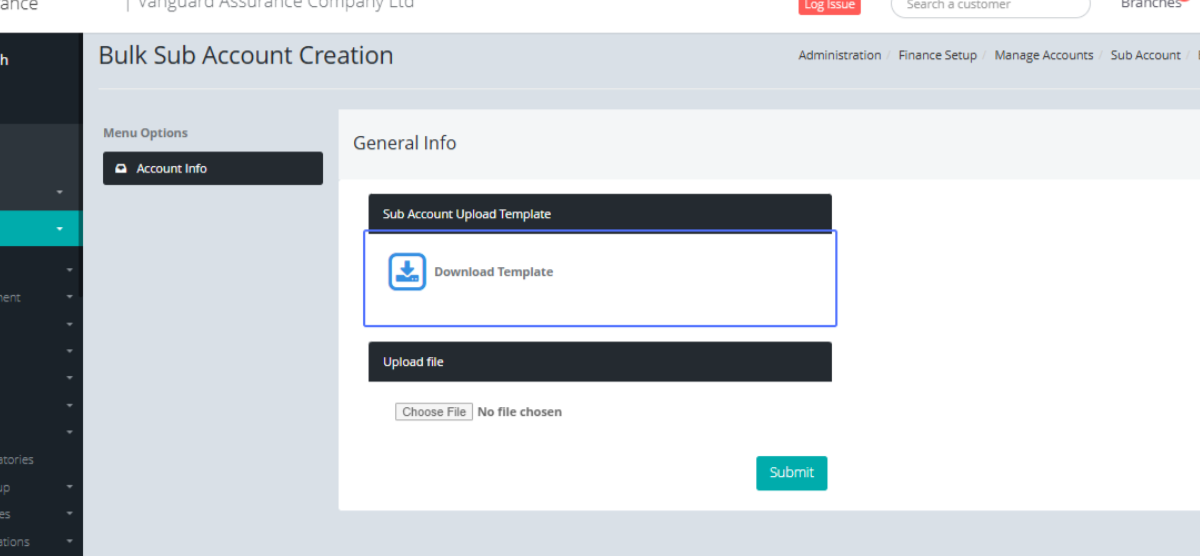
Click the “Choose file” button to select the updated file.
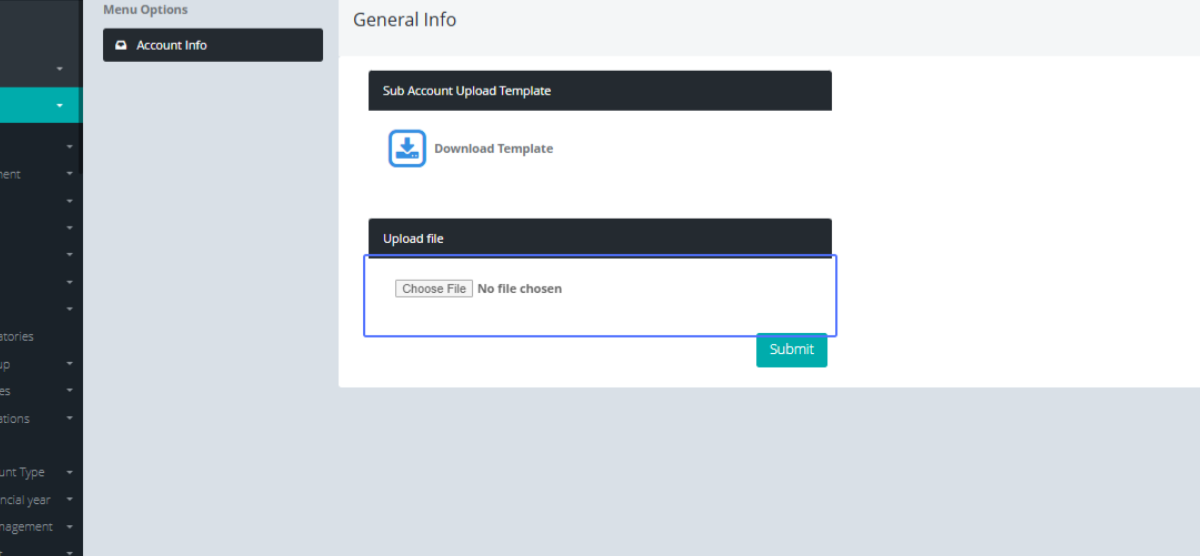
Click on the "Submit" button to create the Bulk Sub account
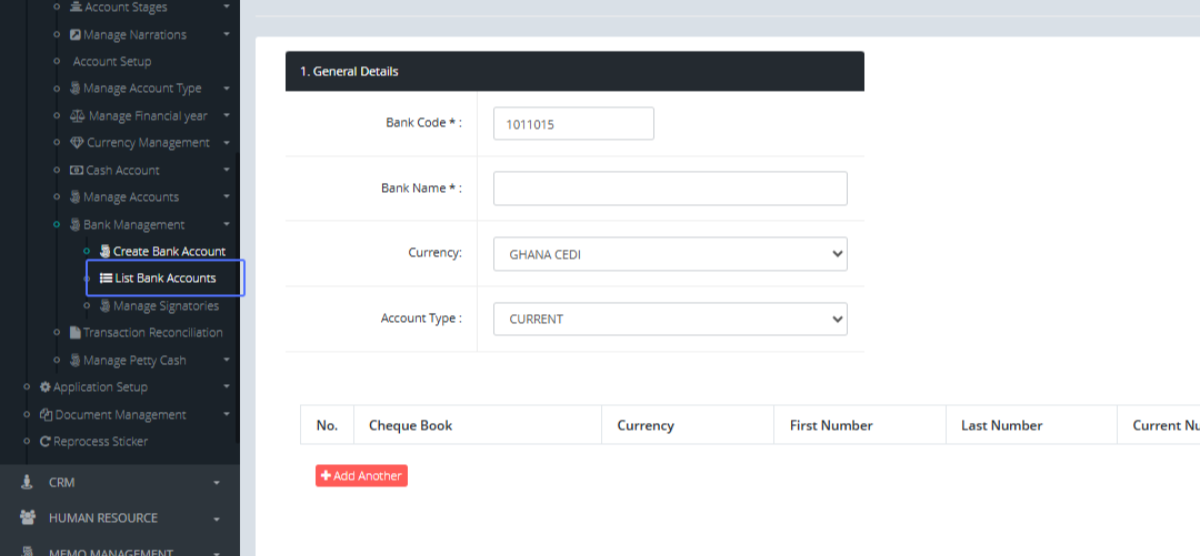
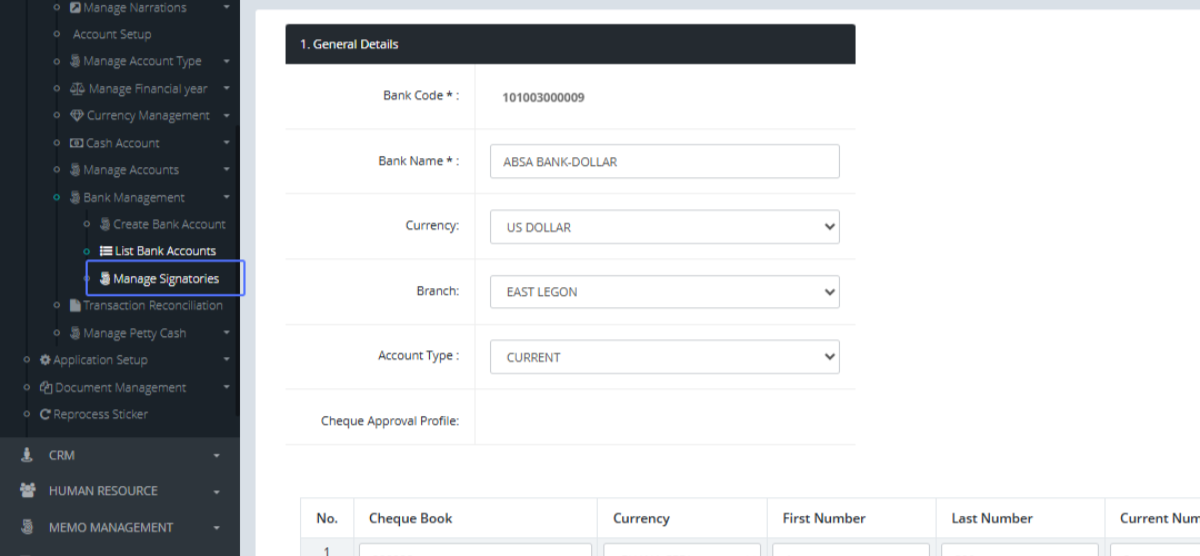
Click on the link "Bank Management" to open the sub menus
Click on the link "Create Bank Account" to open the Bank Account creation form
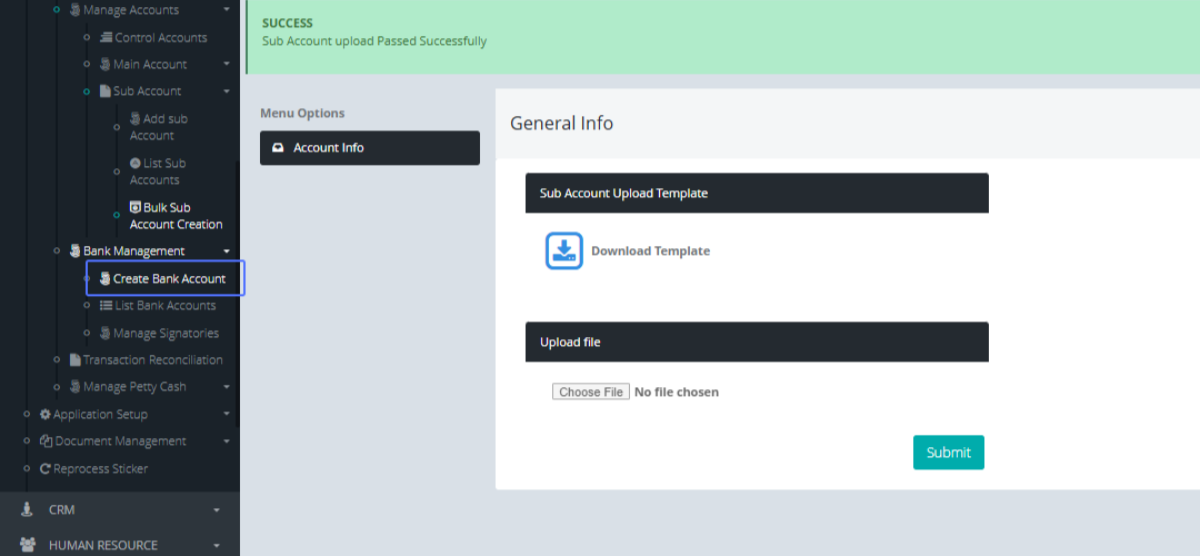
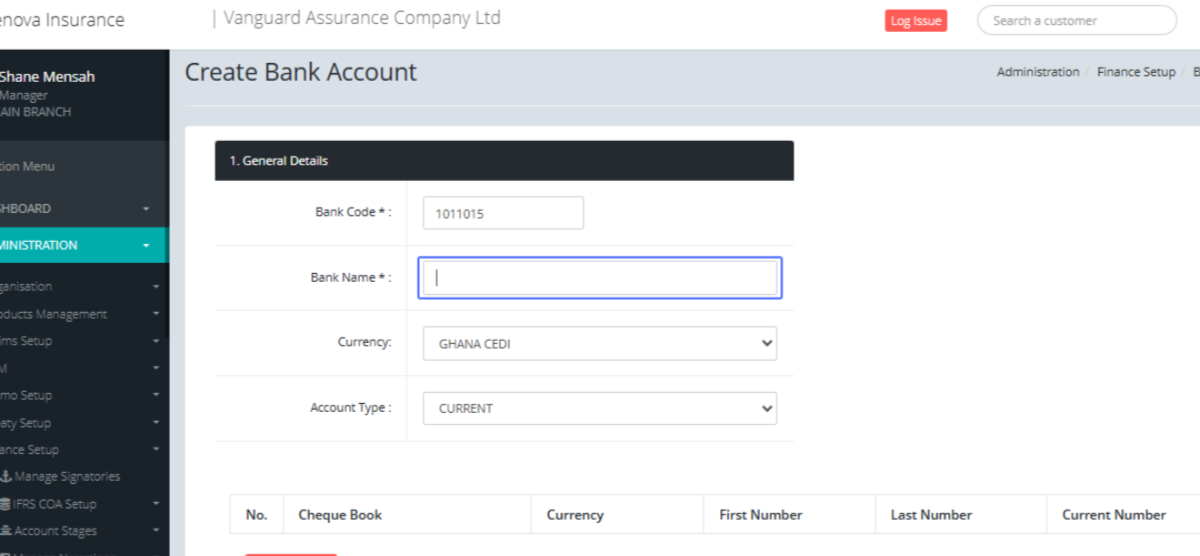
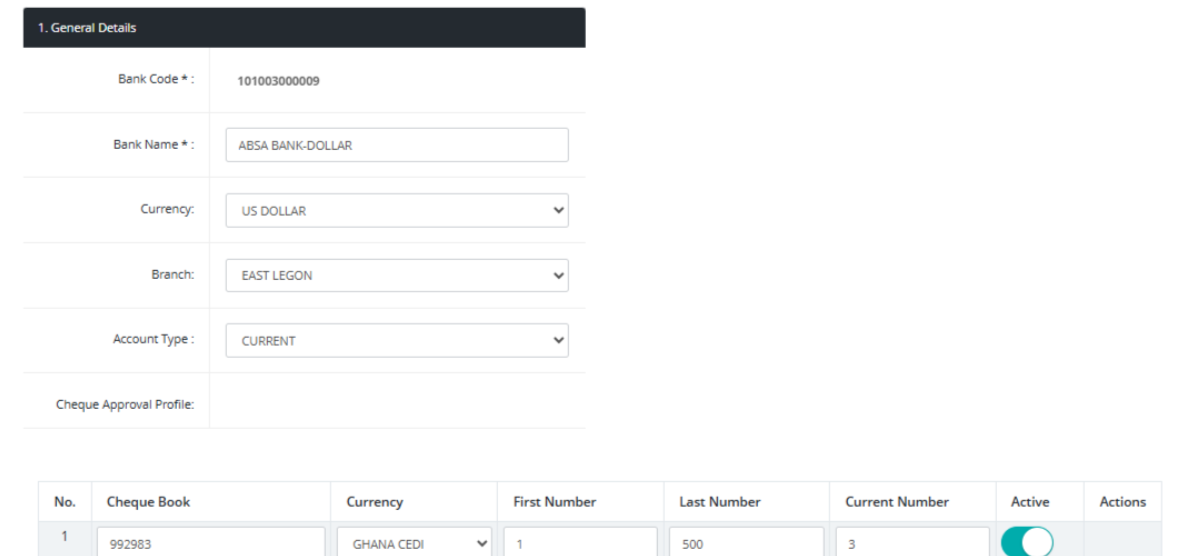
Tab Name: Create Bank Account - GENOVA INSURANCE
Enter the Bank Code within the provided field
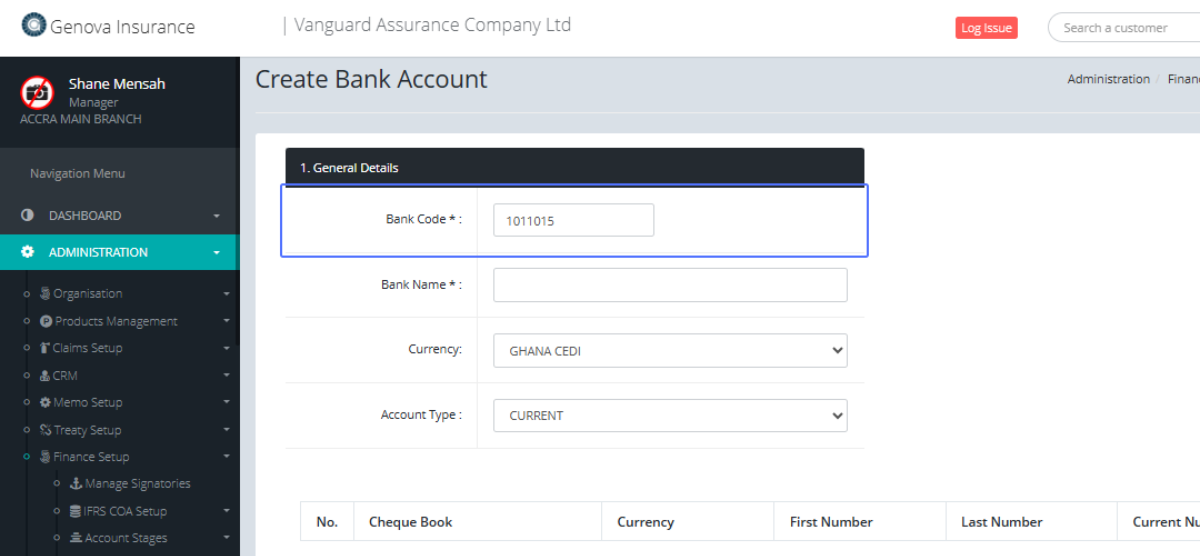
Click on the input
Click on the Currency from the provided drop down list
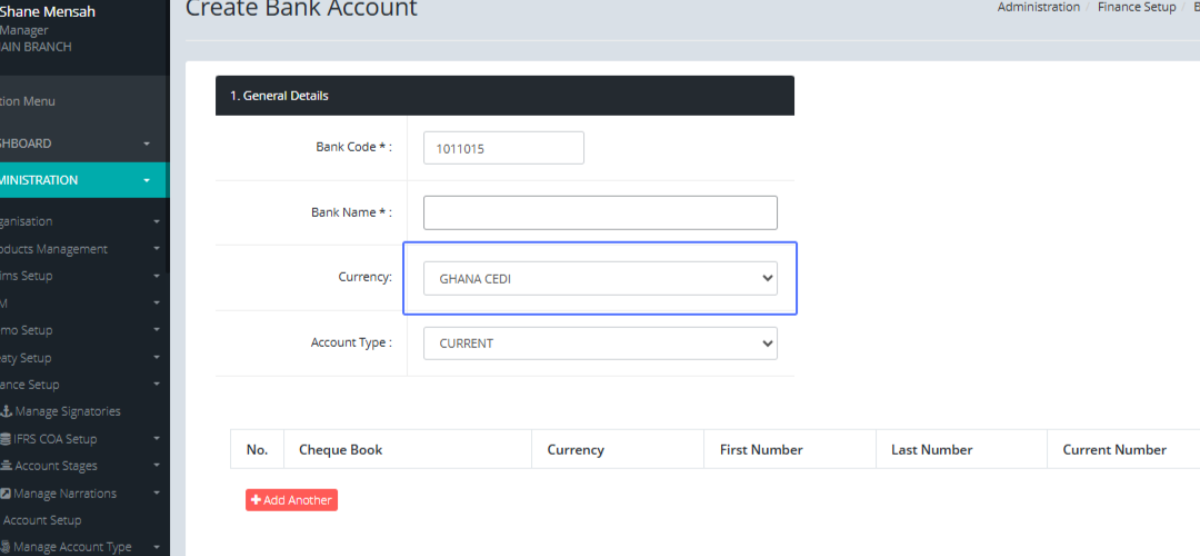
Select the Account Type from the provided drop down list

Click on the "Add Another" button to add another item within the provide list field
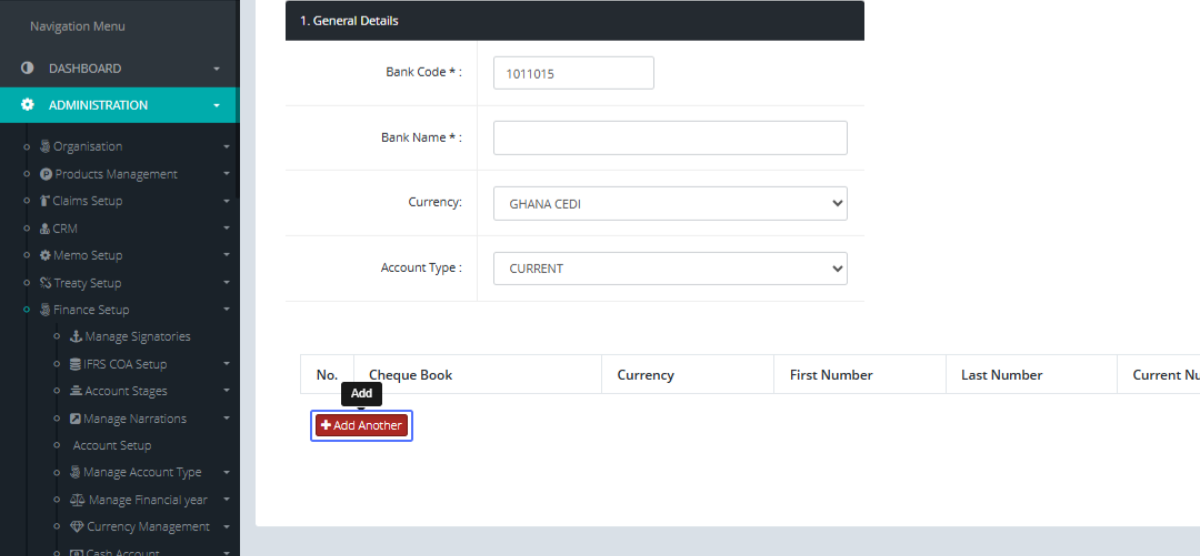
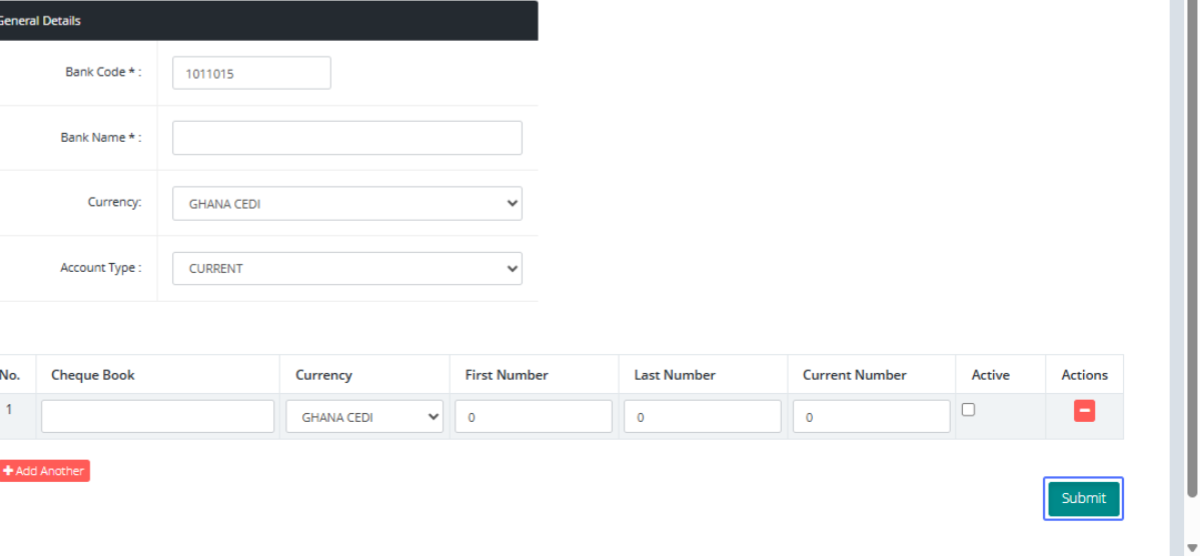
Enter the Check book within the provided input field.
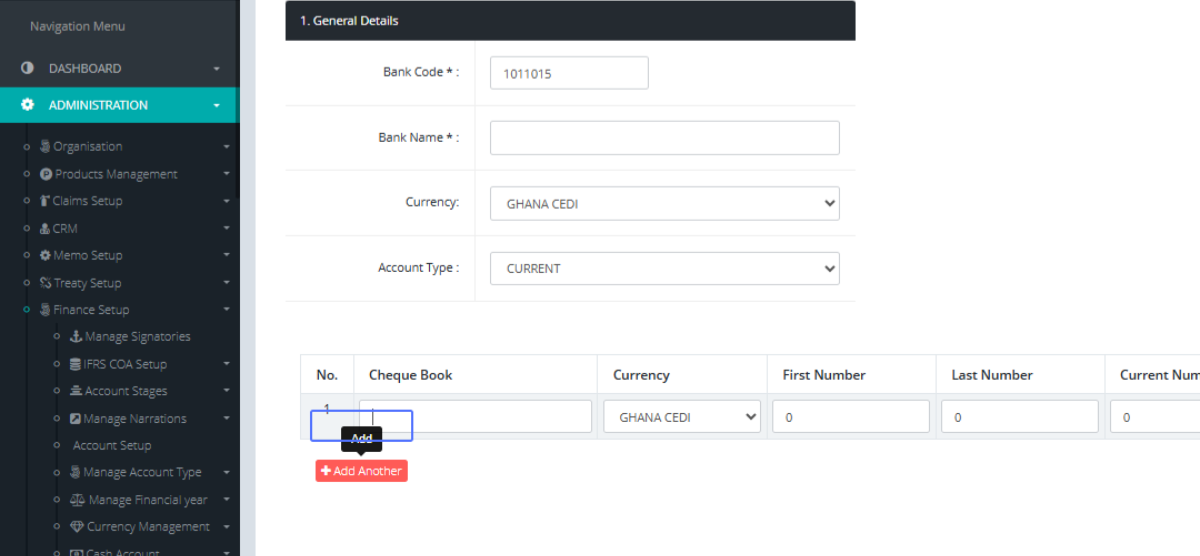
Select the Currency from the provide dropdown
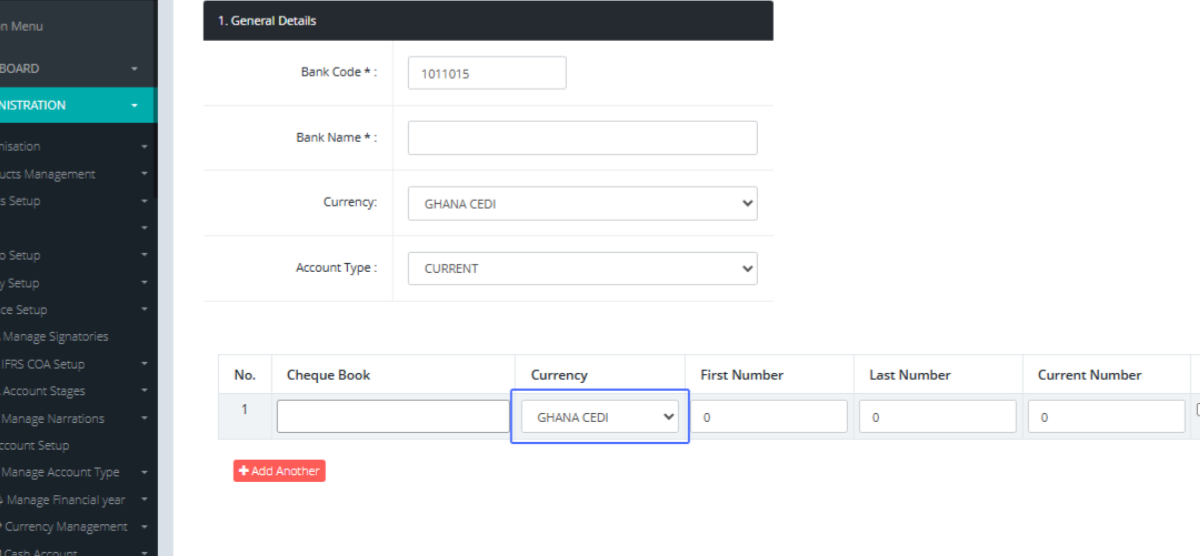
Enter the First number within the provided input field
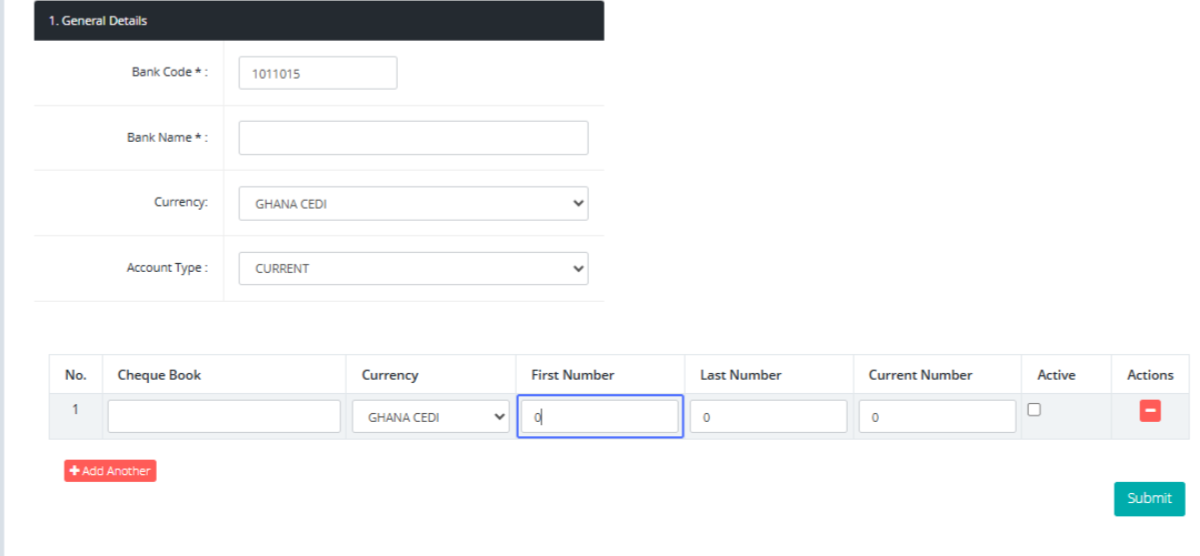
Enter the Last item within the provided input field
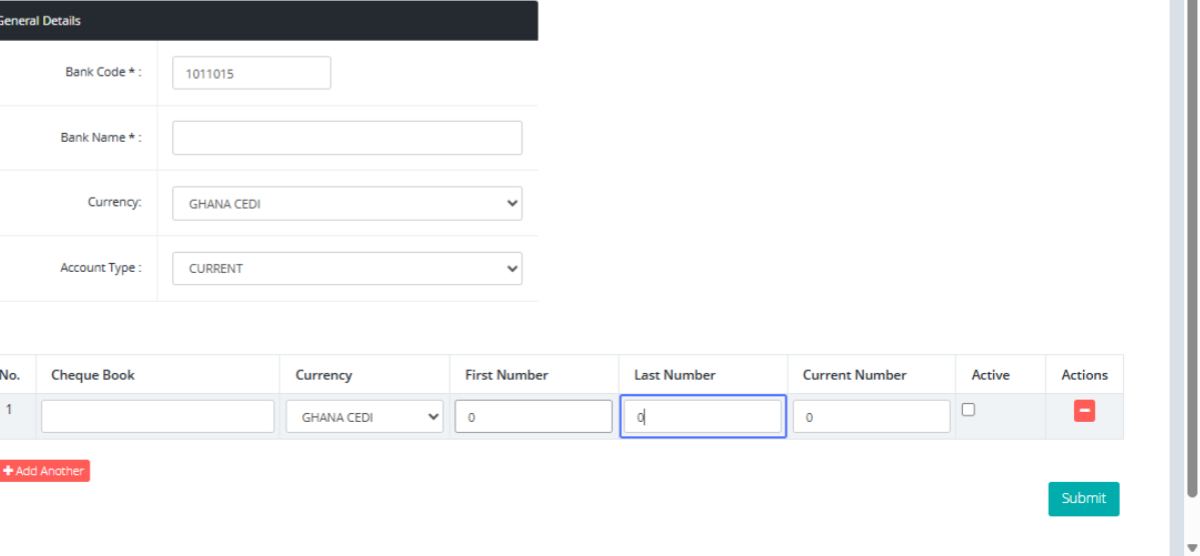
Enter the Current Number within the provided input field
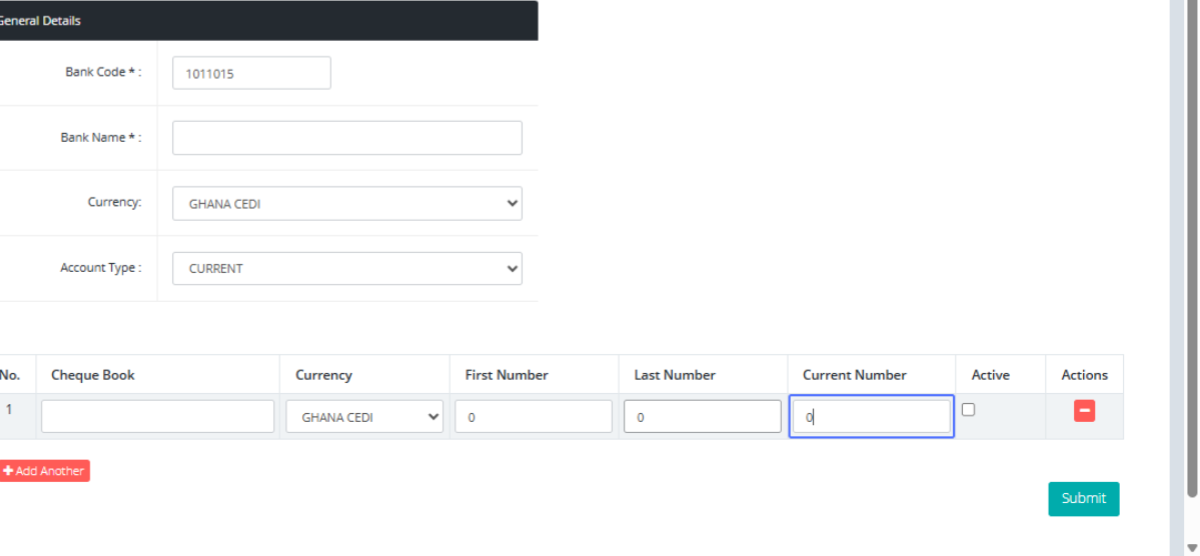
Click the checkbox to mark if the item is active or not.
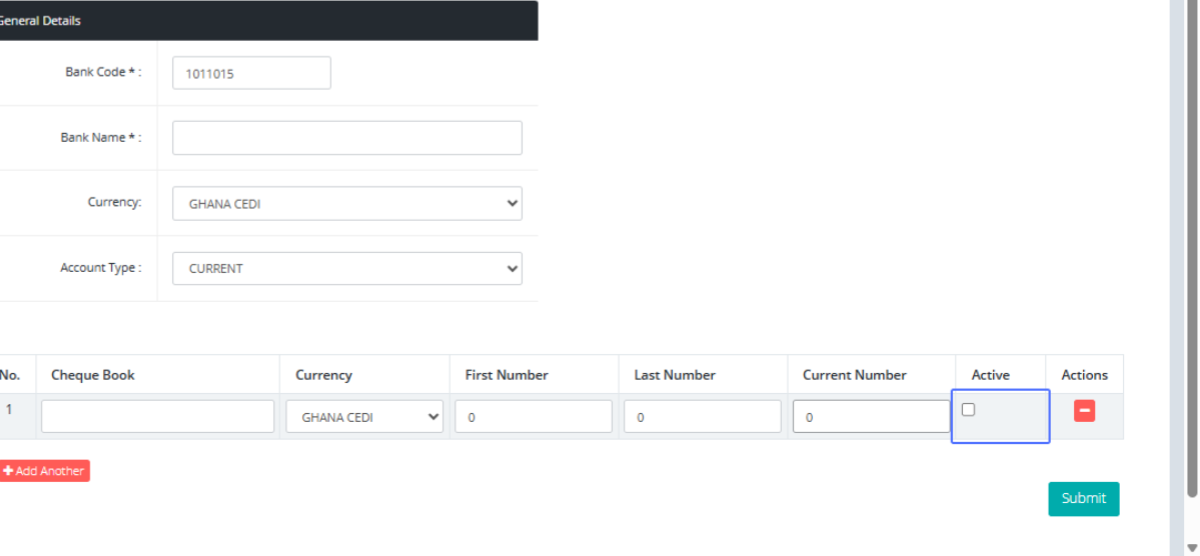
Click on the "Submit" button to save the list items
Click on the link "List Bank Accounts" so show the bank Account List
Tab Name: List Bank Accounts - GENOVA INSURANCE
Click on the "Action" button to see the available actions for the List Item
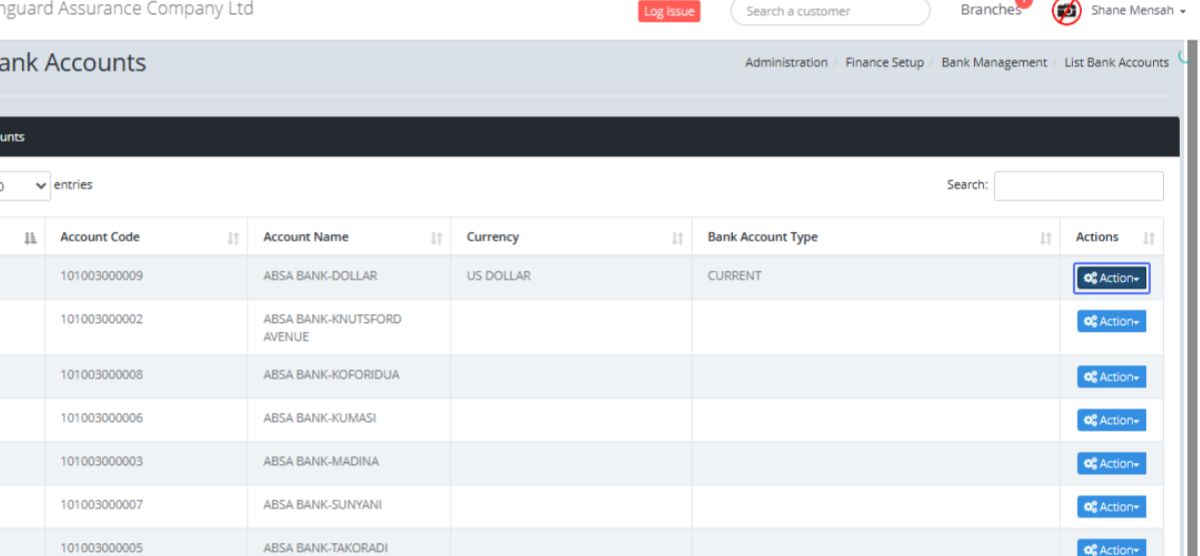
Click on the link "Edit" to edit the selected item.

You will be presented with the Form to make the changes to the existing item.
Click on the link "Manage Signatories" to access the manage signatories page.
Tab Name: Manage Signatories - GENOVA INSURANCE
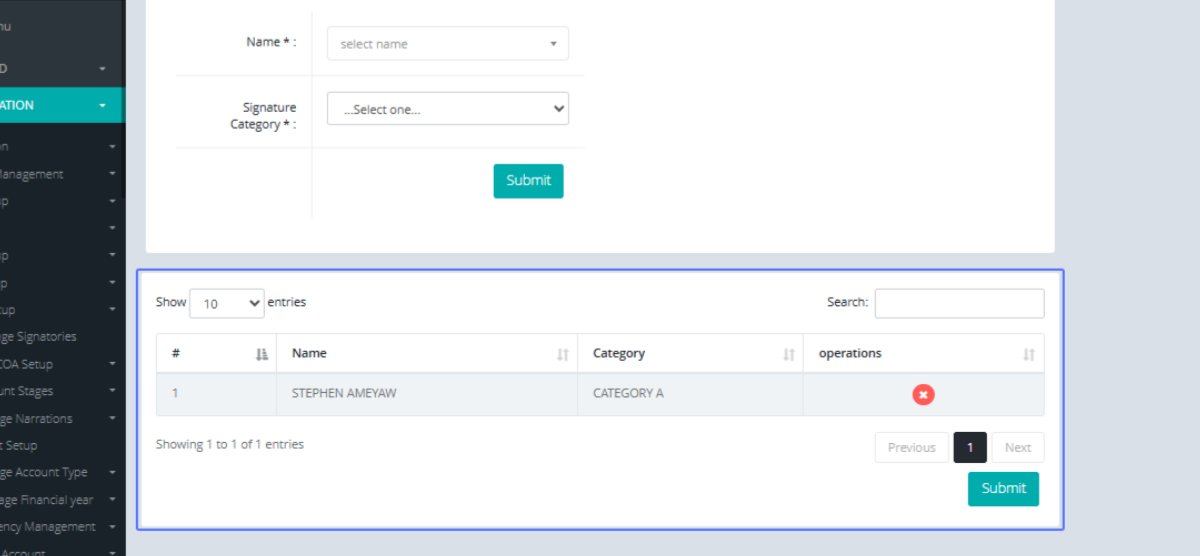
Select the Name from the available dropdown list.
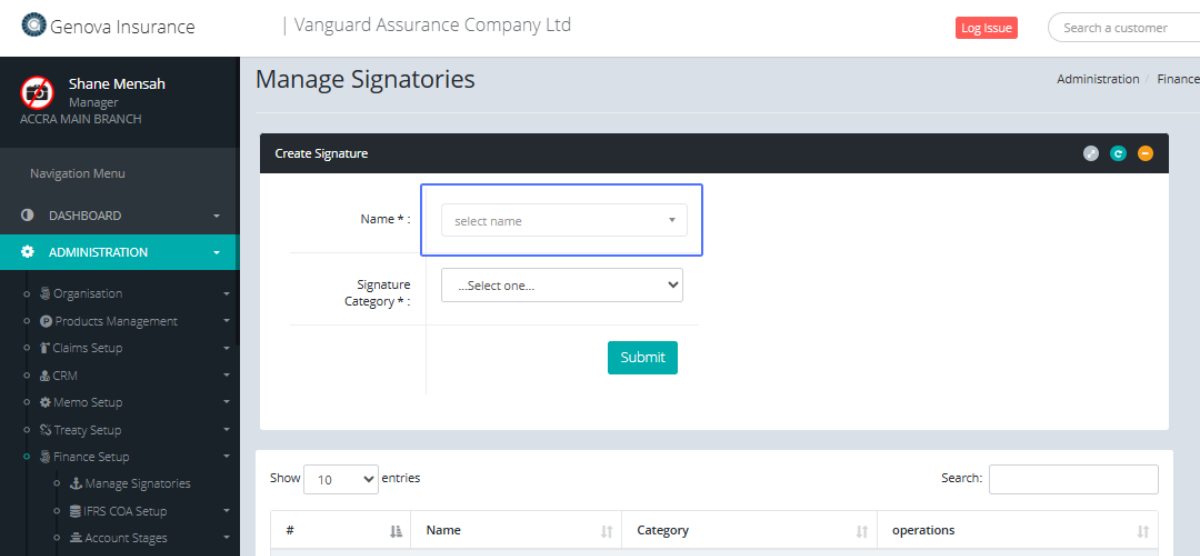
Select the category from the Available Dropdown list
Click on the "Submit" button to perform the search
The Search results would be displayed at the bottom section of the screen
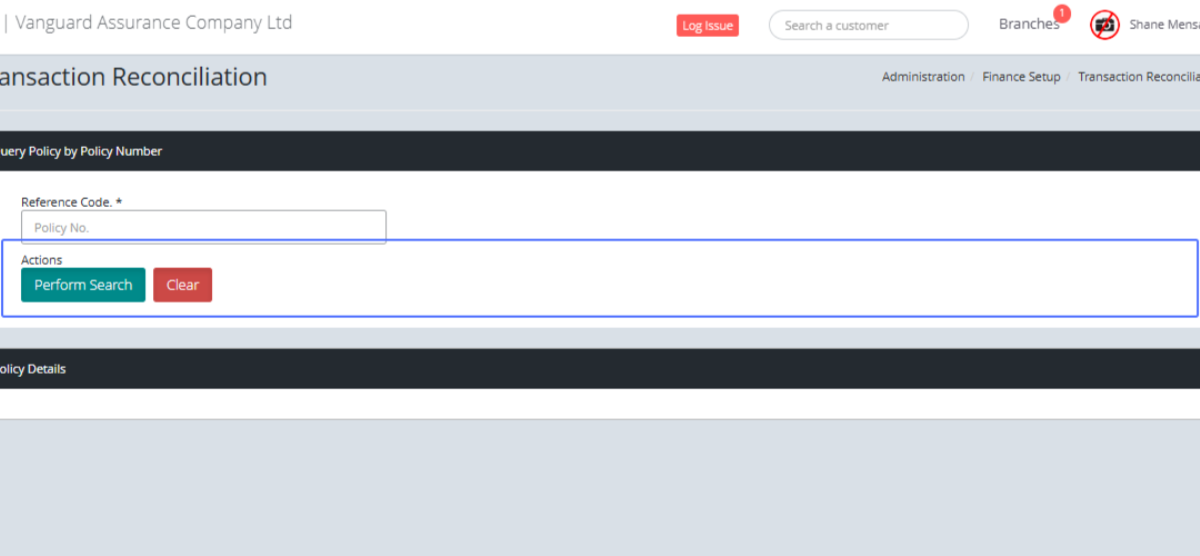
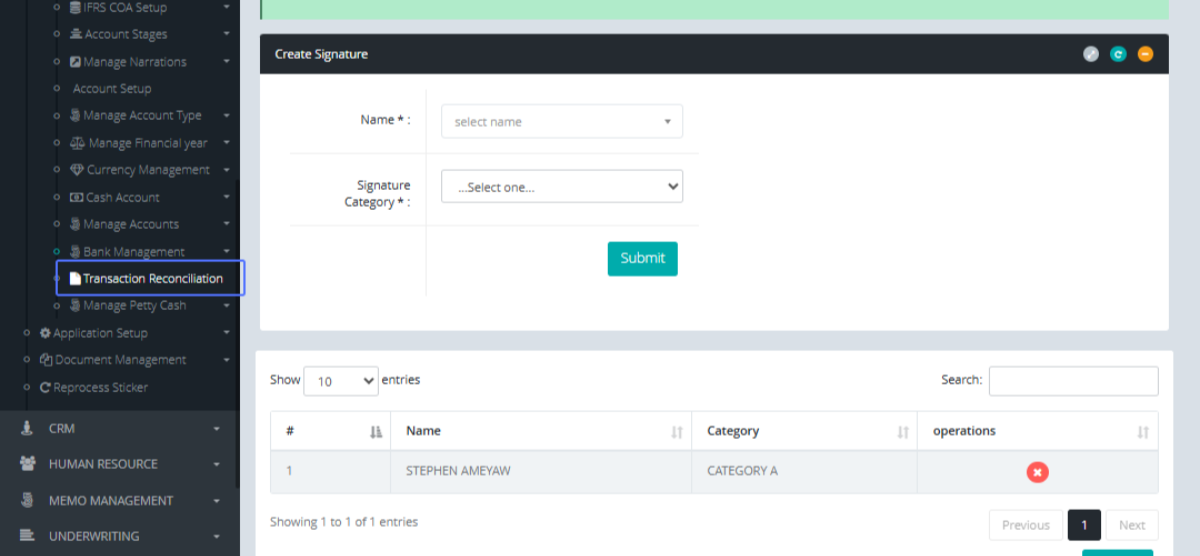
Click on the link "Transaction Reconciliation" to access the Transaction Reconciliation Page
Tab Name: Transaction Reconciliation - GENOVA INSURANCE
Enter the Reference Code within the provided input field
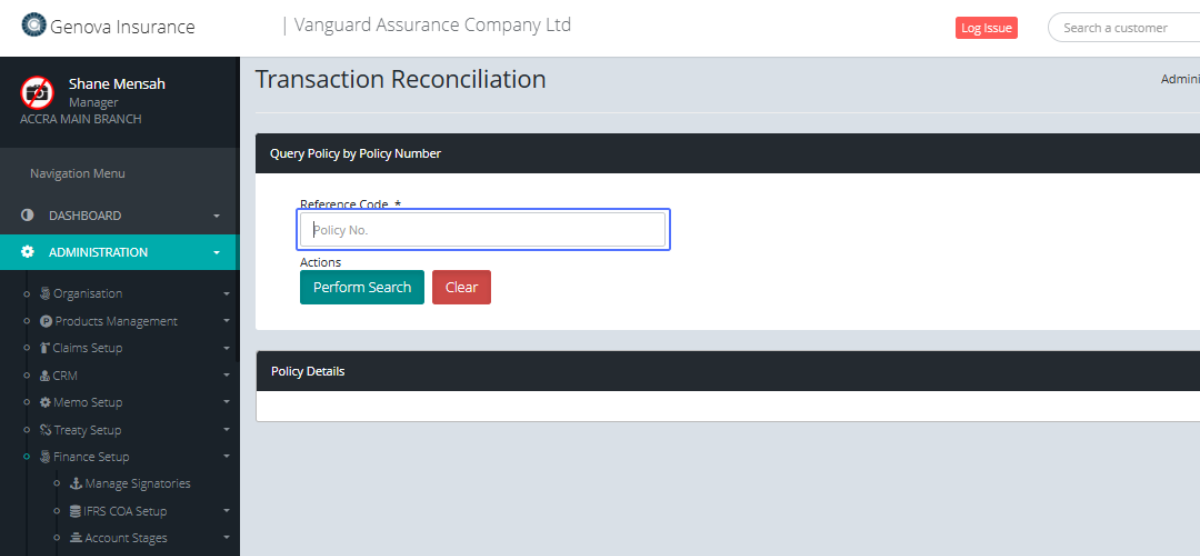
The actions you can perform are the “Perform Search” to search for the reconciliation and “Clear” to clear the input fields.